
Rodeo S 2WD L4-2.2L (1999)
NOTE:
Discard the extra 2-pin connector sub harness included with replacement Shift Lock Solenoid P/N 8-97181-068-2.
6.
Reconnect the Shift Lock Solenoid 2-pin connector and reattach the two screws securing the Shift Lock Solenoid to the selector lever
subassembly.
7.
Reconnect the 1-40 (Rodeo) or 1-3 (Axiom) six-pin connector and slide the female connector onto the bracket.
8.
Reinstall the Selector Lever Knob, Cover Assembly, Center, Front, and Rear Console Assemblies. Refer to the Selector Lever section in the
Service Manual.
9.
Check Shift Lock operation:
a.
With ignition key in "Lock" position, Selector lever should not move from "P" position.
b.
With ignition key in "ON" position and brake pedal depressed. Selector lever can be moved out of "P" position.
c.
Key can be removed only when turned to "LOCK" position and selector lever is in "P" position.
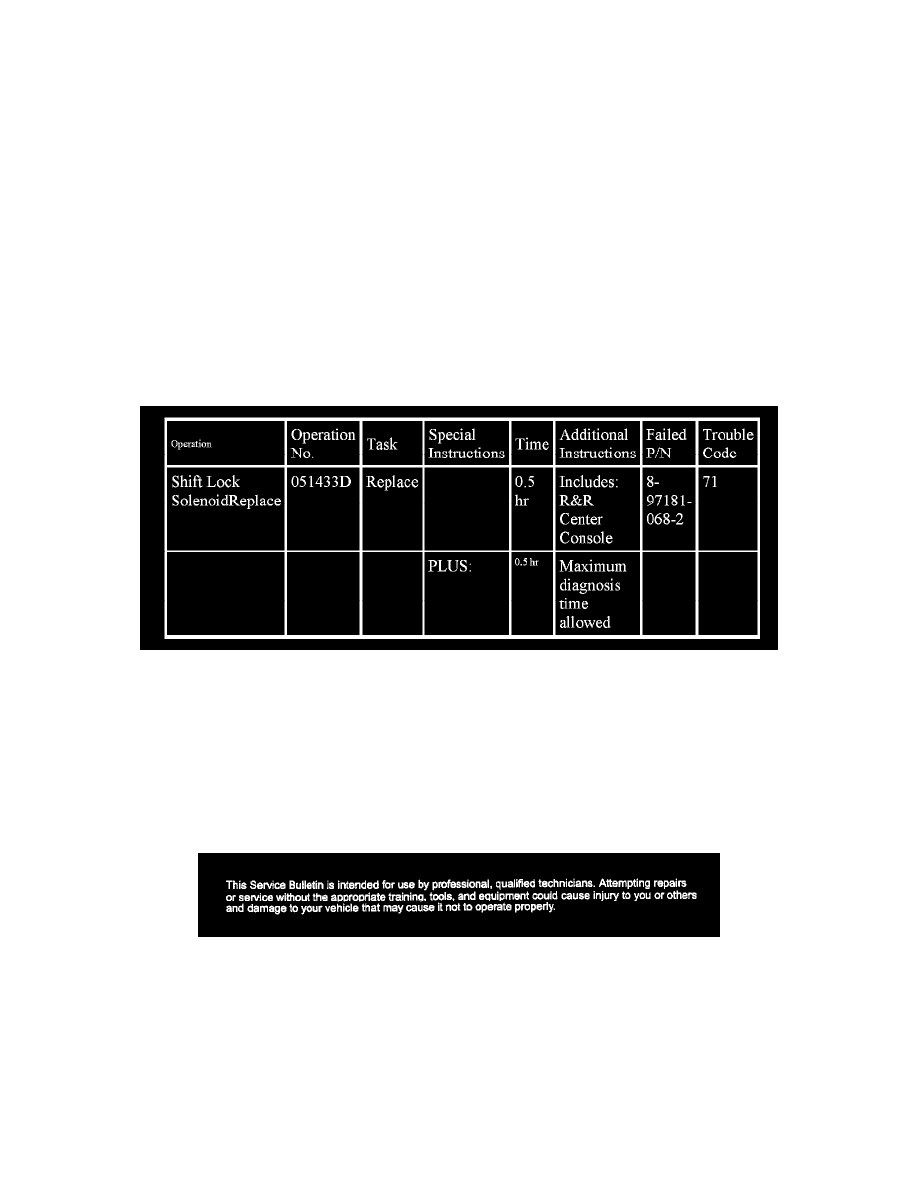
Warranty Claim Information
Use the labor operation shown.
NOTE:
1.
Labor Time includes administrative time allowance.
2.
Information released on paper and electronic format prior to bulletin release cannot be updated. For the most current and up to date information
refer to website
3.
Always refer to the Isuzu Service Policy Procedure Manual for specific details on warranty coverage and policies.
Disclaimer