
Rodeo S 2WD L4-2.2L (1999)
2.
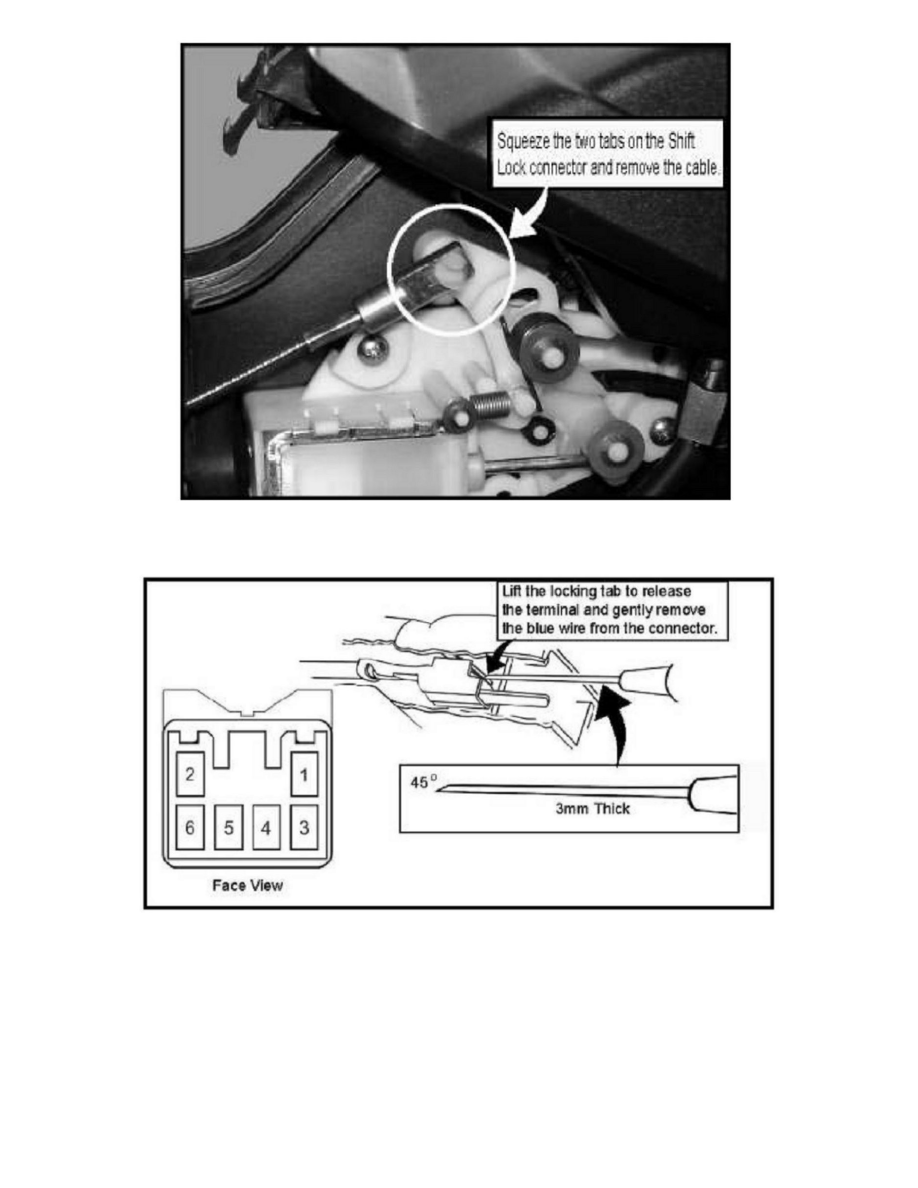
Set parking brake, move Selector Lever to lowest gear, and remove the Shift Lock Cable.
3.
Remove the two screws securing the Shift Lock Solenoid to the Selector Lever subassembly. Disconnect the Shift Lock Solenoid 2-pin connector.
4.
Disconnect the 1-40 (Rodeo) or 1-3 (Axiom) six-pin connector and slide the female connector off bracket. Remove the Terminal Position
Assurance (TPA) Lock from the connector. Locate the two blue wires in position 1 and 3 on the female connector. With appropriate tool (shown
above), apply light pressure upward on the connector locking tab while gently pulling on the blue wire to release.
Note:
Never use force to remove a terminal from a connector.
5.
Insert the two blues wires from the replacement Shift Lock Solenoid into the 1-40 (Rodeo) or 1-3 (Axiom) female connector. It does not matter
which blue wire is inserted into the 1 and 3 position. Gently tug the blue wires to make sure they are secure.