Rodeo Sport 2WD V6-3.2L (2001)

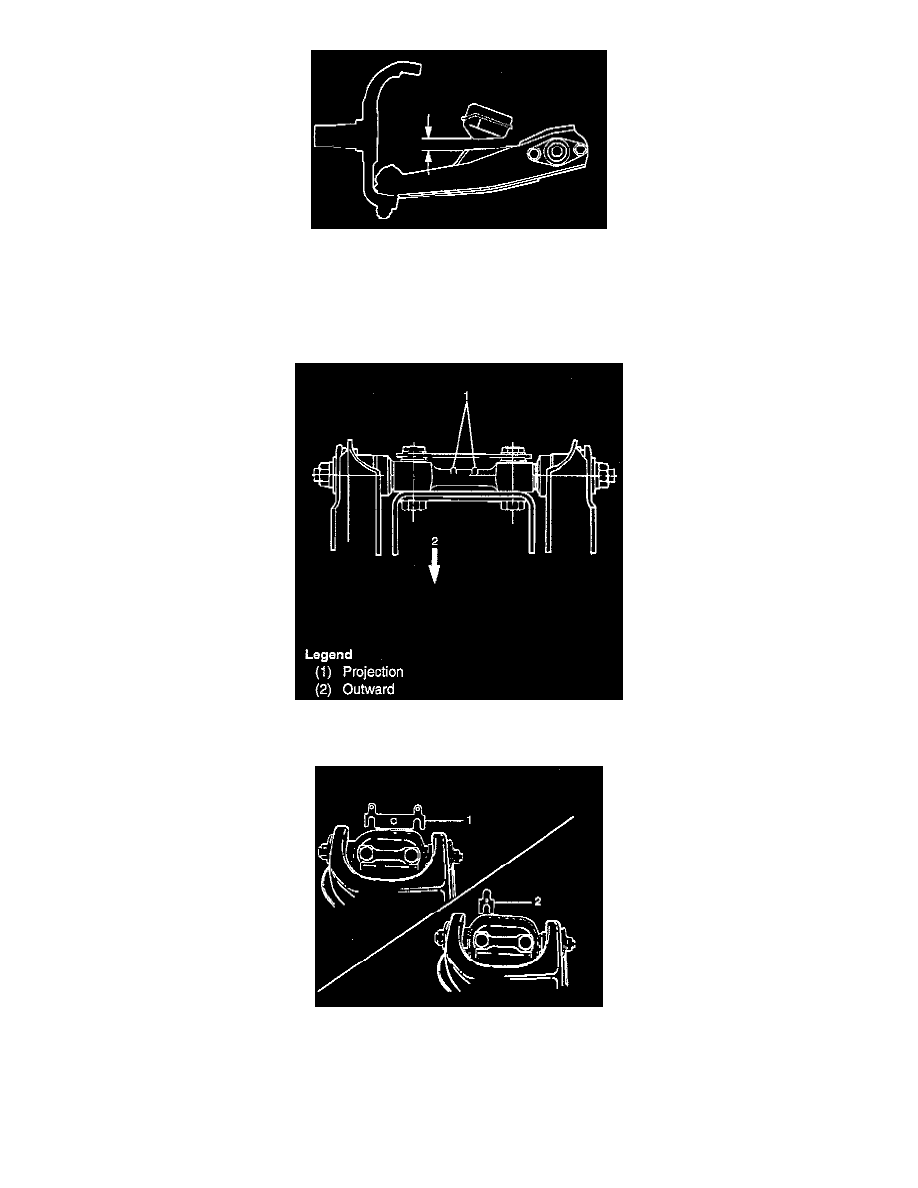
4. Install nut and tighten fulcrum pin nut finger-tight.
Note: Torque fulcrum pin nut after adjusting buffer clearance.
-
Buffer clearance: 22 mm (0.87 inch)
-
Torque: 108 Nm (80 ft. lbs.)
5. Install upper control arm assembly with the fulcrum pin projections turned inward.
6. Install the caster shims(2) between the chassis frame and fulcrum pin.
7. Install the camber shims(1) between the chassis frame and fulcrum pin.
8. Install nut assembly.
9. Install bolt and plate, then tighten the bolt to the specified torque.
Torque: 152 Nm (112 ft. lbs.)
10. Install upper ball joint and tighten it to the specified torque.
Torque: 57 Nm (42 ft. lbs.)
11. Install nut and cotter pin then tighten the nut to the specified torque, with just enough additional torque to align cotter pin holes.
Install new cotter pin.
