
Trooper LS V6-3.5L (1998)
4. Install piston ring with the piston ring expander. The compression ring must be set with the T mark (1) facing up.
Marked T: No.1 Compression ring
Marked T2: No.2 Compression ring
-
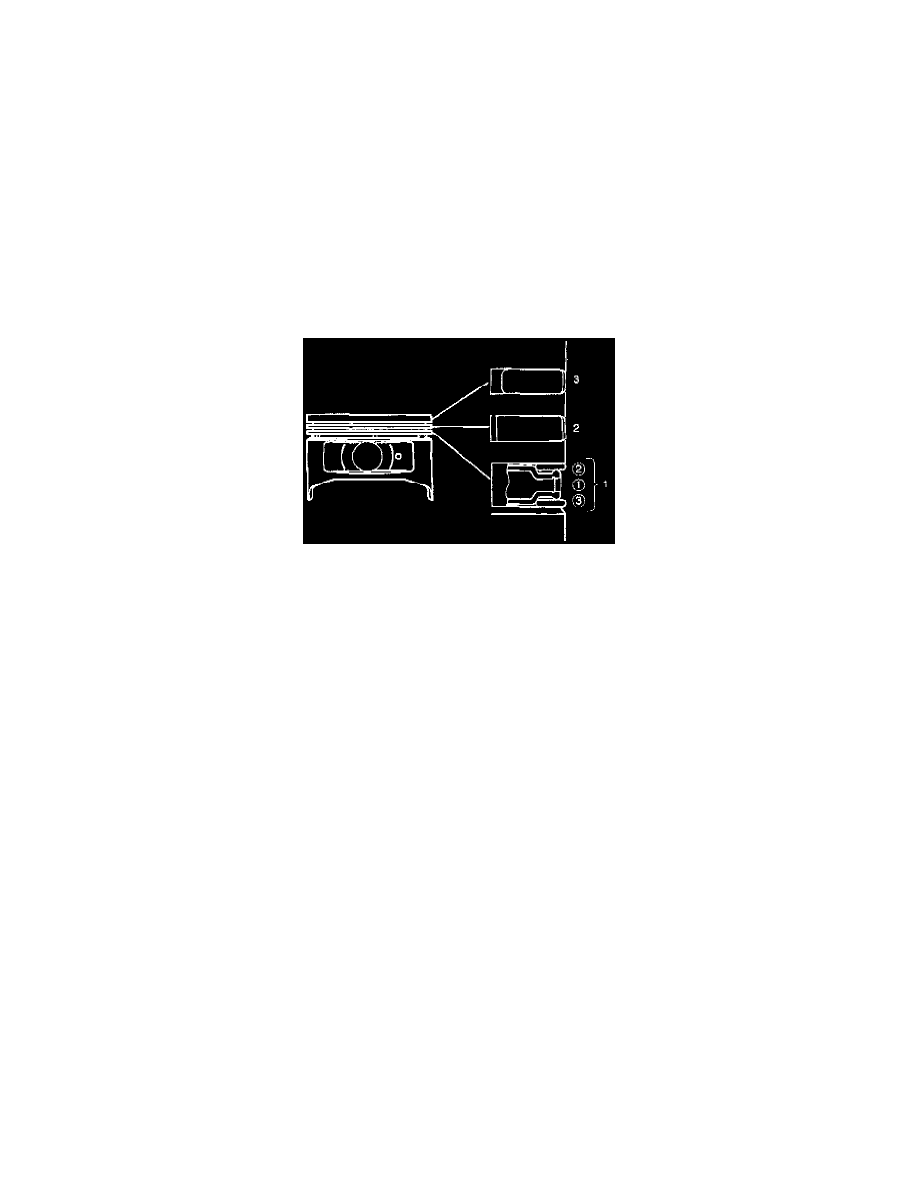
Install piston rings in the following sequence.
1. Oil ring
1. Expander ring
2. Upper side rail
3. Lower side rail
2. 2nd compression ring
3. 1st compression ring
-
The compression rings must be set with the T or T2 mark facing up.
Marked T: No.1 Compression ring
Marked T2: No.2 Compression ring
-
After installation, apply engine oil to the entire circumference of the piston rings. Check to see that all the rings rotate smoothly.
5. Install piston and connecting rod assembly.
-
Insert the bearings into the connecting rods and caps. Apply new engine oil to the bearing faces and nuts.
-
Tighten the connecting rod cap nuts.
Torque: 54 Nm (40 ft. lbs.)
NOTE: Do not apply engine oil to the bearing back faces.
6. Oil gallery, refer to Crankshaft and main bearing.
7. Oil strainer and O-ring.
8. Oil pipe and O-ring.
9. Install crankcase with oil pan, refer to Oil pan and Crankcase.
10. Install cylinder head gasket.
11. Install Cylinder head assembly.
-
Refer to Cylinder head.