Trooper LS V6-3.5L (1998)

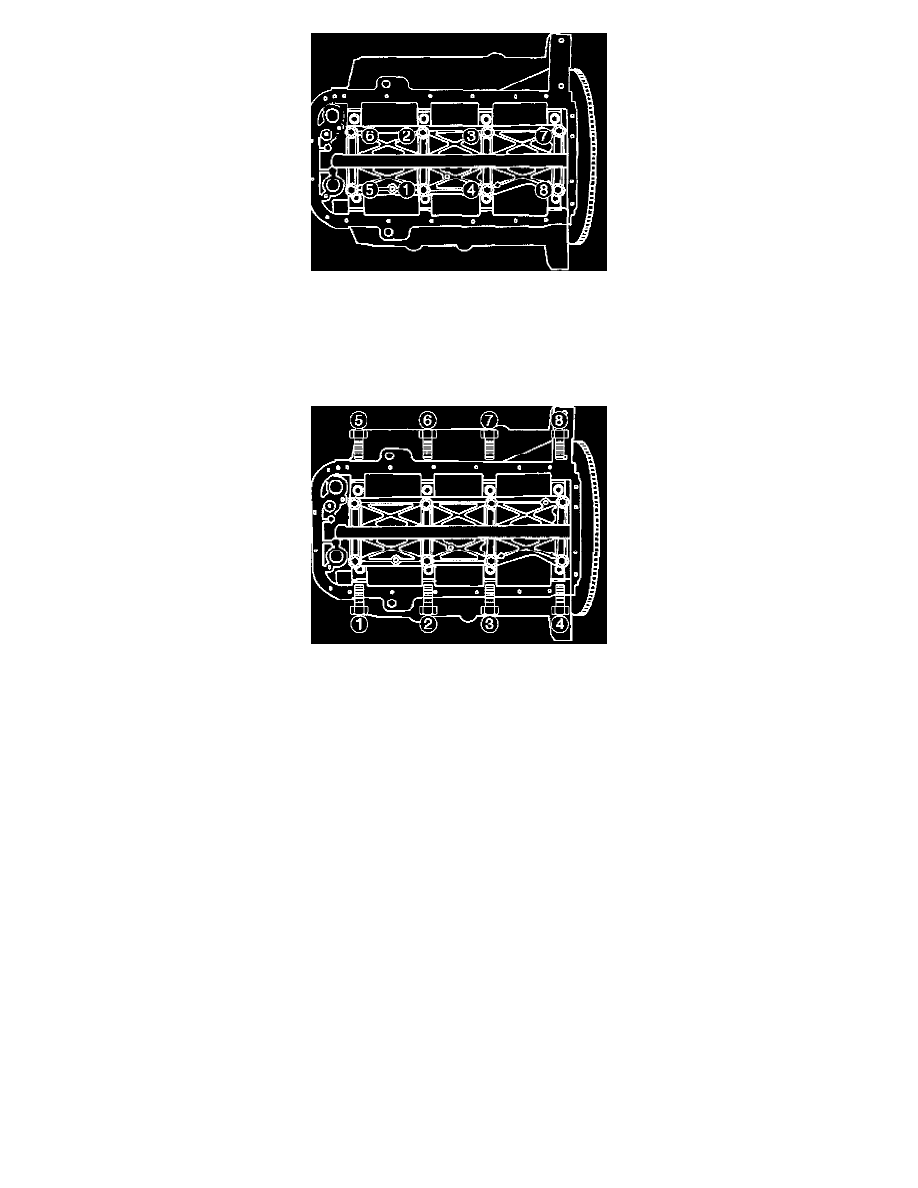
5. Install oil gallery (7) and tighten the bolts in 2 steps, in the order shown.
1st step: 29 Nm (22 ft. lbs.)
2nd step: 55° - 65°
6. Cylinder block side bolts (6)
-
Tighten all the bolts to the specified torque in the order shown.
NOTE: Do not apply engine oil to the crank case side bolts.
Torque: 39 Nm (29 ft. lbs.)
7. Install oil pump assembly (5), refer to Oil pump.
8. Install oil strainer and O-ring (4).
9. Install oil pipe and O-ring (3) and tighten the bolts.
Torque: 25 Nm (18 ft. lbs.)
10. Install crankcase with oil pan (2).
1. Completely remove all residual sealant, lubricant and moisture from the sealing surfaces. The surfaces must be perfectly dry.
2. Apply a correct width bead of sealant (TB-1207C or its equivalent) to the contact surfaces of the oil pan. There must be no gaps in the bead.
3. The crankcase assembly must be installed within 5 minutes after sealant application to prevent premature hardening of the sealant.
