Trooper LS V6-3.5L (1998)

Compressor Clutch Hub: Service and Repair
Removal
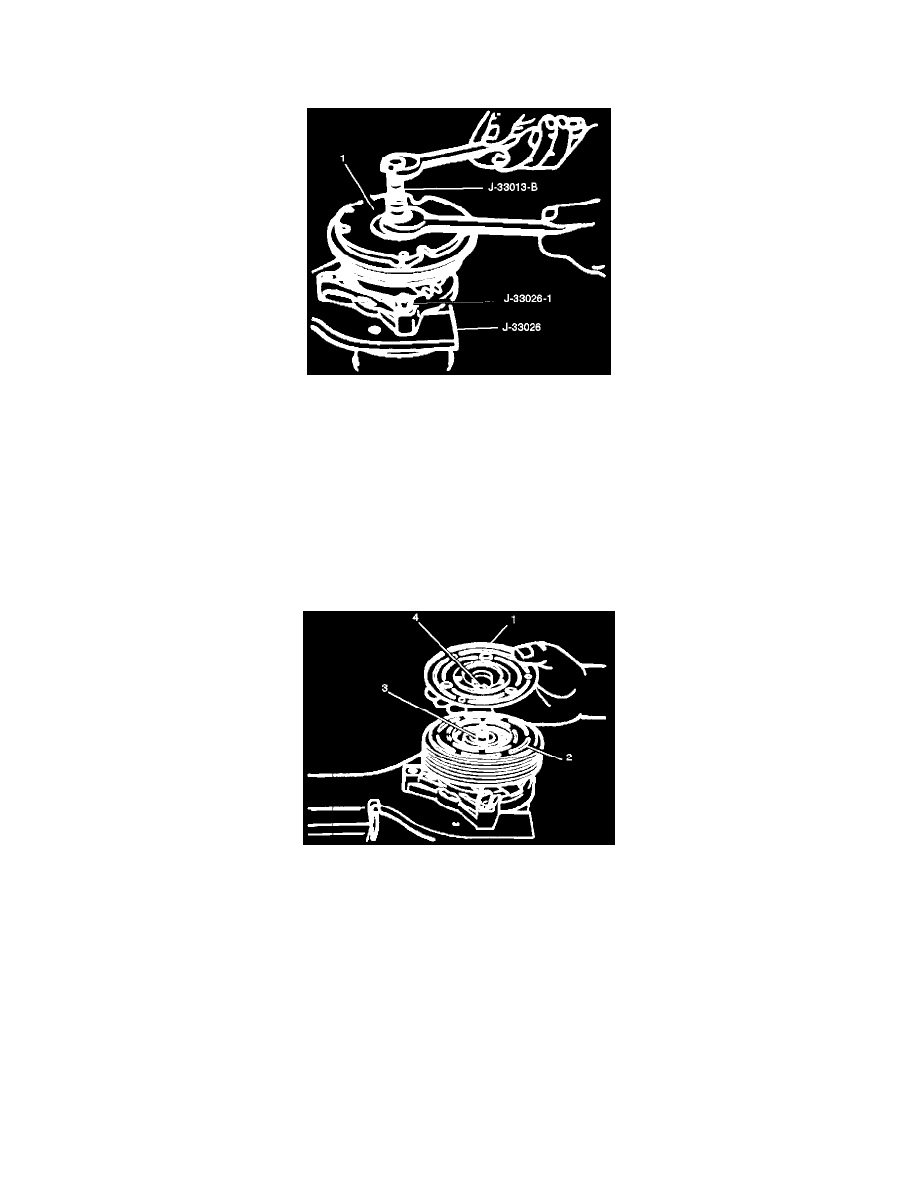
1. Clamp the holding fixture J-33026 in a vise and attach compressor to holding fixture with thumb screws J-33026-1.
2. With center screw forcing tip in place to thrust against the end of the shaft, thread the Clutch Plate and Hub Assembly Installer-Remover
J-33013-B into the hub. Hold the body of the remover with a wrench and turn the center screw into the remover body to remove the clutch plate
and hub assembly (1).
CAUTION: Do not drive or pound on the clutch hub or shaft. Internal damage to compressor may result. The forcing tip on J-33013-B
remover-installer center screw must be flat or the end of the shaft/axial plate assembly will be damaged.
3. Remove the shaft key and retain for reassembly.
Installation
1. Install the shaft key into the hub key groove. Allow the key to project approximately 3.2 mm (1/8 in) out of the keyway. The shaft key is curved
slightly to provide an interference fit in the hub key groove.
2. Be sure the frictional surface of the clutch plate and the clutch rotor (2) are clean before installing the clutch plate and hub assembly (1).
3. Align the shaft key (4) with the shaft keyway (3) and place the clutch plate and the hub assembly onto the compressor shaft.
4. Remove the forcing tip on J-33013-B clutch plate and hub assembly installer-remover center screw and reverse the body direction on the center
screw, as shown.
5. Install the clutch plate and hub installer-remover J-33013-B with bearing as shown.
The body of the J-33013-B installer-remover should be backed off sufficiently to allow the center screw to be threaded onto the end of the
compressor shaft.
