Trooper LS V6-3.5L (1998)

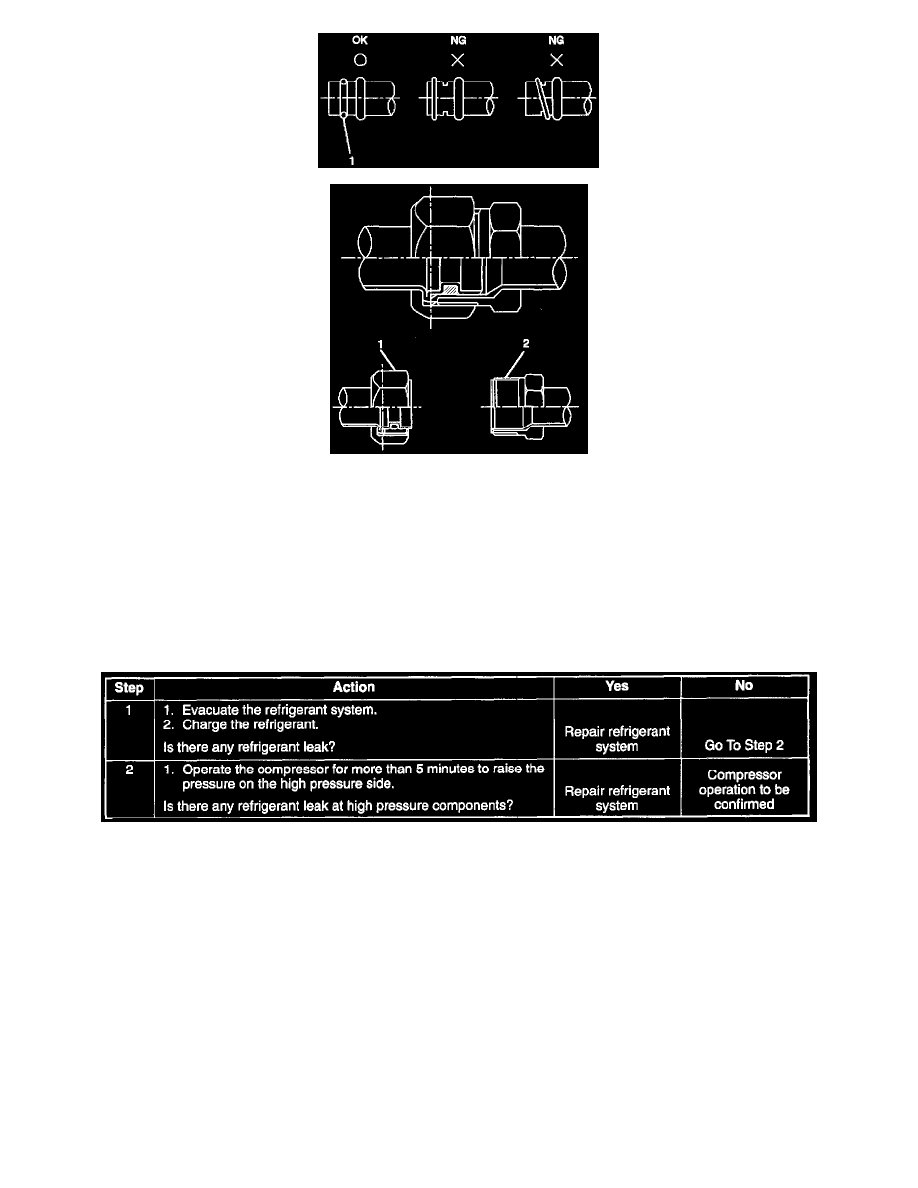
O-rings must be closely aligned with raised portion of refrigerant line.
Insert nut into union.
First tighten nut by hand as much as possible, then tighten nut to specified torque.
Leak Check
Inspection of refrigerant leak
Refrigerant leak may cause an adverse effect not only on the performance and durability of each component of the air-conditioner, but also on the global
atmosphere.
Therefore, it is most important to repair refrigerant leak when there is any leak found.
Inspection flow of refrigerant leak
Inspection steps
Check the components of the air conditioner to see if there occurs any refrigerant leak along the flow of refrigerant.
NOTE:
-
To avoid an error in the detection of refrigerant leak, make sure there is no refrigerant vapor or cigarette smoke around the vehicle before
conducting the inspection.
Also, select a location where the refrigerant vapor will not be blown off by wind.
-
Inspection should be conducted chiefly on the pipe connections and sections where a marked oil contamination is found.
When refrigerant is leaking, oil inside is also leaking at the same time.
-
It is not possible to visually check the leak from inside the cooling unit. Follow the method below when checking.
Remove the drain hose or resistor of the cooling unit, and insert a leak detector to see if there occurs any leak.
High pressure side
1. Discharger section of compressor
2. Inlet/outlet section of condenser
