
Trooper LS V6-3.5L (1998)
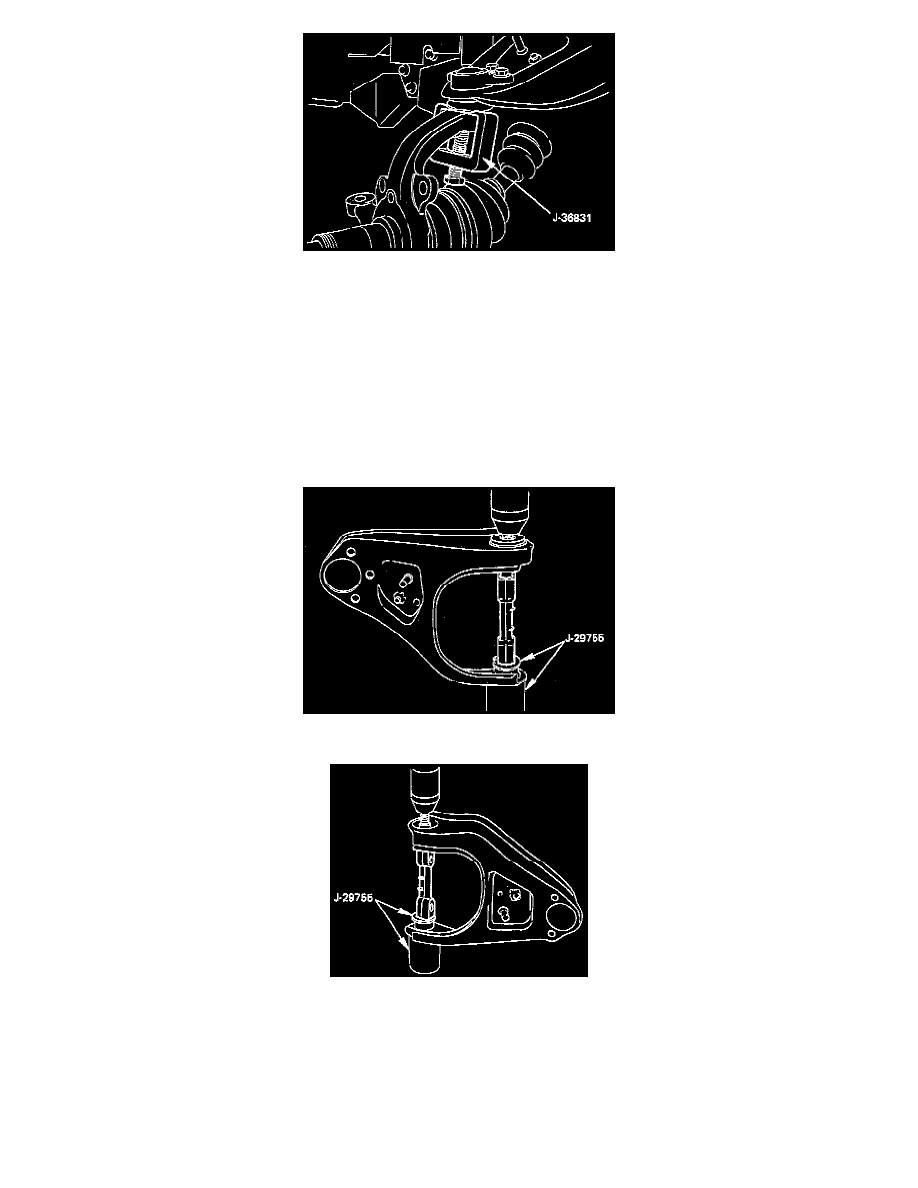
6. Remove nut and cotter pin then use remover J-36831 .
CAUTION: Be careful not to break the ball joint boot.
7. Remove upper ball joint.
8. Remove bolt and plate.
9. Remove nut assembly.
10. Remove camber shims and note the positions and number of shims.
11. Remove caster shims and note the positions and number of shims.
12. Remove upper control arm assembly.
13. Remove nut.
14. Remove plate.
15. Remove bushing by using remover J-29755.
16. Remove fulcrum pin.
INSPECTION AND REPAIR
Make necessary parts replacement if wear, damage, corrosion or any other abnormal conditions are found through inspection. Check the following
parts:
-
Upper control arm
-
Bushing
-
Fulcrum pin