
Trooper S 2WD V6-3.5L (2001)
Compressor Shaft Seal: Service and Repair
REMOVAL
1. Recover the refrigerant using Refrigerant Recovery System.
2. Loosen and reposition compressor in mounting brackets, if necessary.
3. Remove clutch plate and hub assembly from compressor as described previously.
4. Remove the shaft seal retainer ring, using snap ring pliers.
5. Thoroughly clean inside of compressor neck area surrounding the shaft, the exposed portion of the seal, the retainer ring groove and the shaft
itself. Any dirt or foreign material getting into compressor may cause damage.
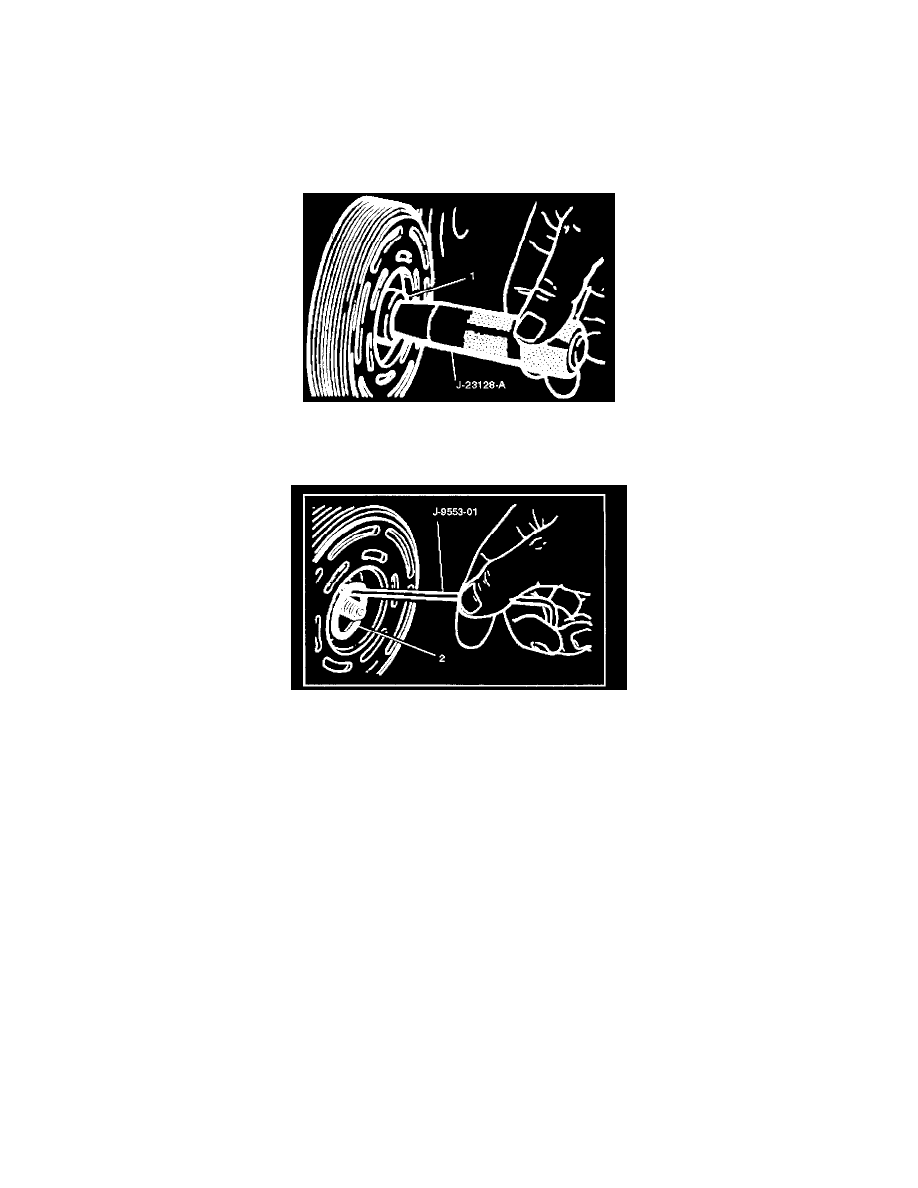
6. Fully engage the knurled tangs of Seal Remover-Installer J-23128-A into the recessed portion of the Seal (1) by turning the handle clockwise.
Remove the Seal from the compressor with a rotary-pulling motion. Discard the seal. The handle must be hand-tightened securely. Do not use a
wrench or pliers.
7. Remove and discard the seal seat O-ring (2) from the compressor neck using O-ring remover J-9553-01.
8. Recheck the shaft and inside of the compressor neck for dirt or foreign material and be sure these areas are perfectly clean before installing new
parts.
Cleaning
Thoroughly clean O-ring seal groove in front head.
CAUTION: Seals should not be re-used. Always use a new specification service seal on rebuild. Be sure that the seal to be installed is not
scratched or damaged in anyway. Make sure that the seal seat and seal are free of lint and dirt that could damage the seal surface or prevent
sealing.
INSTALLATION