
VehiCROSS 4WD V6-3.5L (1999)
Combination Switch: Service and Repair
REMOVAL
1. Turn the steering wheel so that the vehicle's wheels are pointing straight ahead.
2. Turn the ignition switch to "LOCK".
3. Disconnect the battery "-" terminal cable, and wait at least 5 minutes.
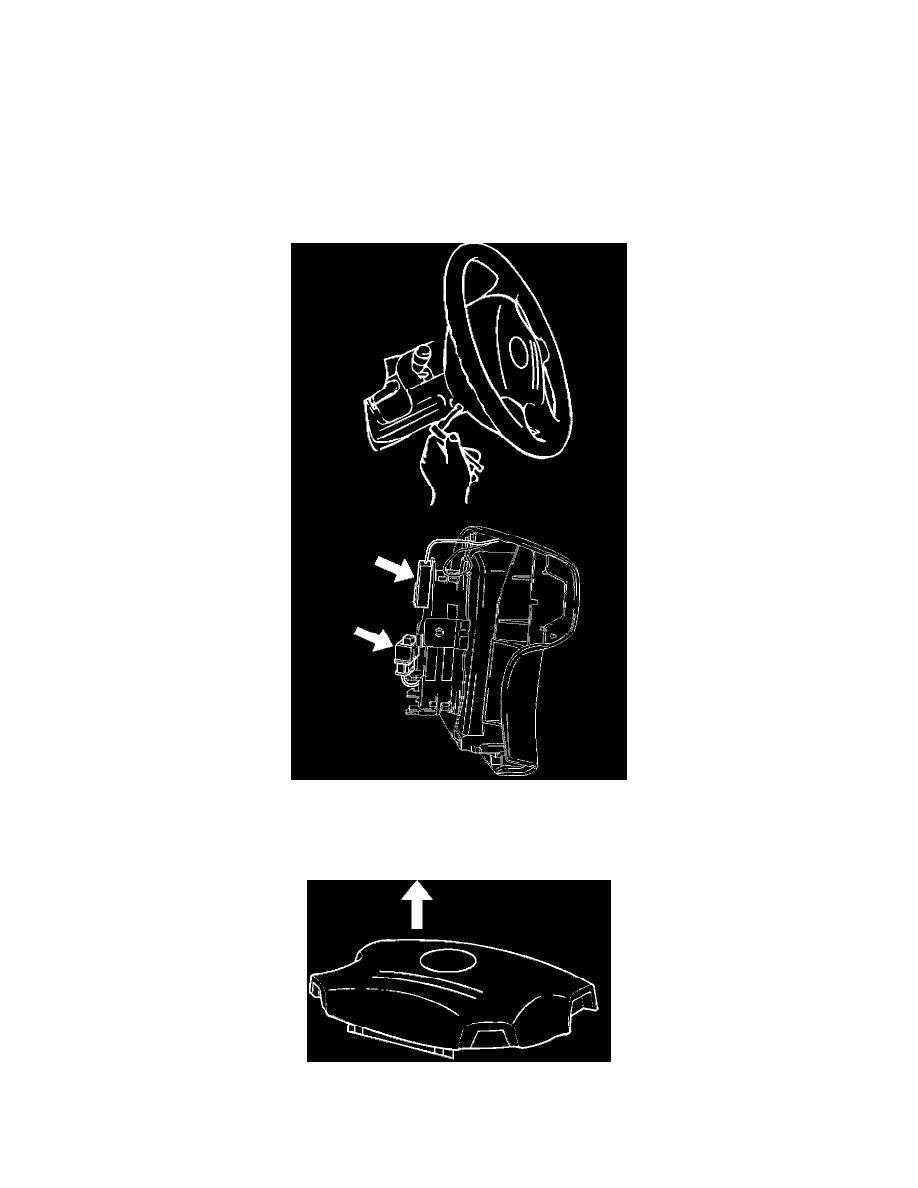
4. Disconnect the yellow 3-way SRS connector located under the steering column.
CAUTION: The wheels of the vehicle must be straight ahead and the steering column in the "LOCK" position before disconnecting the steering
wheel. Failure to do so will cause the coil assembly to become uncentered which will cause damage to the coil assembly.
5. Remove the engine hood opening lever, then remove instrument panel lower cover.
6. Loosen the inflator module fixing bolt from behind the steering wheel assembly using a TORX driver or equivalent until the inflator module can
be released from steering assembly. Disconnect the yellow 2-way SRS connector and horn lead located behind the inflator module, then remove
inflator module.
7. Remove the steering wheel fixing nut.
WARNING: THE INFLATOR MODULE SHOULD ALWAYS BE CARRIED WITH THE URETHANE COVER AWAY FROM
YOUR BODY AND SHOULD ALWAYS BE LAID ON A FLAT SURFACE WITH THE URETHANE SIDE UP. THIS IS NECESSARY
BECAUSE A FREE SPACE IS PROVIDED TO ALLOW THE AIR CUSHION TO EXPAND IN THE UNLIKELY EVENT OF
ACCIDENTAL DEPLOYMENT. OTHERWISE, PERSONAL INJURY MAY RESULT.