
Flexplate
- Make
- Jaguar
- Model
- XK-8 XK8 (X100) Factory Service Manual
- Year
- 1997
- Section
- 303-01 Engine › In-vehicle repair › Flexplate
Flexplate
Removal
- Open the engine compartment and fit paint protection sheets.
- Open the driver's door, or both doors if necessary, to allow the side glass to drop. Ensure that the doors remain open until after the battery has been disconnected.
Disconnect the battery ground cable.
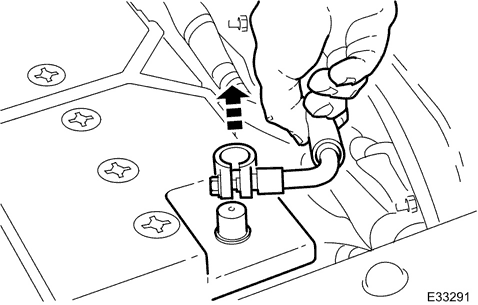
- Remove the battery cover.
Remove the Engine Covers, Air Intake Tube, Catalytic Converters and the Front Muffler. Drain the transmission fluid and remove the transmission for access.
- Refer to Operation 44.20.01 Transmission Remove, which includes each of the above operations.
Remove the drive plate.
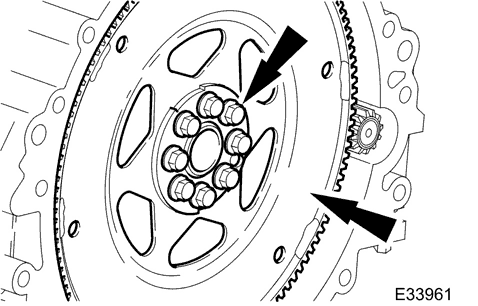
- Prevent the drive plate from rotating by use of a small wedge in the ring gear.
- Remove the bolts which secure the drive plate to the crankshaft.
- Remove the drive plate.
- Clean the crankshaft mating face and any other components which are to be refitted.
Installation
WARNING: MAKE SURE NEW DRIVE PLATE RETAINING BOLTS ARE INSTALLED. FAILURE TO FOLLOW THIS PROCEDURE MAY RESULT IN DAMAGE TO THE VEHICLE.
Fit the drive plate.
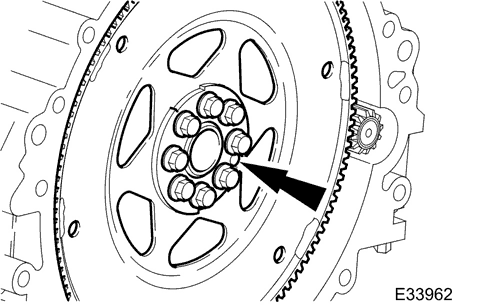
- Fit and align the drive plate to the crankshaft.
- Fit, but not tighten, the bolts which secure the drive plate to the crankshaft.
- Prevent the drive plate from rotating by use of a small wedge in the ring gear.
Tighten the securing bolts in two stages and in the order shown.
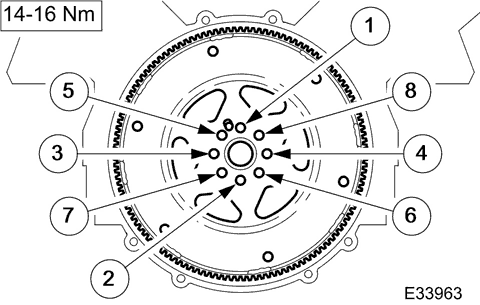
- STAGE ONE tighten to 14-16 Nm.
Tighten the securing bolts in two stages and in the order shown.
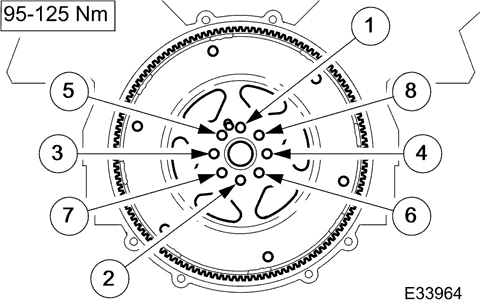
- STAGE TWO tighten to 95-125 Nm.
Refit the Transmission, Catalytic Converters and the Front Muffler, Air Intake Tube and Engine Covers. Refill the transmission with new fluid.
- Refer to Operation 44.20.01 Transmission Install, which includes each of the above operations.
- Remove the paint protection sheets and close the engine compartment cover.
Connect the battery and fit the battery cover.
- Reset the side glass memory. Refer to the Battery Reconnection Procedure 86.15.15.
Parts & tools for this job For 1997 Jaguar XK-8
- PARTEngine gasket setSearch: Jaguar XK-8 1997 engine gasket set
- TOOLTorque wrenchSearch: 3/8 inch torque wrench
- TOOLFeeler gauge setSearch: feeler gauge set
Links open Amazon search results in a new tab. As an Amazon Associate I earn from qualifying purchases.