
Flexplate
- Make
- Jaguar
- Model
- XK-8 XK8 (X100) Factory Service Manual
- Year
- 2003–2004
- Section
- 303-01 Engine › In-vehicle repair › Flexplate
PowertrainFlexplate
Flexplate
Removal
- Remove the automatic transmission. For additional information, refer to Section 307-01 Automatic Transmission/Transaxle
NOTE: Prevent the flexplate from rotating.
Remove the flexplate.
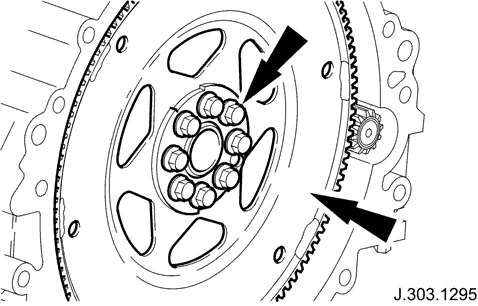
Installation
NOTE: Make sure the crankshaft and flexplate mating faces are clean before installation.
NOTE: The flexplate will only locate in one position.
NOTE: Install, but do not tighten, the flexplate retaining bolts.
Install the flexplate.
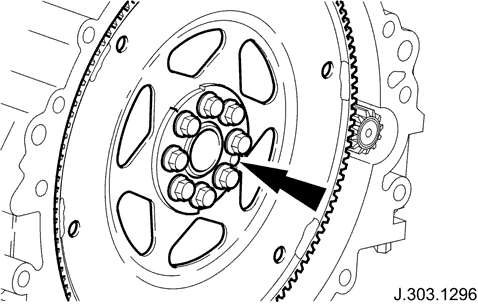
- Prevent the flexplate from rotating.
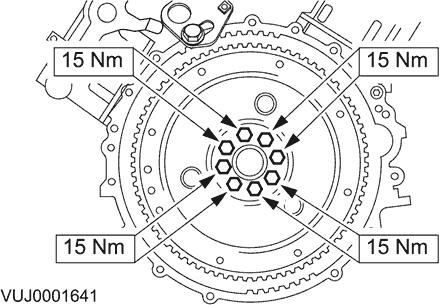
NOTE: Tighten the retaining bolts working diagonally.
Tighten to 15 Nm.
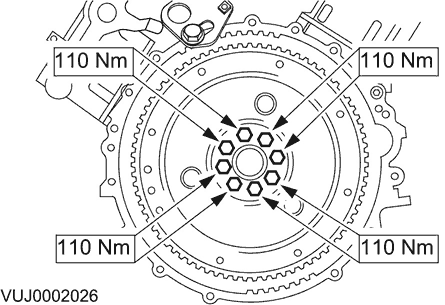
NOTE: Tighten the retaining bolts working diagonally.
Tighten to 110 Nm.
- Install the automatic transmission. For additional information, refer to Section 307-01 Automatic Transmission/Transaxle
Parts & tools for this job For 2003 Jaguar XK-8
- PARTEngine gasket setSearch: Jaguar XK-8 2003 engine gasket set
- TOOLTorque wrenchSearch: 3/8 inch torque wrench
- TOOLFeeler gauge setSearch: feeler gauge set
Links open Amazon search results in a new tab. As an Amazon Associate I earn from qualifying purchases.