
Commander 4WD V8-4.7L VIN N (2006)
c.
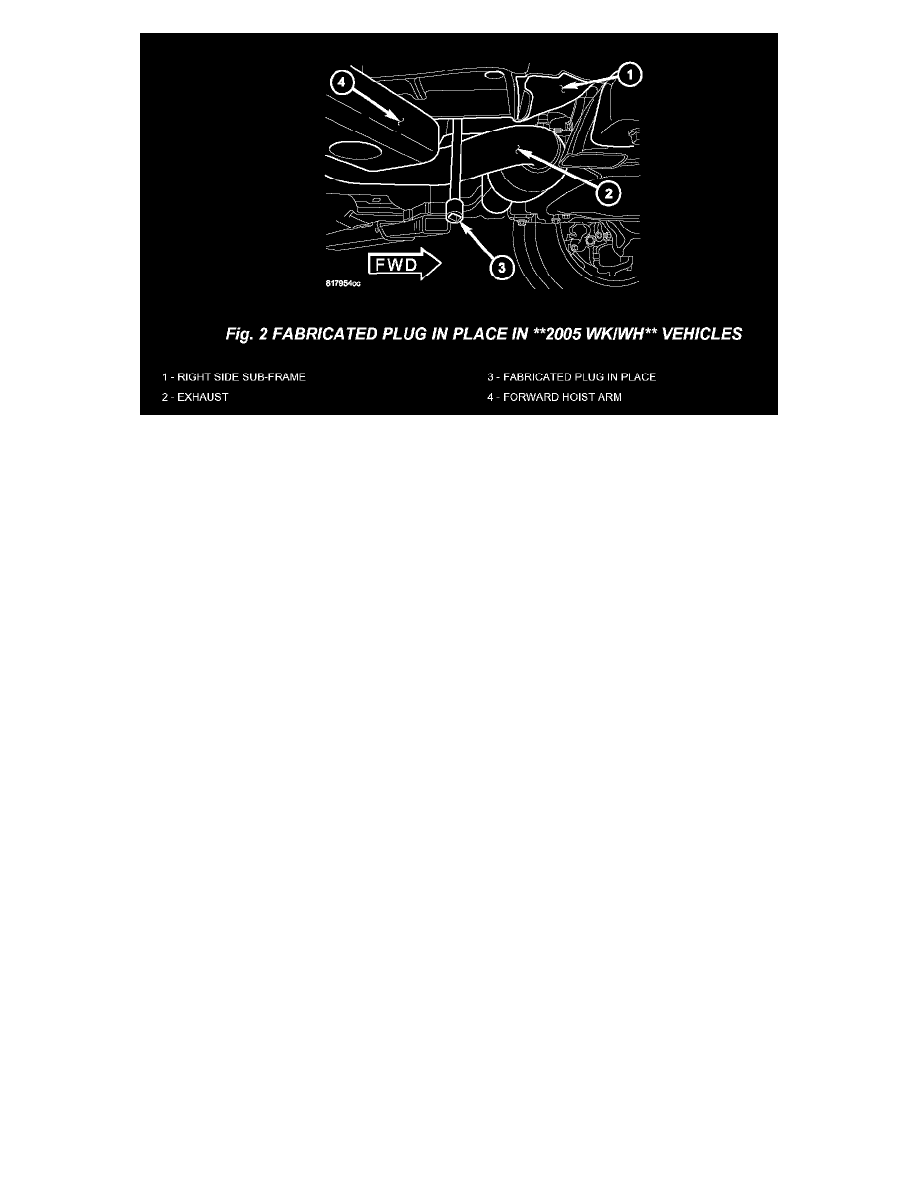
Slip the heater hose over the cooling coil drain tube, located above the right side of the transmission using the socket and extension to reach
up between the frame and the exhaust. Leave the hose socket and extension in place (Fig. 2). Proceed to Step # 7.
5.
Cap/clamp off the drain tube using a suitable cap/clamp.
6.
AB vehicles proceed to Step # 12, other vehicles proceed to next step.
7.
On LX/RS/**2005 WK/WH** vehicles (other vehicles proceed to next step), lower the vehicle.
8.
Remove passenger side floor mat.
9.
Place a protective cover over the carpet and the passenger front seat.
10.
On LX/RS/**WH/WK/XH**XK vehicles (other vehicles proceed to next step), remove the glove box to gain access to the blower motor resistor
/power module. Refer to the detailed service information available in TechCONNECT, under: Service Info, 23 - Body, Instrument Panel, Glove
Box
11.
On LX/**WH/WK/XH/XK vehicles, remove the passenger side instrument panel silencer. Refer to the detailed service information available in
TechCONNECT, under: Service Info, 23 - Body, Instrument Panel, Instrument Panel Silencer. On 2006 - 2007 WH/WK/XH/XK vehicles remove
the blower motor and use a shop vacuum to clean the evaporator coil, reinstall the blower motor and skip to step 18. Other vehicles proceed to
next step.**
12.
Remove the 2 screws securing the blower motor resistor/power module in the NC housing and remove the blower motor resistor/power module.
Do not disconnect the electrical connector.
13.
On LX/**2005 WK/WH** vehicles (other vehicles proceed to next step), proceed to Step # 18
14.
If the vehicle is not equipped with an A/C air filter, proceed to next step. If equipped with an A/C air filter, remove the A/C air filter. Refer to the
detailed service information available in TechCONNECT, under: Service Info, 24 - Heating & Air Conditioning, Distribution, Air Filter.
15.
Inspect and remove any leaves and debris.
16.
If necessary, use a shop vacuum to clean the cooling coil.
17.
If not equipped with an A/C air filter, proceed to next step. If equipped with an A/C air filter, install the air filter door (do not install the air filter at
this time).
18.
Open all the windows in the vehicle.
CAUTION:
Technician must use eye protection, rubber gloves, protective clothing, and avoid breathing vapors.