
Compass 2WD L4-2.4L (2008)
Repair/Instrument Panel Cover - Removal.
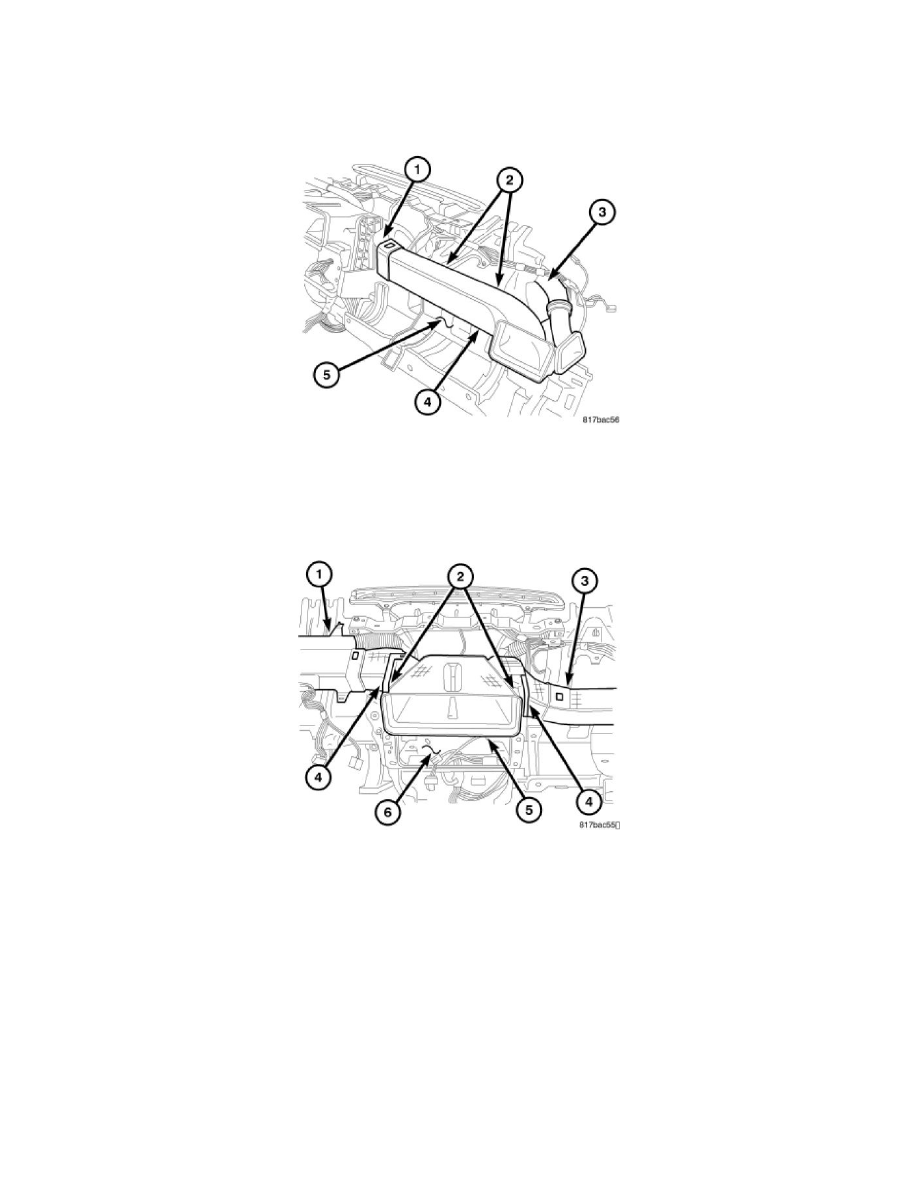
2. Remove the four screws (2) that secure the driver side instrument panel and demister duct assembly (1) to the instrument panel support (5).
3. Disconnect the driver side demister hose (3) from the demister duct.
4. Disconnect the driver side instrument panel duct from the center duct (4).
5. Remove the instrument panel duct and demister duct assembly from the instrument panel support.
PASSENGER SIDE DUCT
6. Remove the instrument panel top coverSee: Body and Frame/Interior Moulding / Trim/Dashboard / Instrument Panel/Service and
Repair/Instrument Panel Cover - Removal.
7. Remove the two screws (2) that secure the passenger side instrument panel duct (4) to the instrument panel support (5).
8. Disconnect the passenger side instrument panel duct from the passenger side demister duct (3) and the center duct (1).
9. Remove the passenger side instrument panel duct from the instrument panel support.
CENTER DUCT
10. Remove the instrument panel ducts (1 and 3) .
11. Remove the two screws (2) that secure the center instrument panel duct (5) to the two brackets (4) located on the top of the instrument panel
support (6).
12. Rotate and tilt the instrument panel center duct as necessary to remove it from the instrument panel support.
Instrument Panel Ducts - Installation
INSTALLATION
NOTE: Illustrations shown with instrument panel removed from vehicle for clarity.
NOTE: LHD model shown in illustrations. RHD model similar.
DRIVER SIDE DUCT
NOTE: The driver side instrument panel duct is serviced only as an assembly with the driver side demister duct.