
Borrego 2WD V6-3.8L (2009)
Windshield: Service and Repair
Repair Procedures
Replacement
Removal
NOTE:
-
Put on gloves to protect your hands.
-
Use seat covers to avoid damaging any surfaces.
1. Remove the following items.
A. Front pillar trim, both sides.
B. Windshield wiper arms and cowl cover .
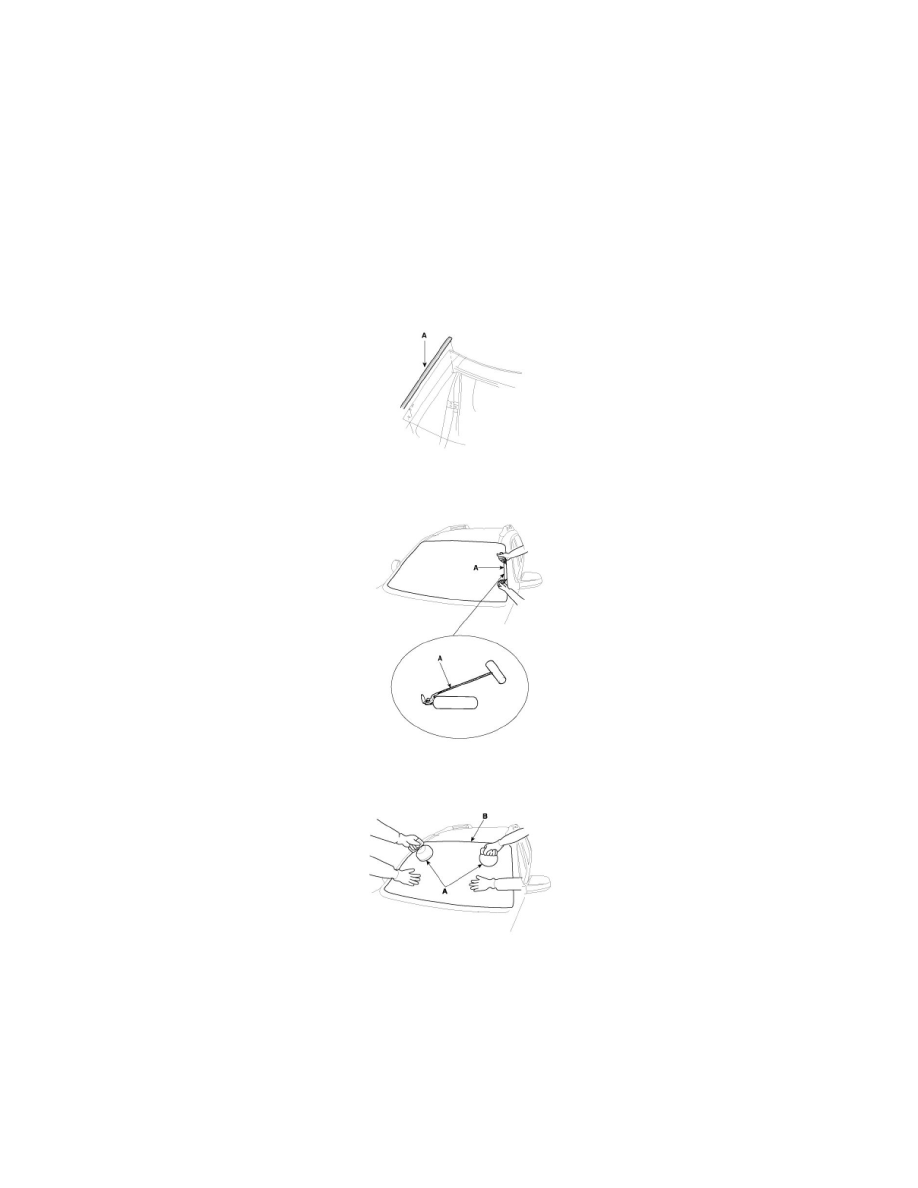
2. Remove the windshield glass side molding (A).
3. Cut out the windshield sealant using the sealant cutting tool (A)(09861-31100).
4. Remove the windshield (A) carefully using the glass holder (B).
Installtion
1. With a knife, scrape the old adhesive smooth to a thickness of about 2mm (0.08 in.) on the bonding surface around the entire windshield opening
flange:
A. Do not scrape down to the painted surface of the body; damaged paint will interfere with proper bonding.
B. Remove the rubber dam and fasteners from the body.
C. Mask off surrounding surfaces before painting.
2. Clean the bonding surface with a sponge dampened in alcohol. After cleaning, keep oil, grease and water from getting on the clean surface.
3. Install the spacer (A) install the windshield glass (B) temporarily with marking sure to position them on the center, and then place the alignment
mark (C).
4. Remove the windshield.