
Optima V6-2.7L (2003)
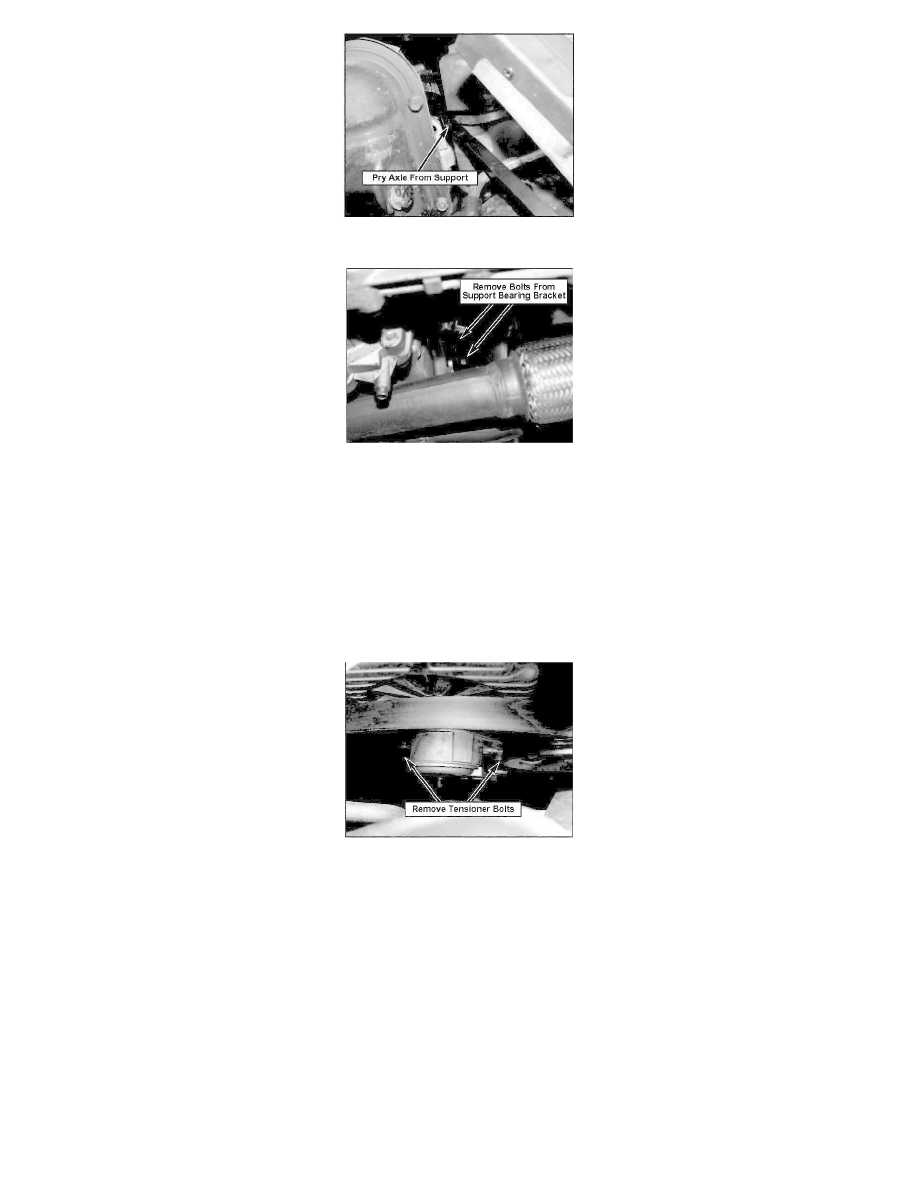
9.
Carefully pry axle from support bearing, do not pry against seal or dust ring. Remove axle.
10.
Remove two bolts securing support bearing bracket to engine and remove inner axle half from transaxle.
11.
Disconnect electrical connections from alternator.
12.
Remove lower alternator bolt and remove alternator through wheel opening.
13.
Install new alternator onto lower bracket and reconnect electrical connections.
14.
Reinstall inner axle half and torque support bearing bracket bolts to 29-36 lb-ft (40-50 Nm).
15.
Reinstall outer axle half, hub washer and nut. Torque hub nut to 148-206 lb-ft (200-280 Nm).
16.
Reinstall ball joint nuts and torque to 74-88 lb-ft (100-120 Nm).
17.
Reinstall under cover and side cover.
18.
Reinstall right front wheel and lower vehicle.
19.
Reinstall upper alternator bolt.
20.
Remove two bolts securing drive belt tensioner and install new drive belt.
21.
Reinstall tensioner.
Battery Cover Installation Procedure
* NOTICE
Battery cover will only fit OEM battery.