
Optima V6-2.7L VIN 4 (2007)
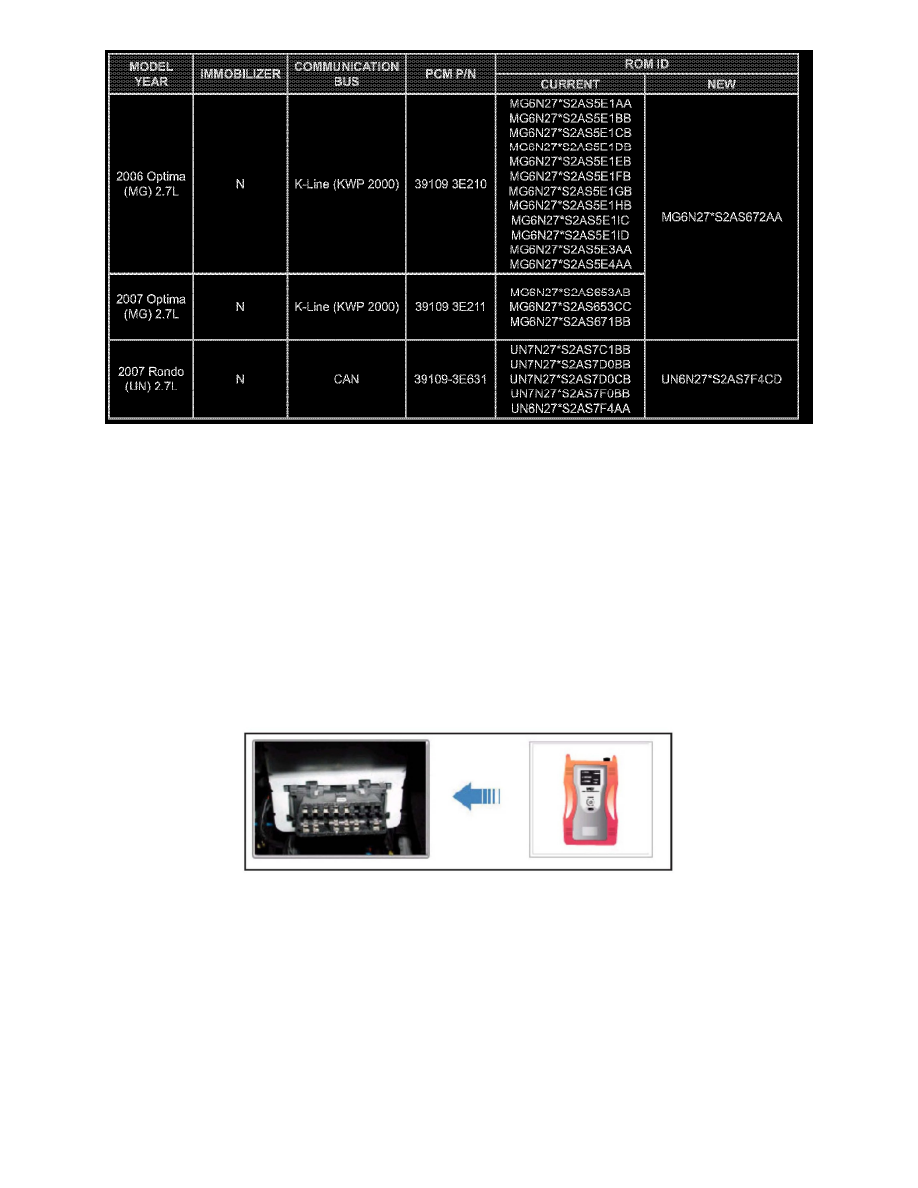
ROM ID INFORMATION TABLE
1.
Connect the power supply cable to the GDS tool.
*NOTICE:
If attempting to perform the PCM upgrade with the power supply cable disconnected from the GDS tool, be sure to check that the GDS tool is
fully charged before PCM upgrade. If the GDS tool is not fully charged, failure to perform the PCM upgrade may occur. Therefore, it is
strongly recommended that the power supply connector be connected to the GDS tool.
2.
Connect the USB cable between the Vehicle Communications Interface (VCI) and the GDS tool.
*NOTICE:
When performing the PCM upgrade using the GDS tool, wireless communication between the VCI and GDS tool is not available. Therefore,
be sure to connect the USB cable between the VCI and the GDS tool.
3.
Connect the Main 16-pin DLC cable (GHDM - 241000) to the VCI.
4.
Connect the Main 16-pin DLC cable (GHDM - 241000) to the OBD-II connector, located under the driver's side of the instrument panel.
5.
With the ignition key ON, turn ON the VCI and GDS tool. Access the GDS vehicle identification number (VIN) screen and configure the vehicle
using the VIN AUTO DETECT Function.
6.
At the GDS Main Screen, select ECU UPGRADE from the menu buttons located on the bottom of the screen Next, select Auto Mode, Engine.
7.
Perform the PCM upgrade in accordance with normal GDS tool PCM upgrade procedures.
Note:
Global Diagnostic System (GDS) users should access the "Notice" function from the GDS Main Screen for instructions regarding ECU
upgrade events.