
Rio5 L4-1.6L (2006)
Timing Belt: Testing and Inspection
INSPECTION
TIMING BELT
1. Check the belt for oil or dust deposits.
Replace, if necessary,
Small deposits should be wiped away with a dry cloth or paper. Do not clean with solvent.
2. When the engine os overhauled or belt tension adjusted, check the belt carefully. If any of the following flaws are evident, replace the belt.
NOTE:
^
Do not bend, twist or turn the timing belt inside cut.
^
Do not allow timing belt to come into contact with oil, water and steam.
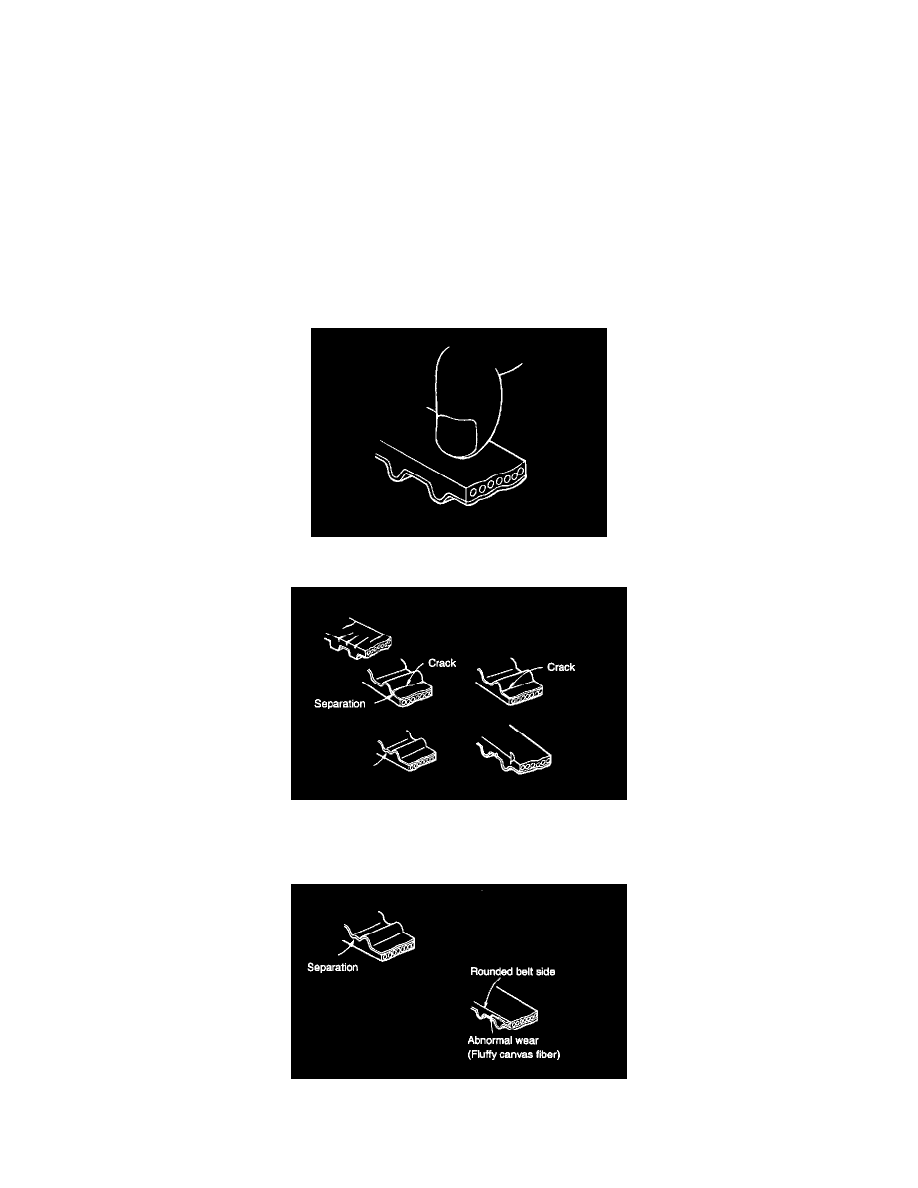
3. Inspect the belt closely. If the following problems are evident, replace the belt with a new one.
1. Hardened back surface of rubber.
Back surface is glossn, non-elastic and so hard that when the nail of your finger is pressed into it, no mark is produced.
2. Cracked back surface of rubber.
3. Side of belt is badly worn.
NOTE: A belt in god condition should have clear-cut sides as if it were cut with a sharp knife.
4. Teeth are badly worn out.
Initial stage: Canvas on load side of the tooth flank worn (fluffy canvas fibers, rubber gone, color changed to white, and unclear canvas
texture)