
Rio5 L4-1.6L (2006)
2) Loosen the tensioner pulley mounting bolt and apply tension to the timing belt.
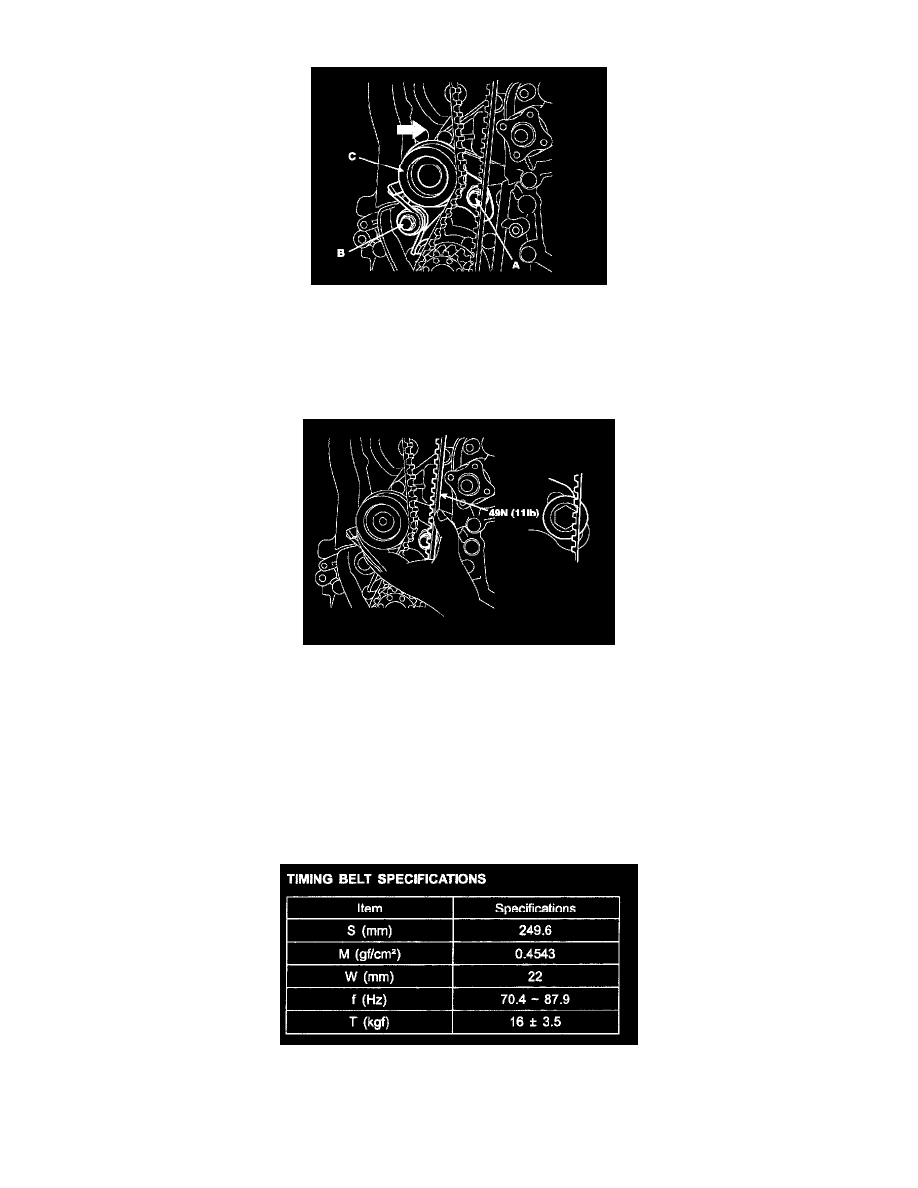
3) After checking the alignment between each sprocket and each timing belt tooth, tighten the mounting bolt (A) and (B) one by one.
Tightening torque: 19.6 - 26.5 Nm (2.0 - 2.7 kgf.m, 14.5 - 19.5 ft. lbs.)
4) Then recheck the belt tension.
Verify that when the tensioner and the tension side of the timing belt are pushed in horizontally with a moderate force [approximately 49 N
(11 lbs.)], the timing belt cog end is approximately 1/2 of the tensioner mounting bolt head radius (across flats) away from the bolt head
center.
5) Timing belt tension measuring procedure (by a sonic tension gauge)
Rotate crankshaft in clockwise direction to set 1st piston on top dead center (TDC) and rotate crankshaft in counterclockwise to 90° then
measure the belt tension in the middle of tension side span (in arrow direction of above illustration) by free vibration method.
CAUTION: Avoid rotating the crankshaft in a counter clock wise direction.
Engine damage could occur.
Conversion equation of frequency into tension: T = (4/9.8) x S2 x M x W x f2/ 100000000
S: Measured belt span (mm)
M: Unit weight of belt (gf/cm2)
W: Belt width (mm)
f: Transverse natural frequency of belt (Hz)
TIMING BELT SPECIFICATIONS
15. Turn the crankshaft two turns in the operating direction (clockwise) and realign the crankshaft sprocket and camshaft sprocket timing mark.
16. Install the timing belt lower cover (A) with bolts (B).