Rio5 L4-1.6L (2006)

Clutch Pedal Assembly: Adjustments
CLUTCH PEDAL INSPECTION AND ADJUSTMENT
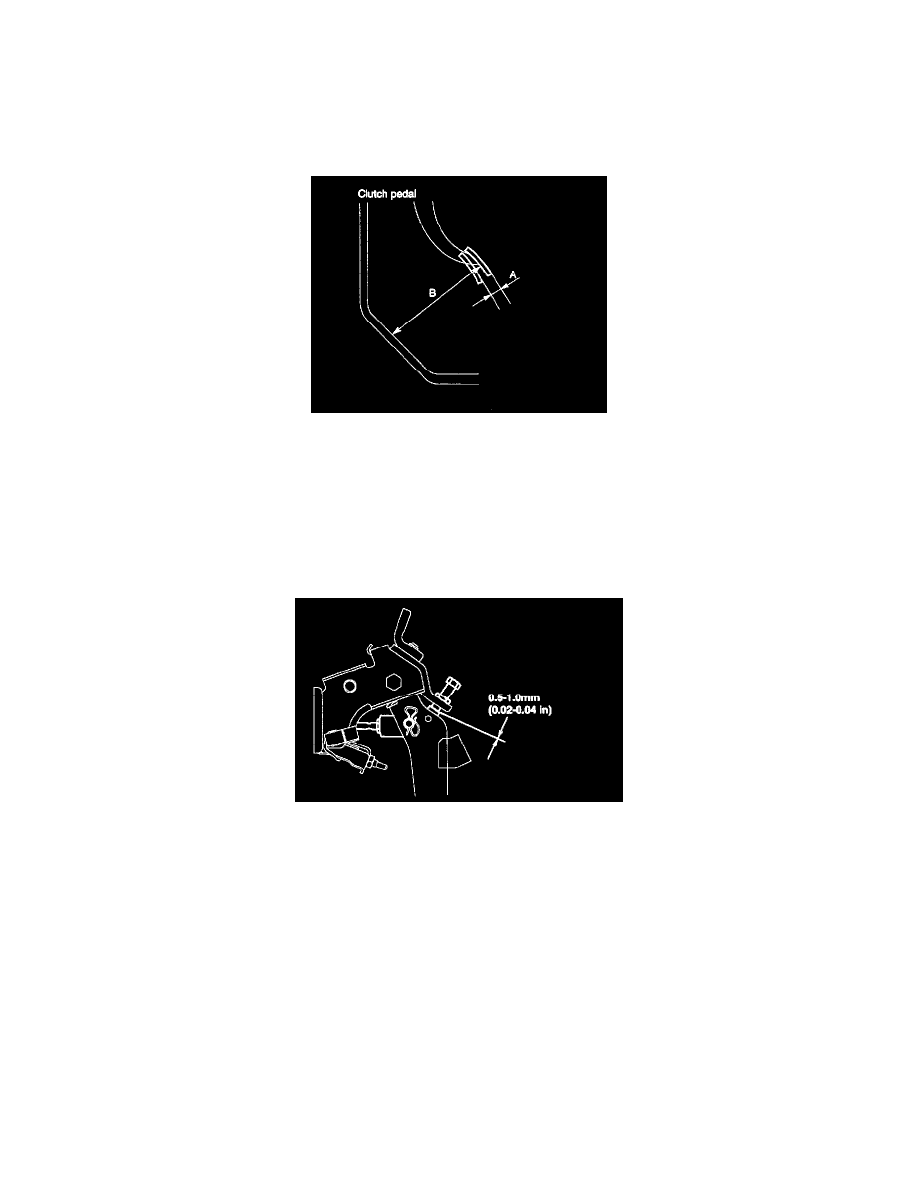
1. Measure the clutch pedal height (from the face of the pedal pad to the floorboard) and the clutch pedal play (measured at the face of the pedal
pad.)
Standard value
(A): 1 - 3 mm (0.04 - 0.11 inch)
(B): 163.9 mm (6.45 inch)
2. If the clutch pedal freeplay and height is not within the standard value range, adjust as follows:
1) Turn and adjust the bolt within the standard value, then secure by tightening the lock nut.
NOTE: If the clutch pedal height is lower than the standard value, loosen the bolt and adjust the push rod. After adjustment, tighten the bolt
so that the clearance with pedal stopper becomes 0.5 mm (0.02 inch) to 1.0 mm (0.04 inch) and secure with lock nut
2) Turn the push rod to agree with the standard value and then secure the push rod with the lock nut.
CAUTION: When adjusting the clutch pedal height or the dutch pedal play, be careful not to push the push rod toward the master cylinder
3. If the clutch pedal free play and the distance between the clutch pedal and the floor board when the clutch is disengaged, do not meet with the
standard values, it may be the result of either air in the hydraulic system or a faulty clutch master cylinder. Bleed the air or disassemble and inspect
the master cylinder or clutch.
