
Sedona V6-3.8L (2009)
Trunk / Liftgate Latch: Service and Repair
Tail Gate
Actuator Assembly Replacement
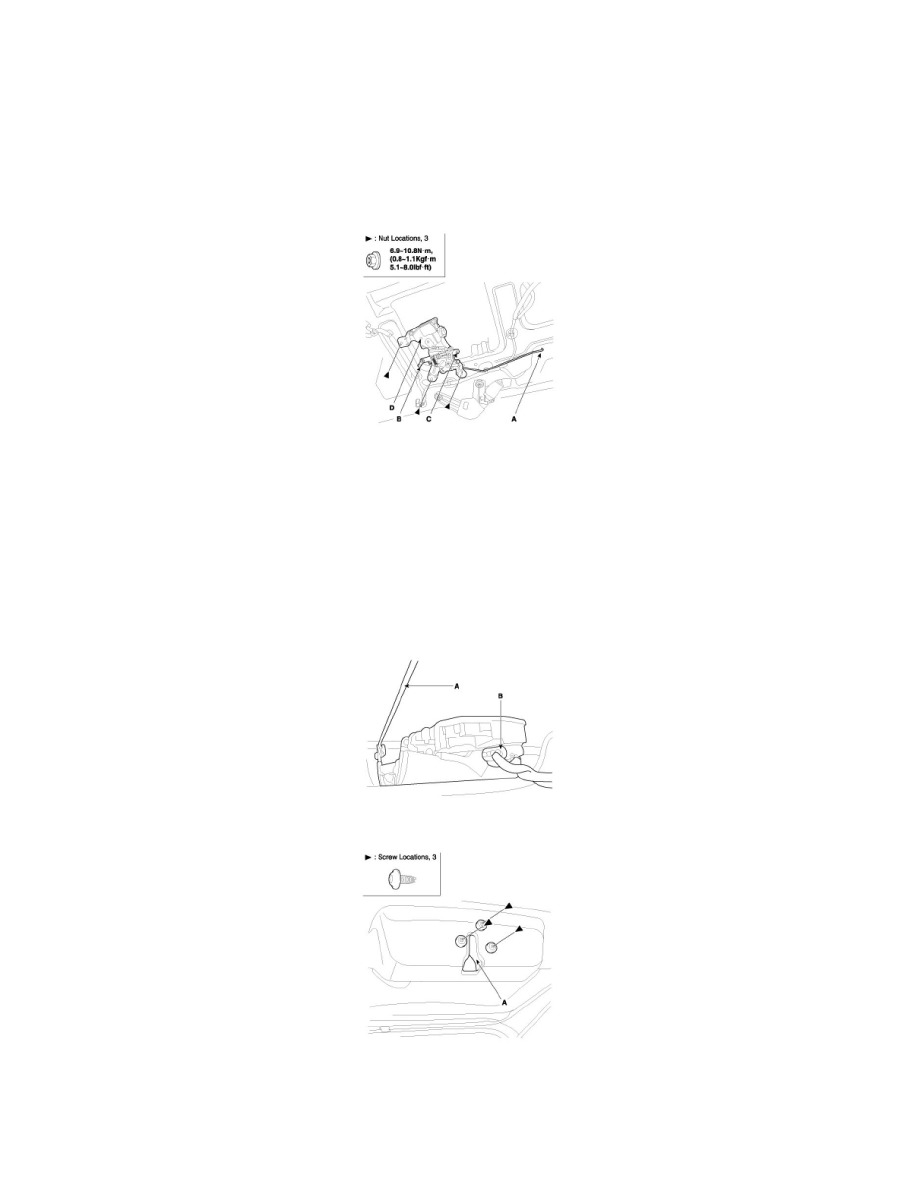
ACTUATOR ASSEMBLY REPLACEMENT
1. Remove the tailgate trim.
2. Disconnect the outside handle rod (A), actuator rod (B), key cylinder rod (C) and connector.
3. After loosening the mounting bolt and nuts, then remove the actuator assembly (D).
4. Installation is the reverse of removal.
NOTE:
-
Make sure the connector is connected properly and the connecting rod is connected properly.
-
Make sure the tailgate opens properly and locks securely.
Latch Assembly Replacement
LATCH ASSEMBLY REPLACEMENT
1. Remove the tailgate trim.
2. Disconnect the outside handle rod (A), connector (B).
3. After loosening the mounting screws, then remove the latch assembly (A).
4. Installation is the reverse of removal.
A. Make sure the connector is connected properly and the connecting rod is connected properly.
B. Make sure the tailgate opens properly and locks securely.