
Sephia GS Sedan L4-1.8L (1997)
Hydraulic Control Assembly - Antilock Brakes: Service and Repair
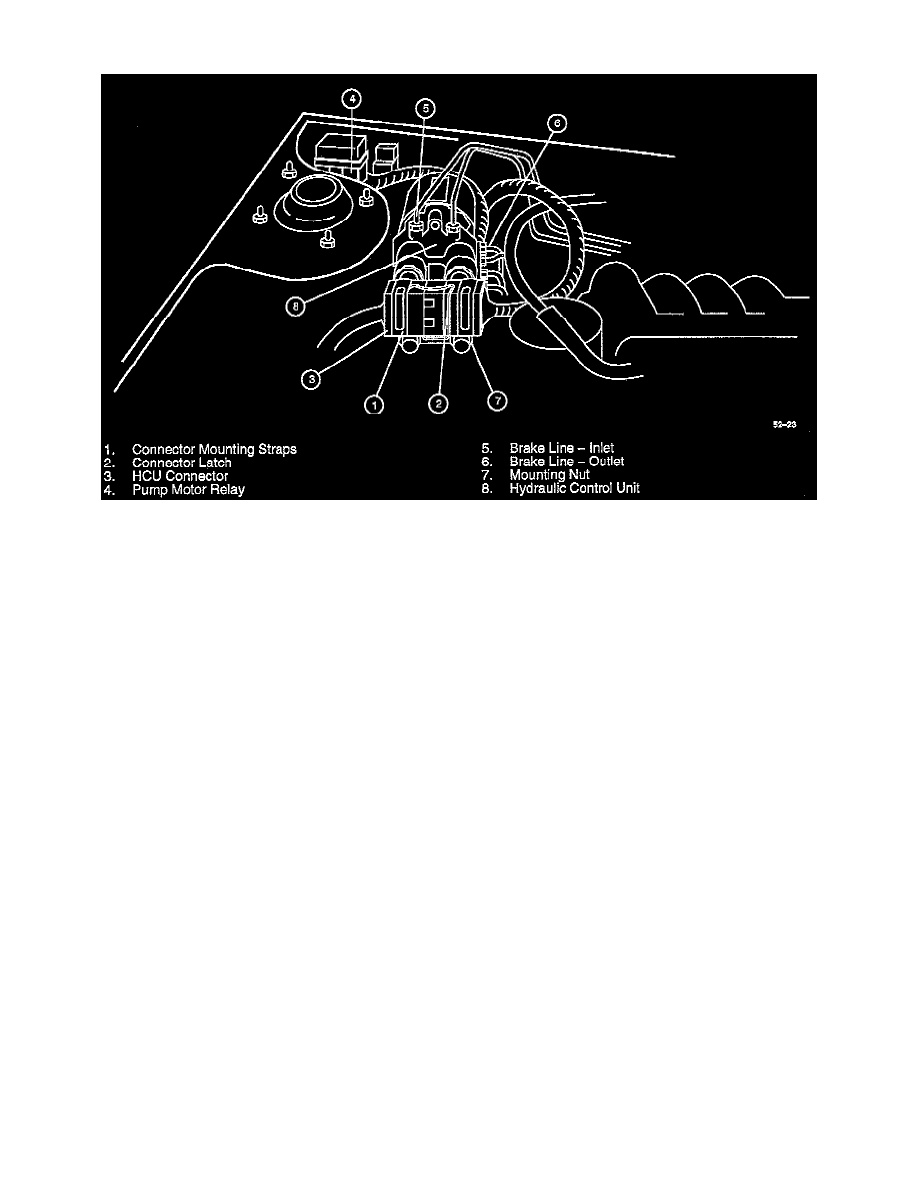
Rear Of Engine Compartment
REMOVAL
1. Disconnect the negative battery cable from the battery.
2. Bend forward the two straps that retain the Hydraulic Control Unit connector. Unlatch and disconnect the connector.
3. Disconnect pump motor connector from its relay.
4. Disconnect the six brake lines (2 inlet and 4 outlet) using a flare nut wrench. Be prepared to catch escaping brake fluid. Temporarily seal the open
brake lines with plastic caps or equivalent.
5. Loosen the three Hydraulic Control Unit mounting nuts (two front and one rear) and lift unit up to remove. Temporarily seal the open brake line
ports with plastic plugs or equivalent.
6. Store the Hydraulic Control Unit in a protective container when it is being serviced.
INSTALLATION
1. Lower Hydraulic Control Unit into position and tighten its three mounting nuts to specification.
-
Tightening torque: 12-18 ft. lbs. (16-24 Nm).
2. Reconnect the six brake lines. Be certain that the four lower outlet lines have been connected to the correct ports. Tighten nuts to specification.
-
Tightening torque: 9-16 ft. lbs. (12-22 Nm).
3. Connect pump motor harness to motor relay and connect the Hydraulic Control Unit connector. Be certain connectors are fully mated. Close the
Hydraulic Control Unit connector latch and secure the connector in place by bending the two straps over it.
4. Reconnect battery cable.
5. Bleed the brake system using the ABS procedure described in Brake System Bleeding.
See: Brake Bleeding