
Sephia GS Sedan L4-1.8L (1997)
Wheel Cylinder: Service and Repair
REMOVAL
1. Remove brake shoe assembly.
2. Disconnect the brake line using a flare nut wrench. Be prepared to catch escaping fluid.
3. Remove the two wheel cylinder mounting bolts. Remove wheel cylinder.
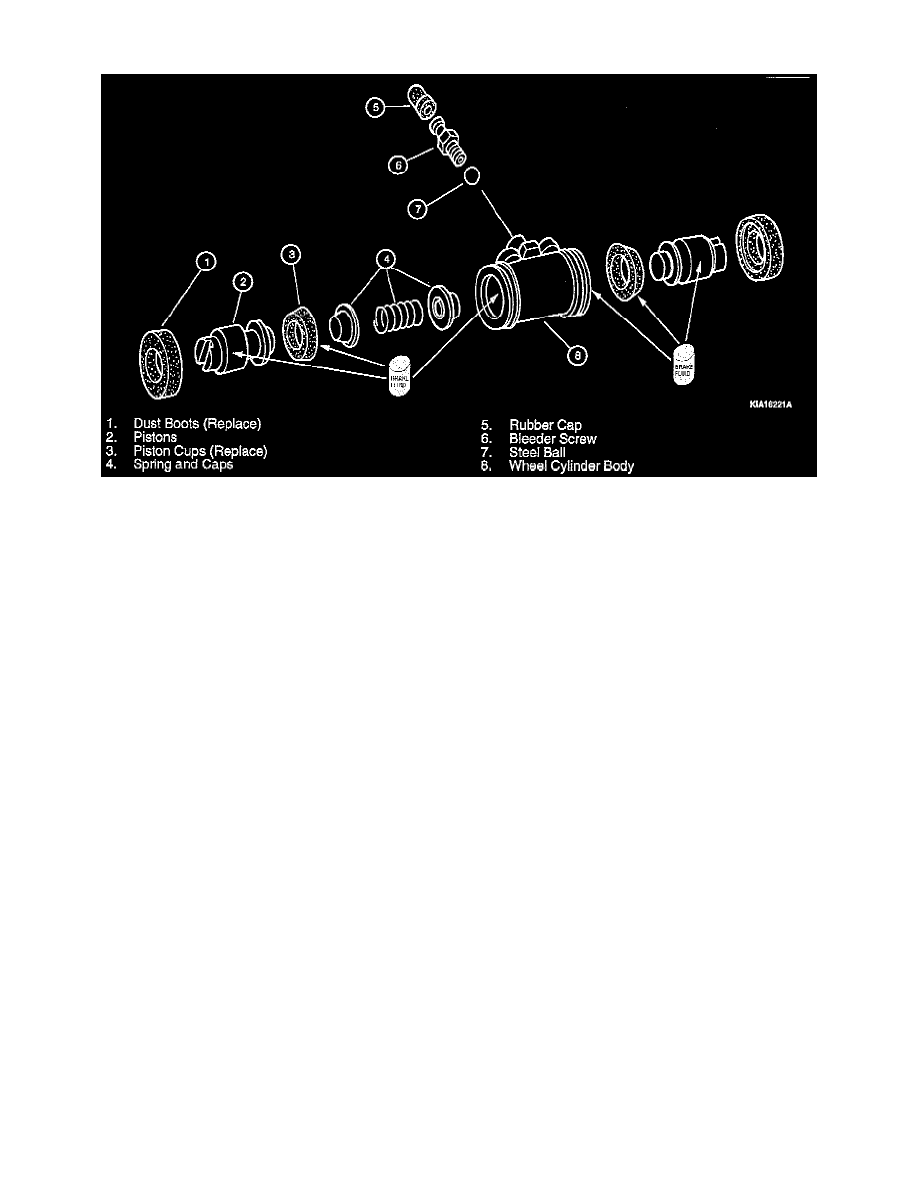
4. Remove the dust boots from each end of the cylinder.
5. Remove all internal parts by pushing them through the cylinder body.
6. Remove the rubber cap, bleeder screw and steel ball.
7. Thoroughly clean the cylinder bore inlet and bleeder ports with isopropyl alcohol. Inspect for corrosion, scoring or ridges.
NOTE: Replace the entire wheel cylinder assembly if a problem is found.
INSTALLATION
1. Make sure that all parts are clean and all cleaning solvents have been removed.
2. Coat all internal parts with clean brake fluid.
3. Install internal parts as shown.
4. Install the steel ball, bleeder screw and rubber cap.
5. Install the dust boots over each end of the cylinder.
6. Mount the cylinder on the backing plate and install two bolts.
-
Tightening torque: 12-20 Nm (9-15 ft. lbs.).
7. Connect the brake line. Tighten the brake line flare nuts.
-
Tightening torque: 12-20 Nm (9-15 ft. lbs.).
8. Install brake shoe assemblies.
9. Fill the master cylinder to the MAX level line with new brake fluid and bleed the system. See: Brake Bleeding/Service and Repair