
Sephia GS Sedan L4-1.8L (1997)
Brake Proportioning/Combination Valve: Testing and Inspection
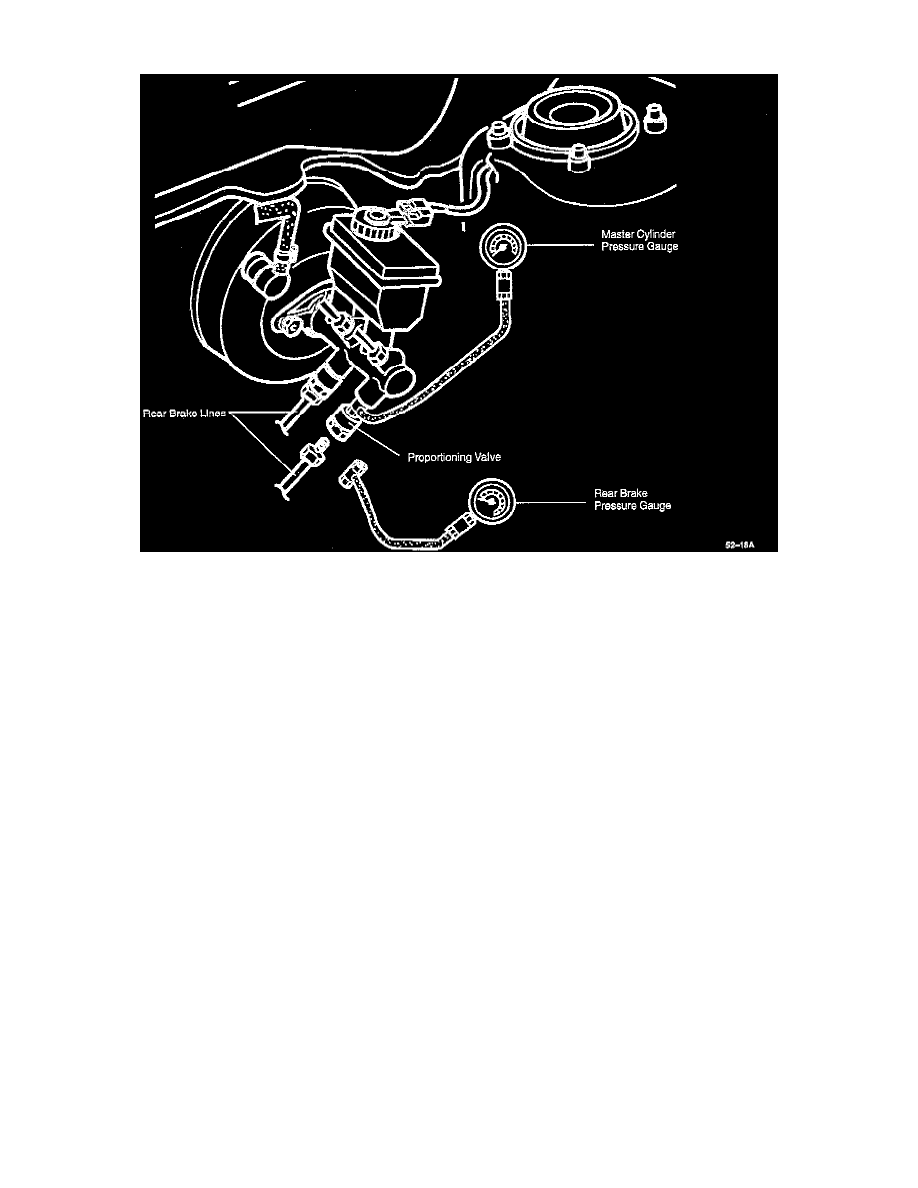
NOTE: Commercially available pressure gauges are required for the following test.
1. Disconnect one rear brake line from its proportioning valve.
2. Remove that proportioning valve from the master cylinder.
3. Connect a brake fluid pressure gauge (with at least 1,424 psi [9,818 kPa] capability) between the master cylinder rear brake line outlet and the
proportioning valve inlet.
4. Connect a second pressure gauge to the same proportioning valve outlet and the brake line inlet.
5. Bleed the system of air. See: Brake Bleeding/Service and Repair
6. Depress the brake pedal until the master cylinder pressure gauge reads 356 PSI (2453 kPa). Record the reading of the rear brake pressure gauge.
Pressure Specification Table
-
With master cylinder pressure @ 356 psi (2453 kPa) the rear brake pressure should be 356 psi (2453 kPa).
-
With master cylinder pressure @ 641 psi (4418 kPa) the rear brake pressure should be 441 psi (3044 kPa).
-
With master cylinder pressure @ 1,424 psi (9818 kPa) the rear brake pressure should be 669 psi (4615 kPa).
7. Repeat the process for the two remaining pressures.
8. Repeat steps 1-7 for the other valve.
9. If the pressure is not as specified above, replace the faulty valve.
10. Remove testing equipment.
11. Install the proportioning valves into the master cylinder outlets.
-
Tighten the proportioning valves to 12-20 Nm (9-15 ft. lbs.).
12. Connect the brake lines to the proportioning valves.
-
Tighten the brake line flare nuts to 12-20 Nm (9-15 ft. lbs.).
13. Fill reservoir to the MAX level line with new fluid.
14. Bleed the system of air. See: Brake Bleeding/Service and Repair
15. Inspect the system for leaks.