
Sephia Sedan L4-1.6L SOHC 16V (1993)
Control Arm: Service and Repair
1. Raise and support vehicle, then remove both front wheels.
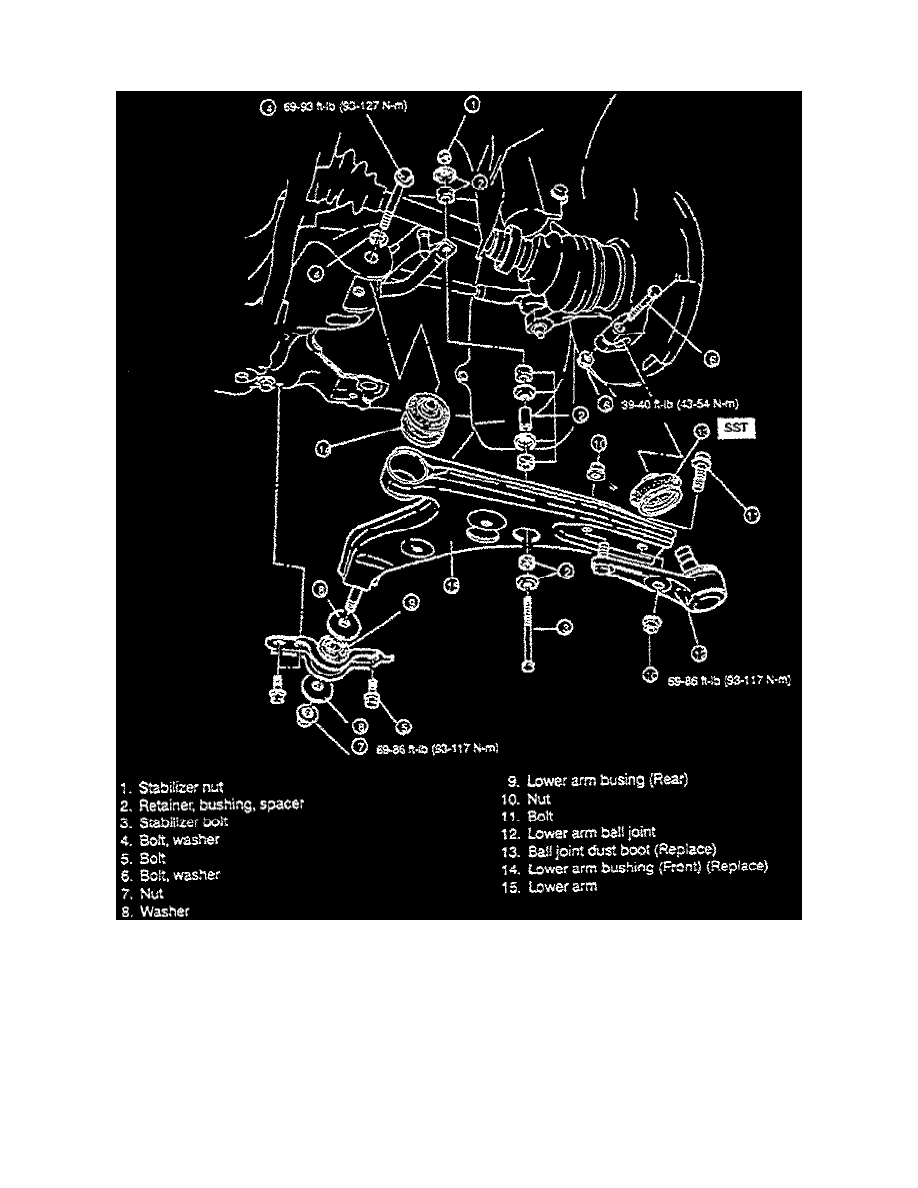
Fig. 7 Control Arm Replacement
2. Remove lower control arm in numbered sequence shown in Fig. 7, noting the following:
a. Secure ball joint in vise.
b. Use a chisel to remove dust boot from ball joint. Use caution to not damage the ball joint.
3. Reverse procedure to install, noting the following:
a. Apply general purpose grease to new dust boot.
b. Install dust boot on ball joint, then press ball joint in control arm.
c. Tighten stabilizer nut so 0.28-0.44 inch of thread is exposed at end of bolt.