
Sorento V6-3.5L (2004)
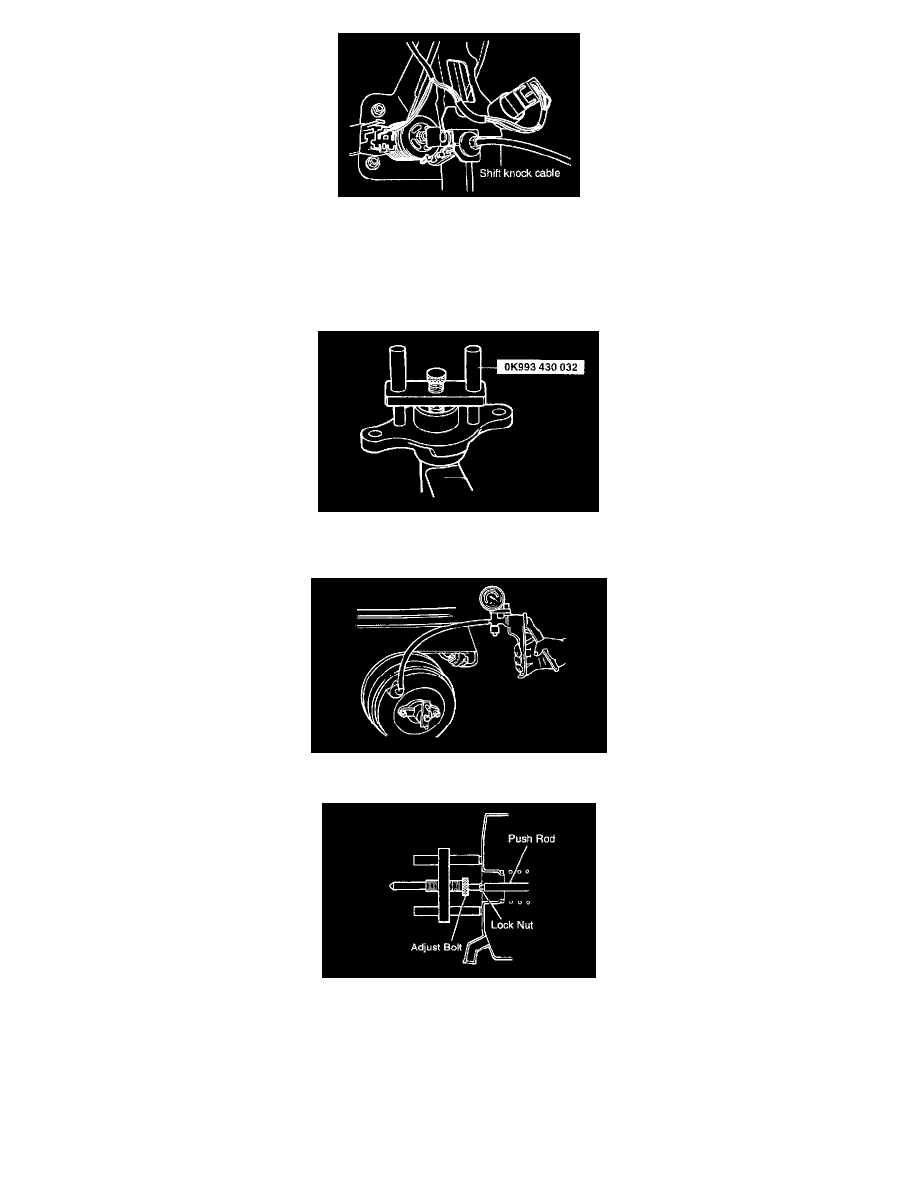
3. Connect the booster push rod and brake pedal with a joint pin and install a snap pin to the joint pin and then install the shift knock cable (A/T).
CAUTION: When installing the snap pin, A new one must be used.
4. Adjust push rod length
1. Insert the gasket onto the master cylinder.
2. Put the SST onto the gasket and tighten the adjusting bolt until the bolt touches the bottom of the push rod hole.
3. Apply 500 mmHg vacuum with a vacuum pump.
4. Invert the SST used in step 2 and place it on the booster.
5. Check whether the clearance between the edge of the adjust bolt and the push rod of the booster is 1.2 - 1.7 mm (0.047 - 0.067 inch)
If it is not 1.2 - 1.7 mm (0.047 - 0.067 inch), loosen the lock nut of the push rod, and turn the push rod to make the adjustment.
Permissible play: 1.2 - 1.7 mm (0.047 - 0.067 inch)
5. Install the master cylinder.
Tightening torque: 10 - 16 Nm (1.0 - 1.6 kg-m, 7 - 11 ft. lbs.)
6. Connect the vacuum hose to the brake booster.
7. After filling the brake reservoir with brake fluid, bleed the system.
8. Check for fluid leakage.
9. Check and adjust the brake pedal for proper operation.