
Spectra L4-2.0L (2004)
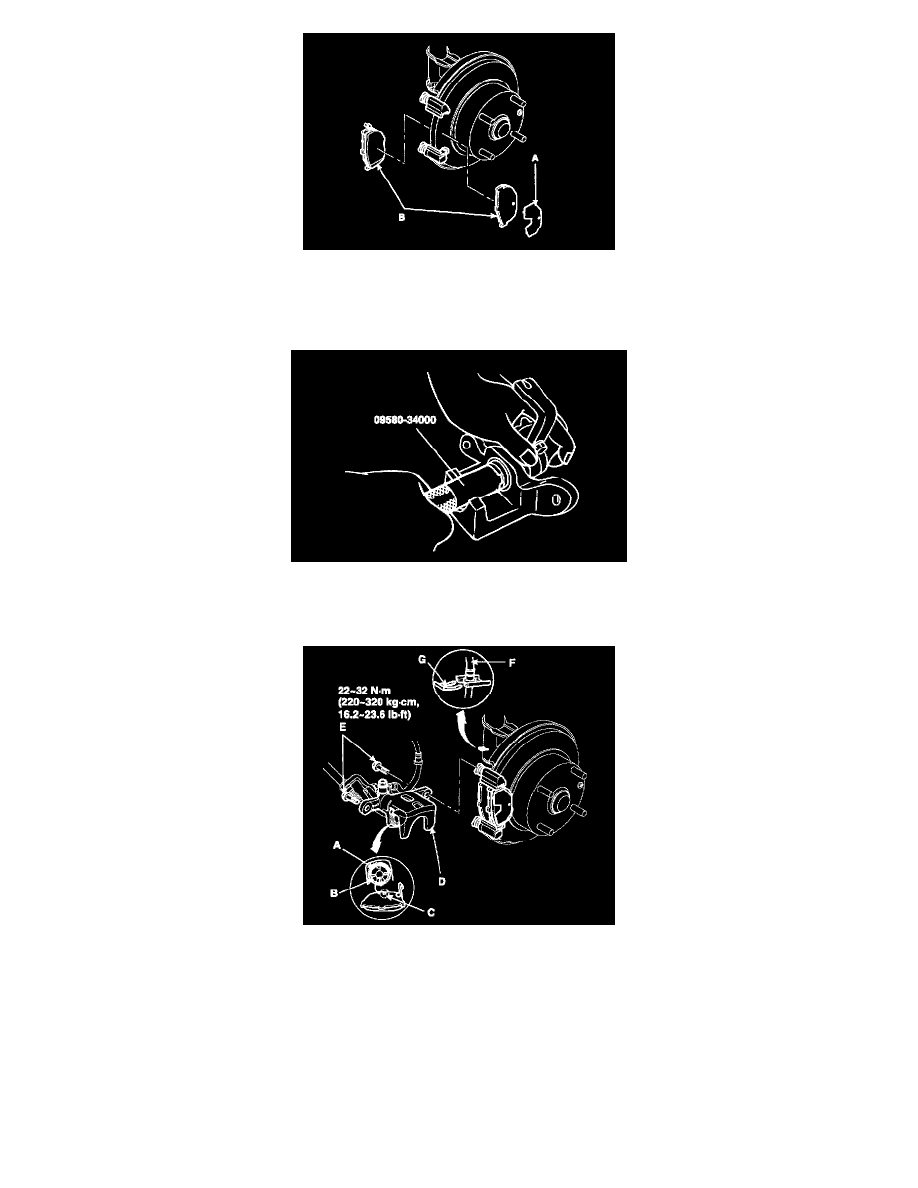
2. Check the foreign material at the pad shim (A) and the back of the pads (B).
3. Contaminated brake discs or pads reduce stopping ability. Keep grease off the discs and pads.
4. Install the brake pads (B) and pad shim (A) on the caliper bracket. Install the inner pad with its wear indicator (C) facing down ward.
If you are reusing the pads, always reinstall the brake pads in their original positions to prevent a momentary loss of braking efficiency.
5. Rotate the caliper piston (A) clockwise into the cylinder, the align the cutout (B) in the piston with the tab (C) on the inner pad by turning the
piston back. Lubricate the boot with rubber grease to avoid twisting the piston boot. If the piston boot is twisted, back it out so it is positioned
properly.
6. Install the brake caliper (D).
7. Install and torque the guide rods (E) to proper specification.
8. Install the brake hose (F) onto the suspension arm with the brake hose clip (G).
9. After installation, check for leaks at hose and line joints and connections, and retighten if necessary.
10. Depress the brake pedal several times to make sure the brakes work, then test - drive.
NOTE: Engagement of the brake may require a Greater pedal stroke immediately after the brake pads have been replaced as a set. Several
applications of the brake pedal will restore the normal pedal stroke.