
Sportage 4WD 4Dr L4-2.0L (2000)
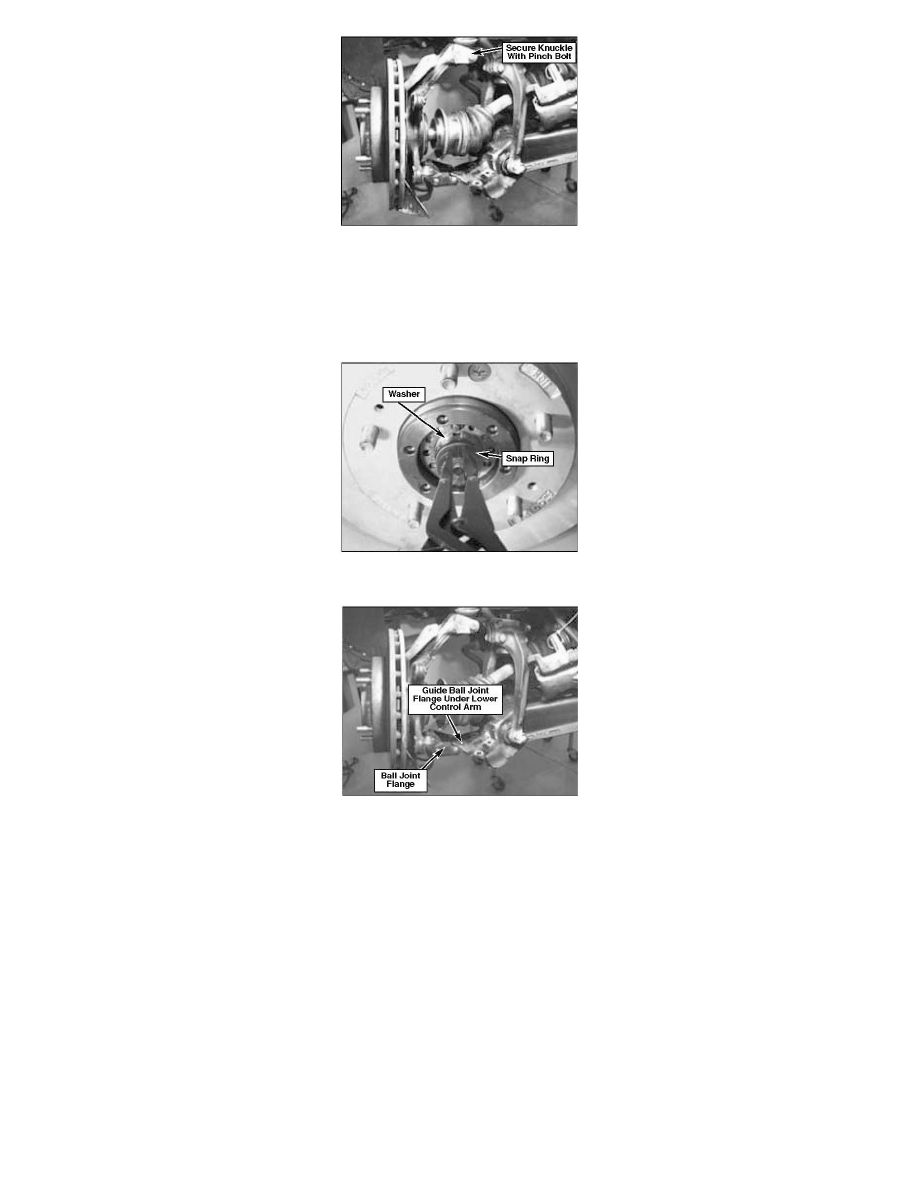
22.
Install knuckle/hub assy by first installing over CV axle shaft, then insert upper ball joint through top of knuckle. Retain with 10 mm pinch bolt
and nut.
* NOTICE
Suspending knuckle from the upper control arm before attaching ball joint to lower control arm will help prevent damage to the dust shield on
the drive shaft and/or to the seal.
23.
Make sure CV axle shaft is inserted all the way into hub, install washer and secure with new snap ring (P/N 0K-011-27-145, included in kit).
24.
Lift knuckle assembly up and guide lower ball joint flange under lower control arm and secure with 4 bolts. Torque bolts to 16 - 19 lb-ft.
25.
Tighten upper ball joint pinch bolt to 36 lb - ft.
26.
Tighten lower ball joint nut to 110 lb - ft and install new cotter pin.
27.
Insert tie rod end into knuckle, install nut, tighten to 27 lb - ft, and install new cotter.
28.
Make sure there is no interference between lower control arm and knuckle or inner seal dust shield when turning steering from full left to full right.
If there is interference, recheck/repeat steps 15 and 16.
29.
Install ABS sensor into knuckle and tighten mounting bolt to 7 lb - ft (if ABS equipped).
30.
Apply small amount of oil to 0-ring on vacuum locking hub.
31.
Install vacuum locking hub to wheel hub and tighten the six bolts in two passes using crisscross pattern.
First pass: Tighten to 19 lb - ft
Second pass: Tighten to 23 lb - ft