Inspection of Crankshaft for 300Tdi Engine Overhaul

ENGINE
58
OVERHAUL
Crankshaft - inspection
NOTE: Crankshafts may be reground 0.25
mm undersize on both main and big-end
journals.
See Crankshaft - regrinding.
1. Clean crankshaft and main bearing caps,
ensure oilways are clear.
2. Check main and big-end journals for signs of
scoring, excessive wear and overheating.
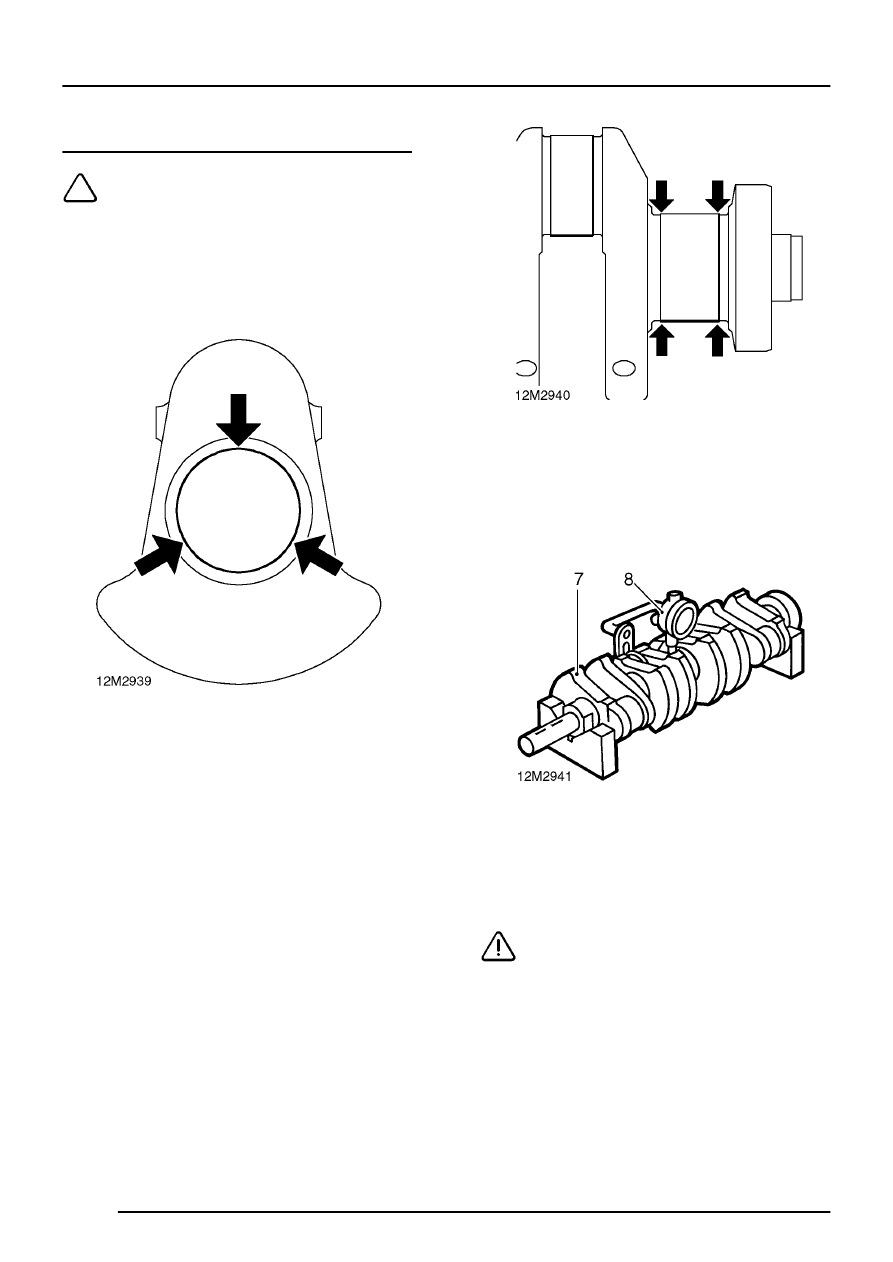
3. Check main and big-end bearing journals for
wear and ovality, make 3 checks at 120
°
intervals in centre of journals.
Maximum ovality = 0.040 mm
Main bearing journal diameter = 63.475 to
63.487 mm
Service limit = 63.36 mm
Regrind diameter = 63.225 to 63.237 mm
Big-end bearing journal diameter = 58.725 to
58.744 mm
Service limit = 58.637 mm
Regrind diameter = 58.475 to 58.494 mm
4. If bearing journal diameters are less than
service limit, crankshaft may be reground to
specified regrind diameter and 0.25 mm
oversize bearing shells fitted.
5. Using a micrometer, measure diameter at each
end of main and big-end bearing journals.
6. From measurements obtained, calculate taper
of each journal.
Maximum journal taper - end to end = 0.025
mm
7. Support each end of crankshaft in Vee blocks.
8. Position a DTI with stylus contacting centre
main bearing journal.
9. Rotate crankshaft and check run-out does not
exceed 0.076 mm.
CAUTION: If run-out exceeds above figure,
renew crankshaft.
