
HEATER/COOLER UNIT - LH DRIVE (page 2 of 2)
- Make
- Land Rover
- Model
- Defender 300Tdi Defender
82
AIR CONDITIONING
6
REPAIR
9. Remove plug connector from resistor.
10. Remove relay from connecting block to gain
access to fixing screw.
11. Remove screw and release relay connector
block. Retain relay in connector block.
12. Remove screw and detach air conditioning 30
amp fuse bracket from resistor. Refit both
resistor retaining screws.
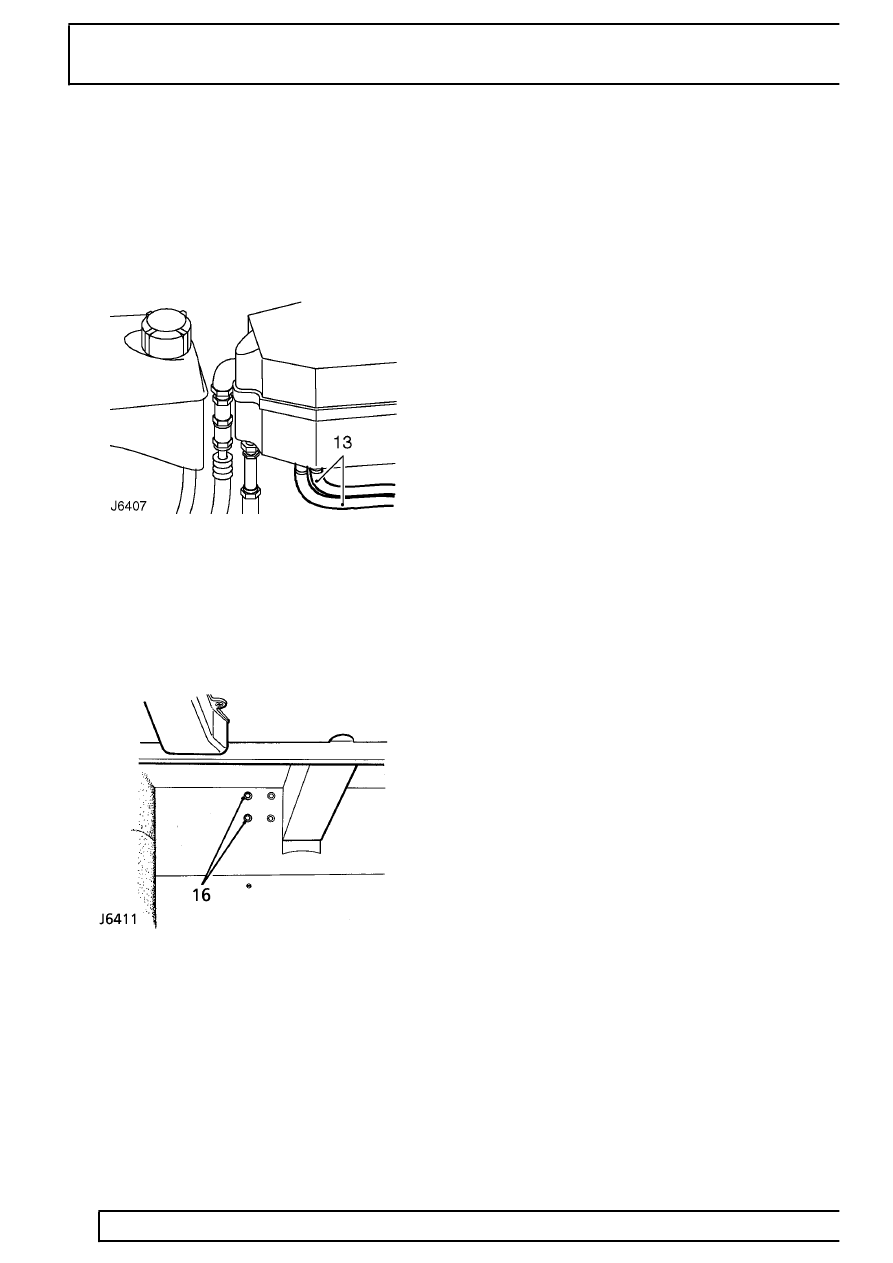
13. Using suitable pipe clamps, clamp heater matrix
feed and return hoses at base of heater/cooler
unit. Release retaining clips and remove hoses.
14. From inside vehicle remove front passenger
carpet, if fitted.
15. Remove retaining screws and fold back footwell
insulation.
16. Remove 2 bolts securing heater/cooler unit lower
mounting bracket to bulkhead.
17. From inside engine compartment remove 2 bolts
securing top heater/cooler unit mounting bracket
to engine bulkhead. This also releases earthing
leads.
18. Remove bolt securing support bracket to front of
heater/cooler casing.
19. Lift heater/cooler unit clear of air duct seal and
remove from vehicle.
20. Discard all pipe connection ’O’ rings.
Refit
21. Coat unions, threads and new ’O’ rings with
refrigerant oil prior to reassembly.
22. Position heater/cooler unit in engine
compartment and locate with air duct seal.
23. Secure unit top and bottom mounting brackets to
bulkhead and support bracket to front of unit
casing. Fully tighten fixing bolts when unit is
correctly positioned.
24. Fit footwell insulation.
25. Reconnect heater matrix hoses.
26. Fit air conditioning fuse bracket, relay connector
block, relay and resistor plug connector.
27. Fit control cable to evaporator air flap operating
rod, using a new clip.
28. Fit pipe connector to vacuum switch.
29. Connect compressor clutch switch multi-plug.
30. Connect high and low pressure pipes to
evaporator.
31. Fit expansion tank
See COOLING SYSTEM,
Repair, Expansion tank.
32. Evacuate and recharge air conditioning system
See Adjustment, Refrigerant recovery,
recycling, recharging.
33. Reconnect battery.
Parts & tools for this job For Land Rover Defender
- TOOLA/C manifold gauge setSearch: AC manifold gauge set
- TOOLUV leak detection kitSearch: AC UV leak detection kit
- PARTCabin filterSearch: Land Rover Defender cabin filter
Links open Amazon search results in a new tab. As an Amazon Associate I earn from qualifying purchases.