300Tdi Defender

AIR CONDITIONING
7
REPAIR
EVAPORATOR - LH DRIVE
Service repair no - 82.25.20
Remove
1. Remove heater/cooler unit
See Heater/cooler
unit.
2. Suitably support unit on a bench to prevent
damage to heater matrix pipes.
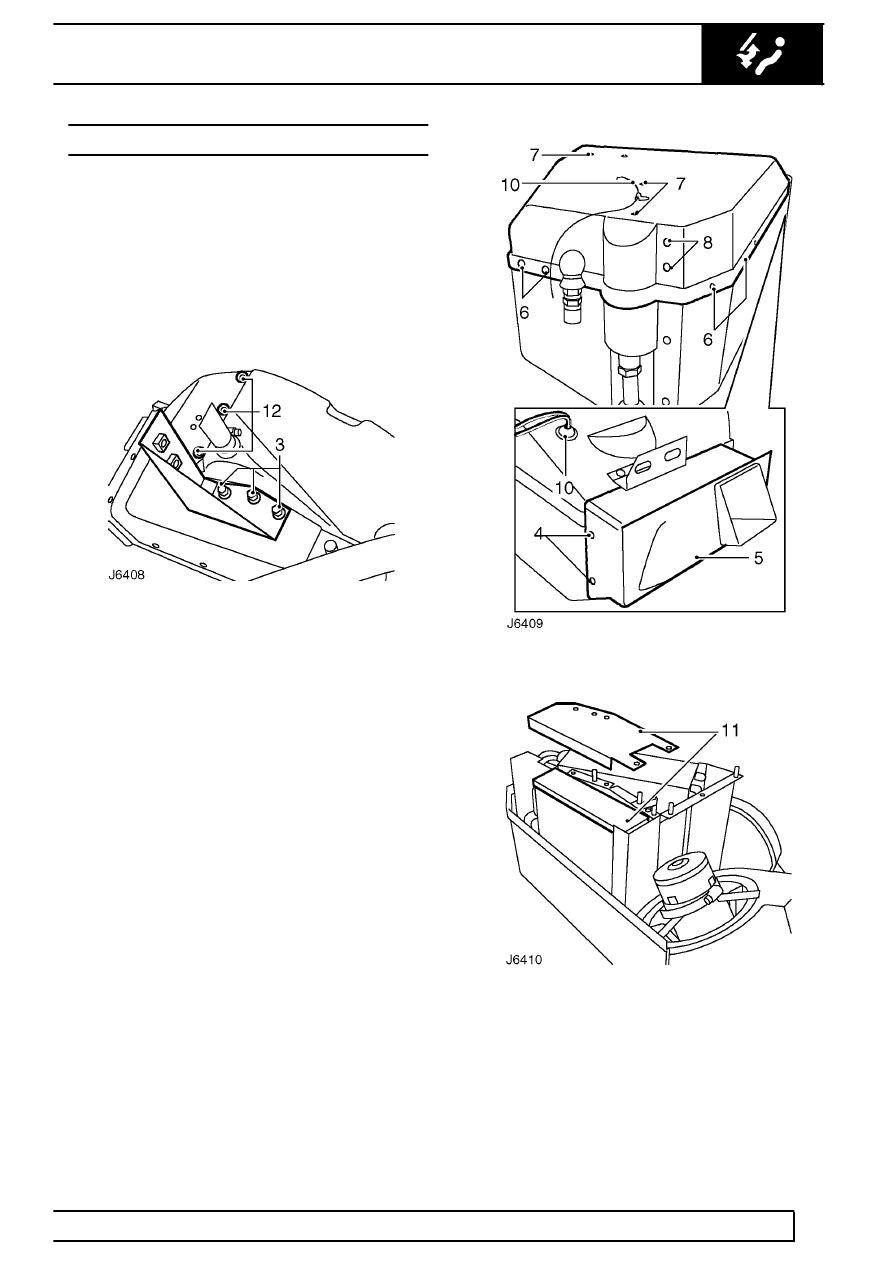
3. Release 3 nuts and remove mounting bracket
from underneath unit casing.
4. Remove 7 screws securing outlet duct to
heater/cooler unit.
5. Carefully break sealing compound around edge
of duct and pull ducting from unit.
6. Remove 15 screws located around cover seam.
Break sealing compound from unit body and top
cover.
7. Remove 4 screws and 4 nuts from top of cover.
8. From front of unit remove 2 screws adjacent to
low pressure pipe moulding.
9. At side of unit remove 2 screws adjacent to air
intake aperture.
10. Lift off top cover, release grommet and feed
blower motor wiring and air control flap rod
through respective apertures. Note thermostat
temperature probe which is inserted in
evaporator matrix through top cover.
11. Lift support plate and insulation pad from heater
matrix.
12. From bottom of unit casing, remove 3 screws
adjacent to dump valve outlet, and screws next
to heater matrix pipes.
