
MASTER CYLINDER (page 3 of 3)
- Make
- Land Rover
- Model
- Defender 300Tdi Defender
70
BRAKES
4
OVERHAUL
Assembling master cylinder
CAUTION: It is important that the following
instructions are carried out precisely,
otherwise damage could be caused to new
seals when inserting plungers into cylinder bore.
Generous amounts of new brake fluid should be
used to lubricate parts during assembly.
NOTE: Thoroughly check that no debris is
lodged in fluid passageways and drillings.
If debris is found, carefully remove,
re-clean cylinder and re-check.
16. Fit new swirl tube to bottom of cylinder bore.
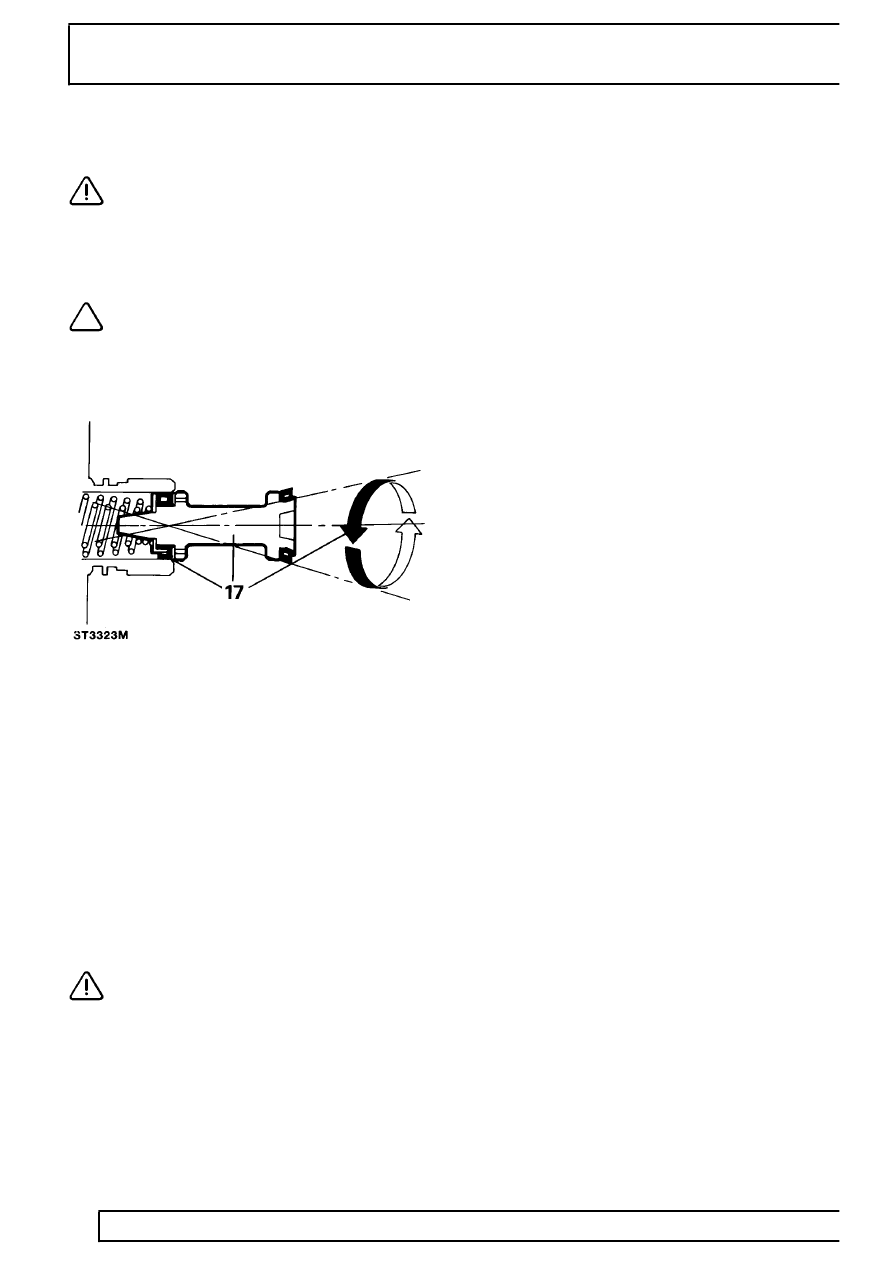
17. Lubricate secondary plunger and cylinder bore.
Offer plunger assembly to cylinder until
recuperation seal is resting centrally in mouth of
bore. Gently introduce plunger with a circular
rocking motion, as illustrated. Ensuring that seal
does not become trapped, ease seal into bore
and slowly push plunger down bore in one
continuous movement.
18. Fit primary plunger assembly using same
method as for secondary plunger, push plunger
down bore.
19. Fit original guide ring to support primary plunger.
20. Coat a new ’O’ ring with brake fluid and fit to its
respective groove on outer location surface of
master cylinder.
CAUTION: ’O’ ring should not be rolled
down outer location surface of master
cylinder but should be slightly stretched
and eased down cylinder and into its groove. Do
not over stretch seal.
21. Fit a new retaining ring on outer surface of
master cylinder ensuring that serrations of ring
are facing mounting flange.
22. Fit two new reservoir seals in their respective
ports.
23. Fit a new vacuum seal to either primary plunger
or to bottom of transfer housing bore, open face
of seal towards primary plunger guide ring.
24. Lubricate vacuum seal with brake fluid, fit
transfer housing to master cylinder, push
housing fully up to cylinder mounting flange. Do
not adjust transfer housing after fitting.
25. Lubricate a new water ingress seal with brake
fluid, slightly stretch seal and ease it down
housing until seal is in correct position between
housing and flange.
26. Roll reservoir into top of master cylinder,
reversing procedure described in instruction 3.
27. Fit master cylinder to servo
See Repair,
Master cylinder .
28. Reconnect battery, and road test vehicle.
Parts & tools for this job For Land Rover Defender
- TOOLBrake bleeder kitSearch: one man brake bleeder kit
- FLUIDBrake fluidSearch: brake fluid
- TOOLBrake line flaring toolSearch: brake line flaring tool
Links open Amazon search results in a new tab. As an Amazon Associate I earn from qualifying purchases.