
300Tdi Defender Master Cylinder | Brakes | Page 466
BRAKES
3
OVERHAUL
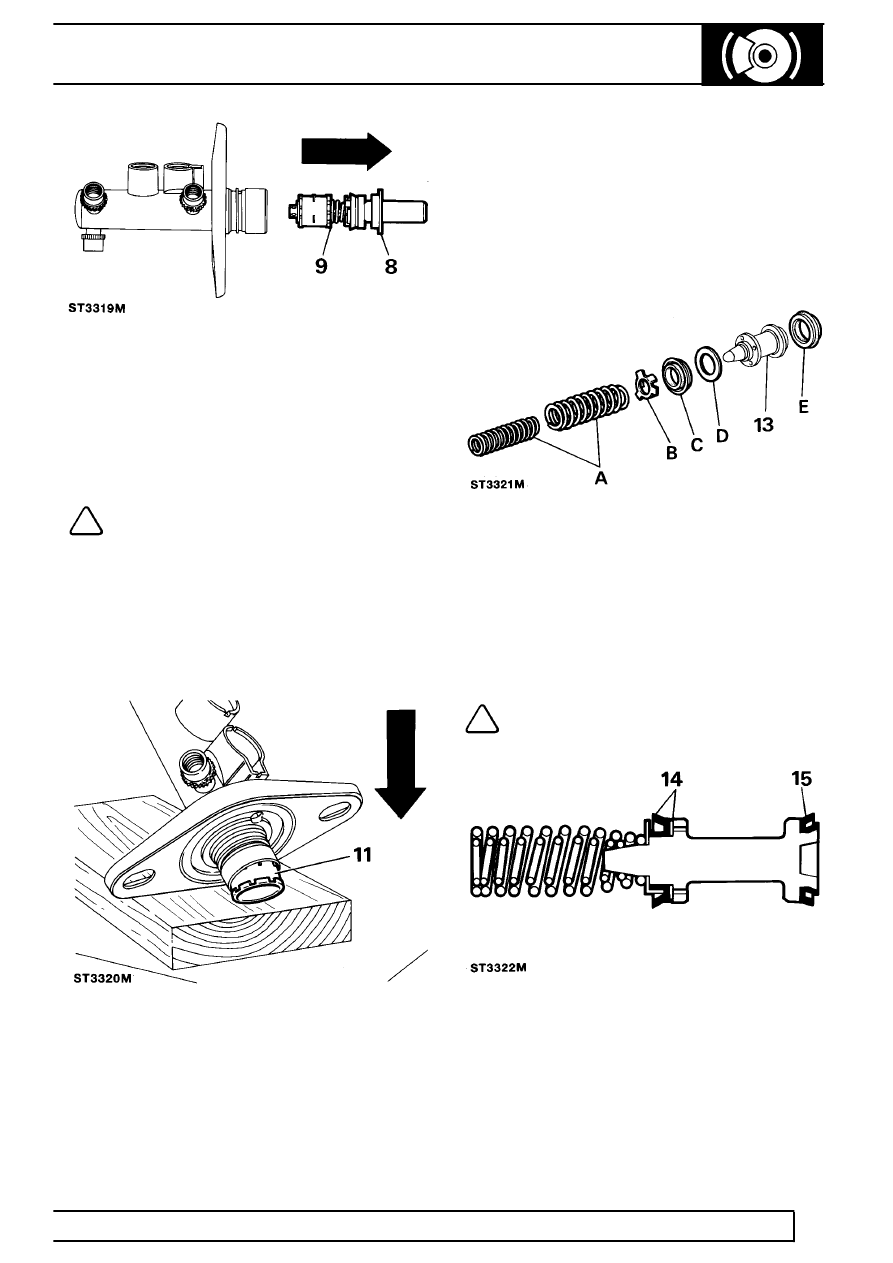
8. Remove guide ring from mouth of master
cylinder which supports primary plunger
assembly and place to one side, this component
is not part of master cylinder service kit and is to
be refitted on assembly of unit.
9. Pull primary plunger assembly out of master
cylinder.
NOTE: The primary plunger assembly
cannot be broken down any further and is
serviced as a complete unit. Discard
assembly.
10. The secondary plunger assembly will remain at
bottom of master cylinder bore, plunger can be
easily expelled by tapping assembly on a piece
of timber until plunger appears at cylinder mouth,
carefully pull plunger from master cylinder.
11. If swirl tube was not expelled at same time as
secondary plunger, repeat above operation to
expel it from bottom of master cylinder bore and
discard.
12. Clean all parts with Girling cleaning fluid or
unused brake fluid and place cleaned parts on to
a clean sheet of paper. Inspect cylinder bore and
plungers for signs of corrosion, ridges and score
marks. Provided working surfaces are in perfect
condition, new seals from a Girling Service
repair kit may be used.
Renewing secondary plunger seals
A. Springs
B. Seal retainer
C. Recuperating seal (primary cup)
D. Washer
E. ’L’ seal
13. Remove components above from secondary
plunger and discard:
NOTE: A small screwdriver with end
rounded and polished is required to
remove ’L’ seal. DO NOT damage
secondary plunger.
14. Coat new seals in unused brake fluid and firstly
fit ’L’ seal to plunger.
15. Fit washer followed by recuperating seal. Fit seal
retainer and springs, ensure springs are
correctly seated.