Assemble Rear Axle and Final Drive for 300Tdi Defender

51
REAR AXLE AND FINAL DRIVE
4
OVERHAUL
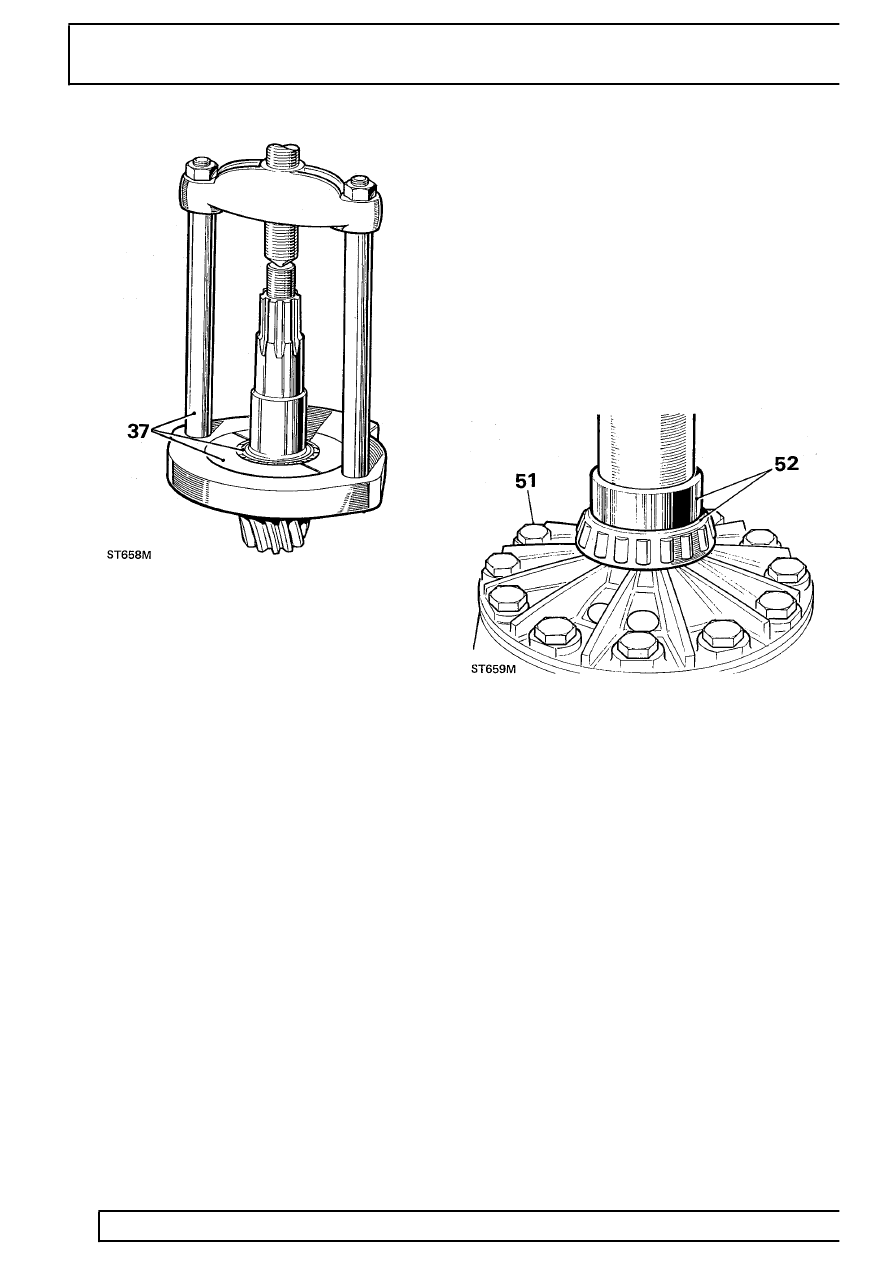
37. Using LRT-51-500 and press LRT-99-002,
remove inner bearing cone from pinion.
INSPECTION
38. Examine all components for obvious wear or
damage.
39. Bearing cones must be a press fit on their
locations, except drive pinion flange and bearing
which is a slide fit.
40. The crown wheel and pinion are supplied as a
matched pair and must not be interchanged
separately. A new crown wheel and pinion
matched pair may be fitted to an original gear
carrier casing if sound. original crown wheel and
pinion, if sound, may be fitted into a replacement
casing.
41. The two parts of differential unit casing are
matched and must not be replaced separately.
42. Discard and renew all thrust washers.
43. Differential housings with worn thrust washer
seatings must be replaced as a pair.
44. Examine differential case to crown wheel joint
face for burrs and damage which could lead to
crown wheel run-out when fitted.
ASSEMBLE
Differential
45. Fit differential lower wheel and thrust washer to
differential case. See illustration following
instruction 23.
46. Fit dished thrust washers.
47. Fit cross-shaft and pinions.
48. Fit differential upper wheel and thrust washer.
49. Fit differential upper case lining-up marks.
50. Secure assembly with bolts using Loctite
’Studlock’ grade CVX on threads and tighten
evenly and diametrically to
95 Nm (70 lbf/ft).
51. Fit crown wheel to differential casing. Use Loctite
’Studlock’ grade CVX on fixing bolt threads and
tighten to correct torque.
52. Press on differential roller bearing cones less
shim washers, using LRT-51-504, and leave to
one side until required for instruction 96.
53. Fit bearing cups to differential.
54. Fit differential unit and bearings to gear carrier
casing, and rotate unit to centralize bearings. Do
not fit bearing caps.
