300Tdi Defender

REAR AXLE AND FINAL DRIVE
1
OVERHAUL
DIFFERENTIAL ASSEMBLY - 110/130
Service repair no - 51.15.07
Overhaul
1. Drain off differential lubricating oil, and refit plug.
2. Remove rear axle assembly from vehicle
See
Repair, Rear axle
3. Remove hub driving member fixings.
4. Withdraw driving member and axle shaft
sufficiently to disengage differential.
5. Repeat instruction 4 for other axle shaft.
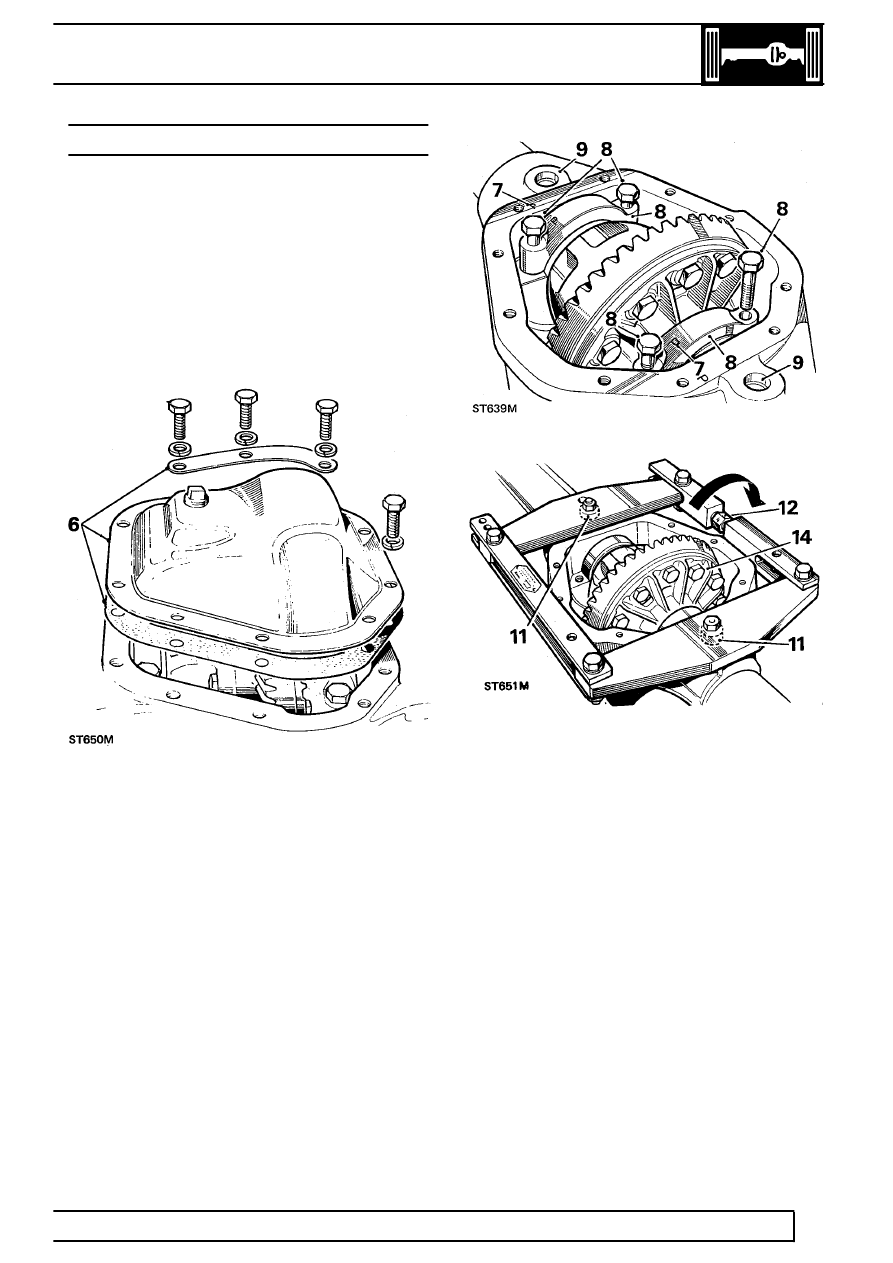
6. Remove fixings and support strip at differential
cover and withdraw cover and joint washer.
7. Note relationship marking on bearing caps and
axle casing to ensure correct refitting.
8. Remove fixings and withdraw differential bearing
caps.
9. Clean out and examine spreader tool pegholes
provided in gear casing face; ensure that holes
are free from dirt and burrs and damage.
10. Ensure that turnbuckle adjuster is free to turn.
Using axle spreader 18G31C
11. Fit axle spreader to engage peg holes.
(Spreader 18G131C, Adaptor pegs 18G131F)
12. Using a spanner, turn adjuster until all free play
between spreader and casing is taken up,
denoted by adjuster becoming stiff to turn.
13. Check that side members of spreader are clear
of casing.
14. Stretch casing, rotating adjuster by one flat at a
time, until differential assembly can be levered
out. Do not lever against spreader; use suitable
packing under levers to avoid damage to casing.
