
300Tdi Defender
TRANSFER GEARBOX
3
REPAIR
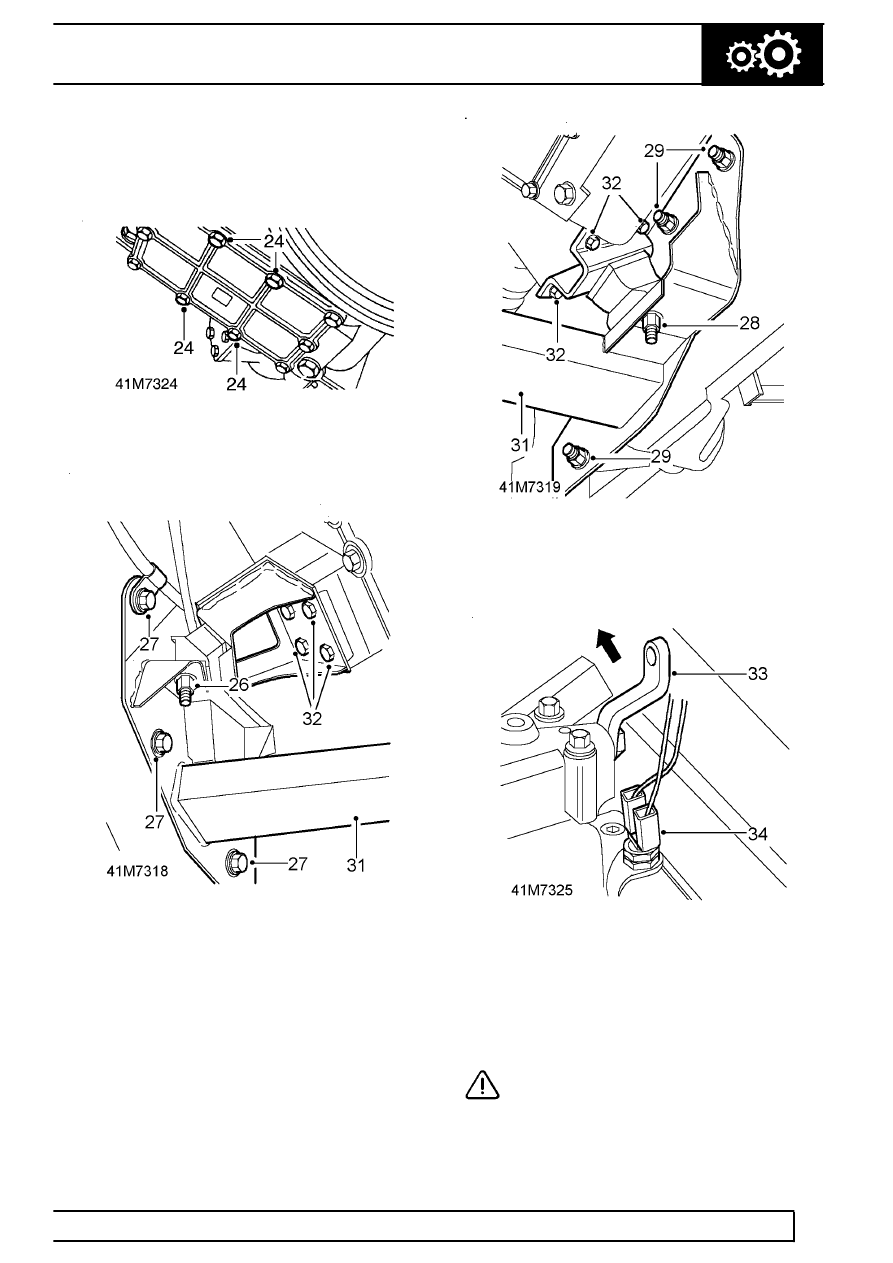
23. Position 4, 30 mm (1.25 in), spacers between
top of hoist and adaptor plate, LRT-99-010, at
securing points and secure adaptor plate to
hoist.
24. Remove 4 central bolts from transfer box bottom
cover, move hoist into position and secure
adaptor plate to transfer box.
25. Adjust hoist to take weight of transfer box.
26. Remove nut securing transfer box LH mounting
rubber to chassis crossmember.
27. Remove 4 nuts and bolts securing chassis
crossmember to chassis longitudinal.
28. Remove nut securing transfer box RH mounting
rubber to chassis crossmember.
29. Remove 4 nuts and bolts securing chassis
crossmember to chassis longitudinal.
30. With assistance and using a body jack between
chassis longitudinals, jack chassis sufficiently to
enable removal of crossmember.
31. Remove chassis crossmember.
32. Remove 4 bolts from both sides and remove LH
and RH mounting brackets from transfer box.
33. Disconnect electrical leads from differential lock
switch.
34. Move the small cranked lever, for high/low
selector, upward to allow access to adjacent nut
securing transfer box to main gearbox.
35. Position a jack to support main gearbox.
CAUTION: Use a block of wood or hard
rubber pad to protect gearbox.