TD5 Defender

12
ENGINE
4
OVERHAUL
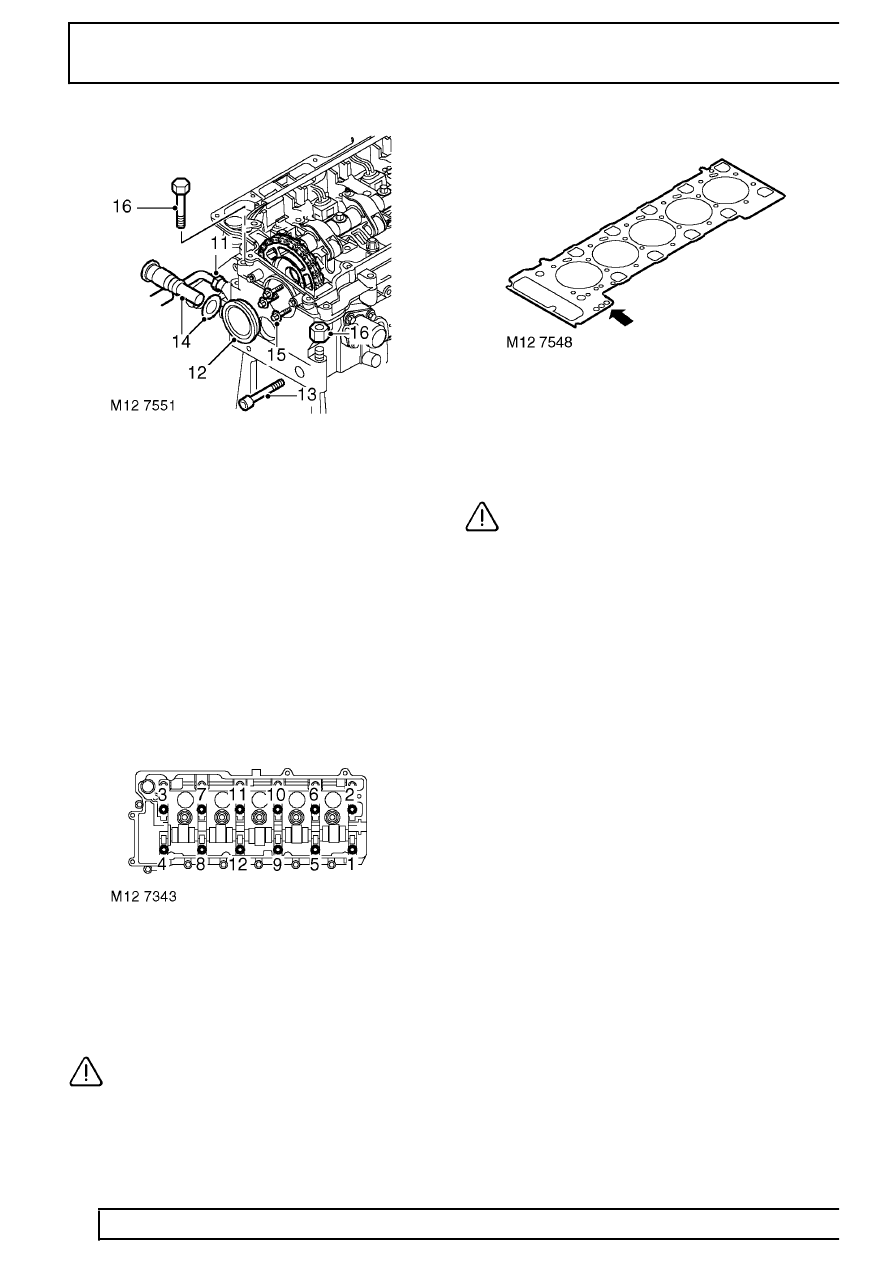
11. Disconnect alternator/vacuum pump oil feed pipe
union from cylinder head, remove and discard
’O’ ring.
12. Remove camshaft sprocket access plug from
front of cylinder head, remove and discard ’O’
ring.
13. Remove timing chain fixed guide Allen screw.
14. Remove timing chain tensioner, remove and
discard sealing washer.
15. Remove and discard 3 bolts securing camshaft
sprocket to camshaft; release sprocket from
camshaft.
16. Remove bolt and nut securing front of cylinder
head to timing chain cover.
17. Using sequence shown, progressively loosen
then remove 12 cylinder head bolts; discard
bolts together with their captive washers.
18. Using assistance, remove cylinder head and
place on 2 wooden blocks.
CAUTION: Cylinder head is dowel located,
do not tap it sideways to free it from
cylinder block. Support both ends of
cylinder head on blocks of wood. With the
camshaft carrier bolted down, the injector nozzles
and some of the valves will protrude from the face
of the cylinder head.
19. Remove the cylinder head gasket.
20. Note the gasket thickness indicator and ensure
the same thickness gasket is used on refitment
of the cylinder head.
CAUTION: If new pistons, connecting rods
or crankshaft are fitted, it will be
necessary to measure piston stand proud
in order to determine thickness of gasket
required. See this Section.
21. Remove and discard 2 plastic locating dowels
from cylinder block.
22. Carry out cylinder head overhaul procedures.
See this Section.
