
Discovery II
IN CAR ENTERTAINMENT
DESCRIPTION AND OPERATION 86-6-17
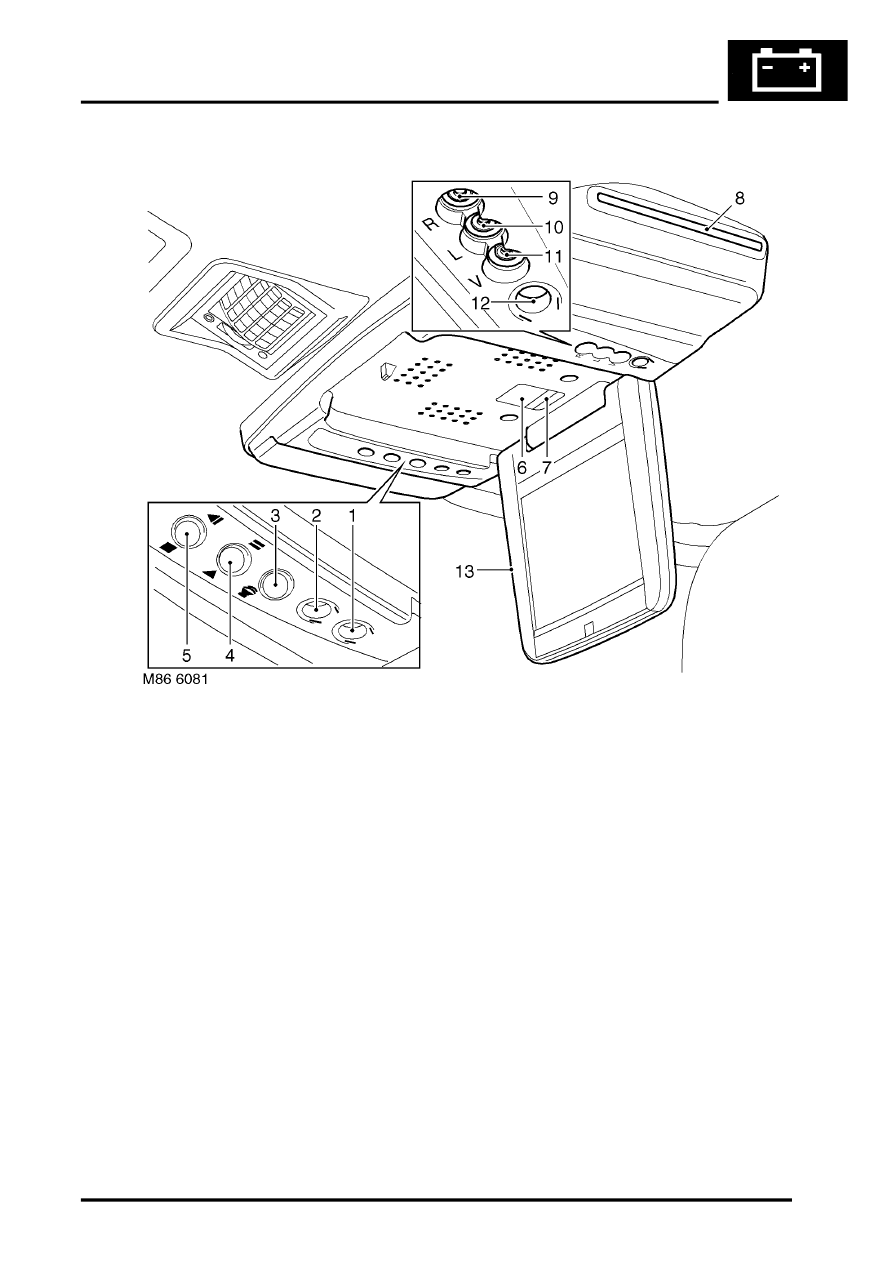
Overhead Console Unit
1 Headphone jack
2 Headphone jack
3 Audio select button
4 Play/Pause button
5 Stop/Eject button
6 Infra-red LED
7 Status LED
8 CD/DVD slot
9 Audio In – Right
10 Audio In – Left
11 Video In
12 Headphone jack
13 LCD monitor
The overhead console unit is attached to a bracket which in turn is attached to a roof cross-member, to the rear of the
front sunroof. The cross-member is drilled and fitted with three captive nuts. The bracket is secured to the cross-
member with three Torx screws and provides the attachment support for the overhead console unit. The unit is
secured to the bracket with two screws located underneath the screen and two further screws which are located
beneath the button and plug trim panels.
The overhead console unit is connected to the main DVD wiring harness by a short link lead which has a connector
at each end. The main wiring harness is routed across the roof, above the headlining, to the top of the right hand 'B'
post and is then routed along the roof panel and descends down the 'A' post, behind the trim panel, to the CD switch
box next to the passenger compartment fusebox.