
Discovery II
TRANSFER BOX - LT230SE
41-56
OVERHAUL
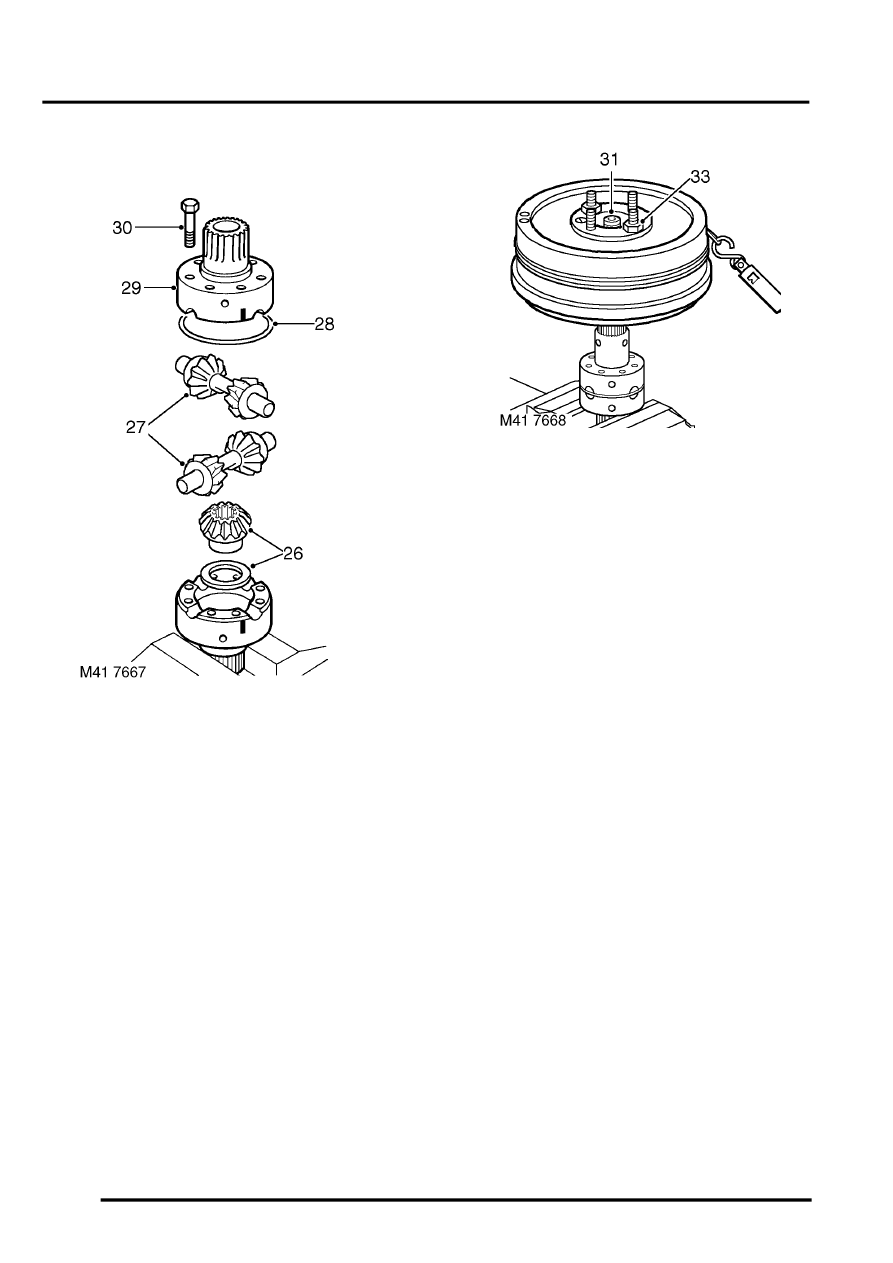
25. Remove retaining ring, then remove the planet
gears and cross shafts.
26. Fit a 1.05 mm (0.04 in) thrust washer to sun
gear from rear half of carrier. Position gear in
rear half of carrier.
27. Fit planet gears, cross shafts and dished thrust
washers to rear half of carrier. Ensure that
cross shafts are fitted correctly. Do not fit
the sun gear into the rear half carrier at this
stage.
28. Fit retaining ring.
29. Ensuring that assembly marks are aligned, fit
both halves of carrier together.
30. Fit the differential carrier bolts and, working in a
diagonal sequence, tighten the bolts to 60 Nm,
(44 lbf.ft).
31. Invert the assembly in the vice, insert the rear
output shaft into the rear half of the carrier and
check that the gears rotate freely.
32. Fit output flange on to the splines of the output
shaft, but do not fit flange nut at this stage.
33. Fit transmission brake drum to output flange
and secure the drum using 2 nuts.
34. Carry out the load to turn check, using the same
method as for the front half carrier. Record the
shim thickness when the load to turn is correct.
35. Fit the sun gear and selected thickness shim to
the front half carrier.
36. Ensuring that assembly marks are aligned, fit
both halves of carrier together.
37. Fit the differential carrier bolts and, working in a
diagonal sequence, tighten the bolts to 60 Nm,
(44 lbf.ft).
38. With differential assembled, fit rear output shaft
and brake drum, then check overall load to turn.
This should be approximately the same as the
combined load to turn figure of both front and
rear half carriers.
l
Used gears = 0.90 kg (2.0 lb)
l
New gears = 3.44 kg (7.6 lb)