
Discovery II
TRANSFER BOX - LT230SE
REPAIRS
41-39
Refit
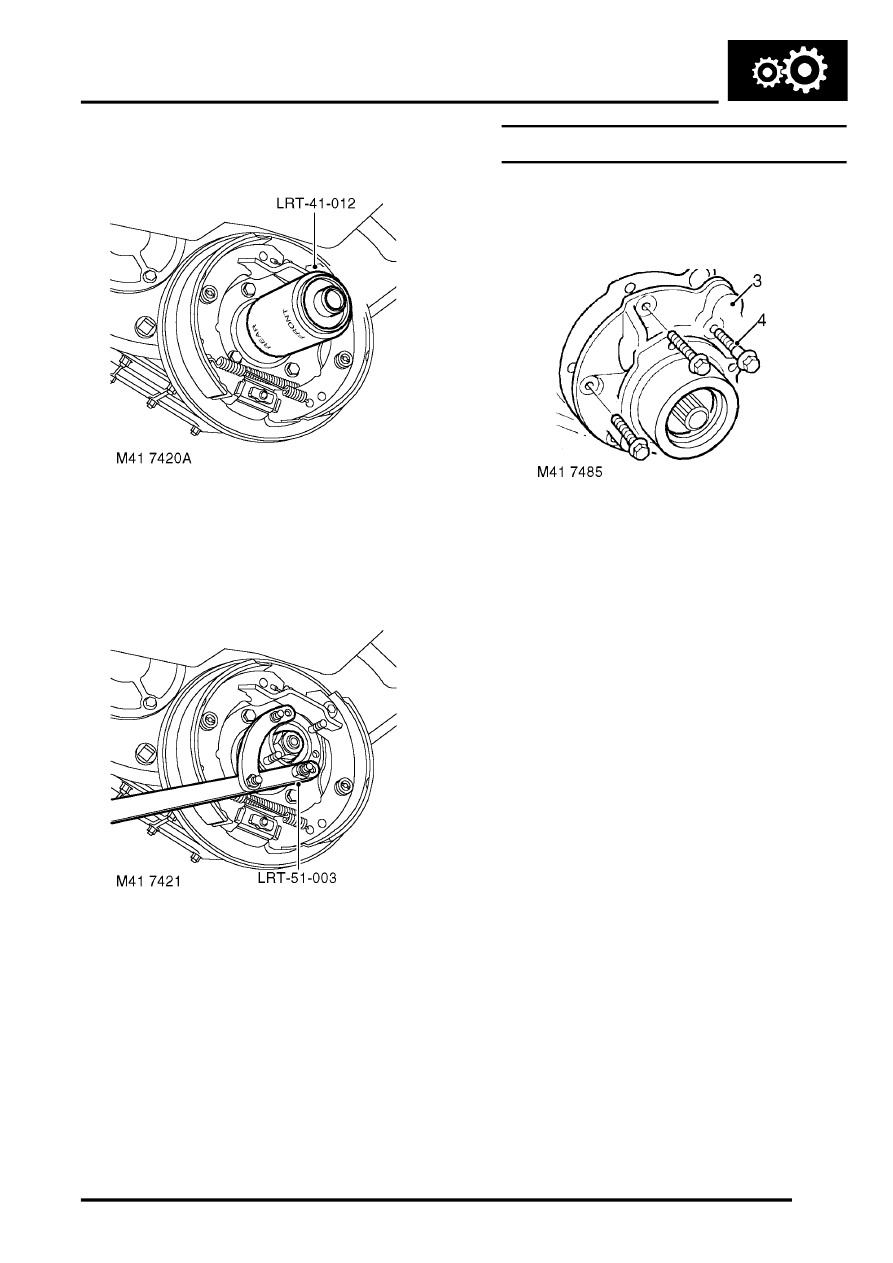
1. Clean seal mating faces.
2. Fit new seal using tool LRT-41-012.
CAUTION: Oil seal must be fitted dry.
3. Position drive flange, fit new felt and steel
washers.
4. Position tool LRT-51-003 and tighten new
drive flange nut to 148 Nm (109 lbf.ft).
5. Position handbrake drum and tighten screw.
6. Tighten brake shoe adjuster bolt to 25 Nm (18
lbf.ft) then loosen one and a half turns.
7. Check that brake drum is free to rotate.
8. Fit propeller shaft.
9. Top-up transfer box oil.
Gasket - rear output shaft housing
$% 41.20.55
Remove
1. Drain transfer gearbox oil.
2. Remove rear output shaft seal.
REPAIRS, Seal - rear output shaft.
3. Mark output shaft housing to main casing for
assembly purposes.
4. Note position of shoulder bolt, remove 6 bolts
securing housing to main casing.
Refit
1. Clean output shaft housing, mating face on
main casing and sealant from bolt threads.
2. Apply sealant, Part No. STC 4600 to mating
flange on output shaft housing.
3. Fit output shaft housing to main casing.
4. Apply sealant, Part No. STC 50552 to output
shaft housing bolt threads.
5. Fit output shaft housing bolts and tighten by
diagonal selection to 45 Nm (33 lbf.ft).
6. Fit rear output shaft seal.
REPAIRS, Seal - rear output shaft.
7. Fill transfer gearbox with oil.