
300Tdi Discovery
19
FUEL SYSTEM
26
REPAIR
ADD: 09/95
FUEL FILLER NECK - ADVANCED EVAPS
Service repair no - 19.55.07
WARNING: Ensure that fuel handling
precautions given in 1 - Introduction are
strictly adhered to when carrying out
following instructions.
CAUTION: Before disconnecting any part
of fuel system, it is imperative that all dust,
dirt and debris is removed from around
components to prevent ingress of foreign matter
into fuel system.
Remove
1. Depressurise fuel system.
See fuel system -
depressurise - advanced evaps
2. Disconnect battery negative lead.
3. Check the amount of fuel in the tank. If the tank
is full drain 6 US gallons (22 litres) minimum.
See fuel tank - draining.
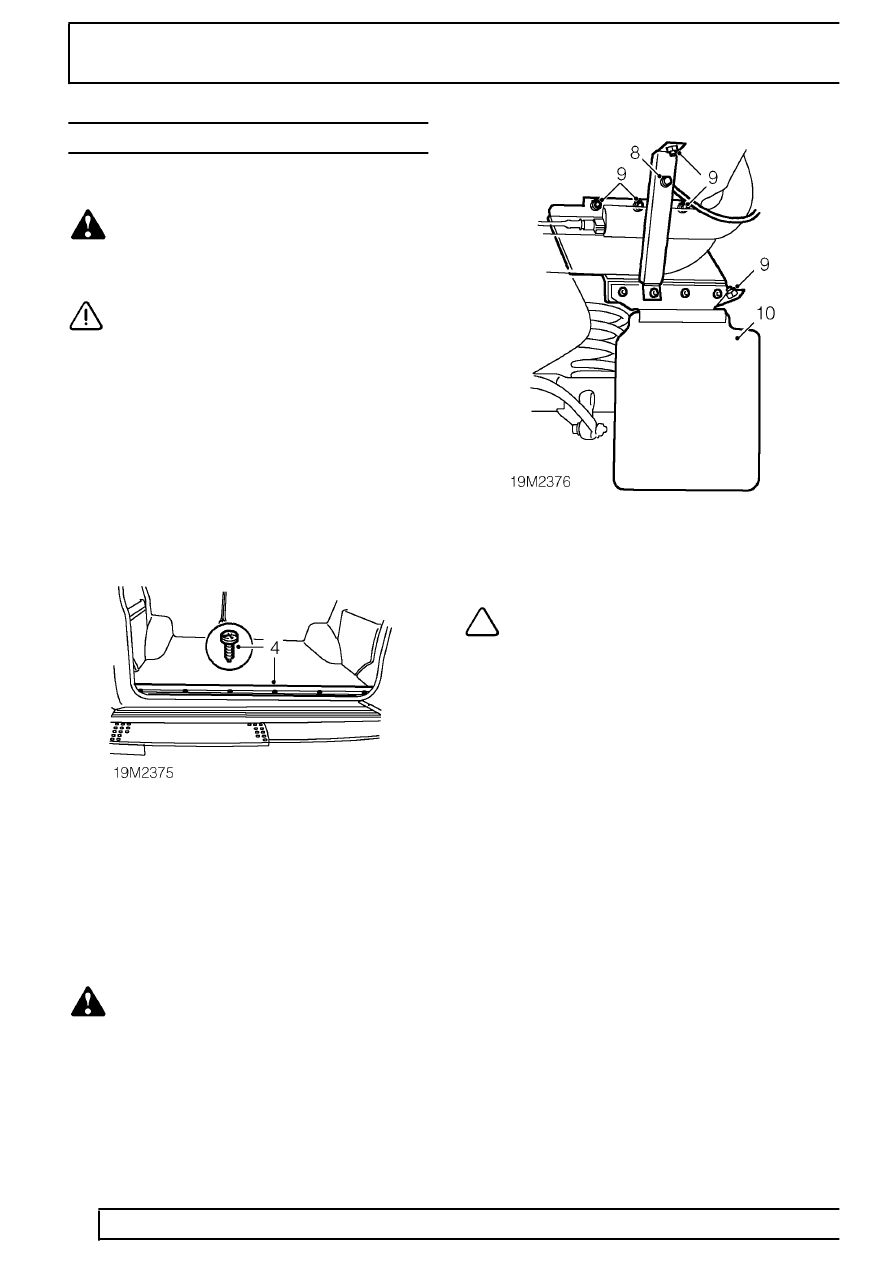
4. Remove 6 screws securing tail door tread strip
and remove tread strip.
5. Remove RH luggage compartment side panel.
See CHASSIS AND BODY, Repair, rear
compartment trim panels
6. Fold back loadspace carpet and sound
insulation to gain access to RH mudflap fixing.
7. Raise rear of vehicle.
WARNING: Support on safety stands.
8. Remove nut and bolt securing filler neck support
bracket to mud flap bracket.
NOTE: This fixing also retains the filler
neck earth strap.
9. Remove 5 nuts and bolts securing mud flap to
body.
10. Remove mud flap.