
300Tdi Discovery
SFI
25
REPAIR
ADD: 09/95
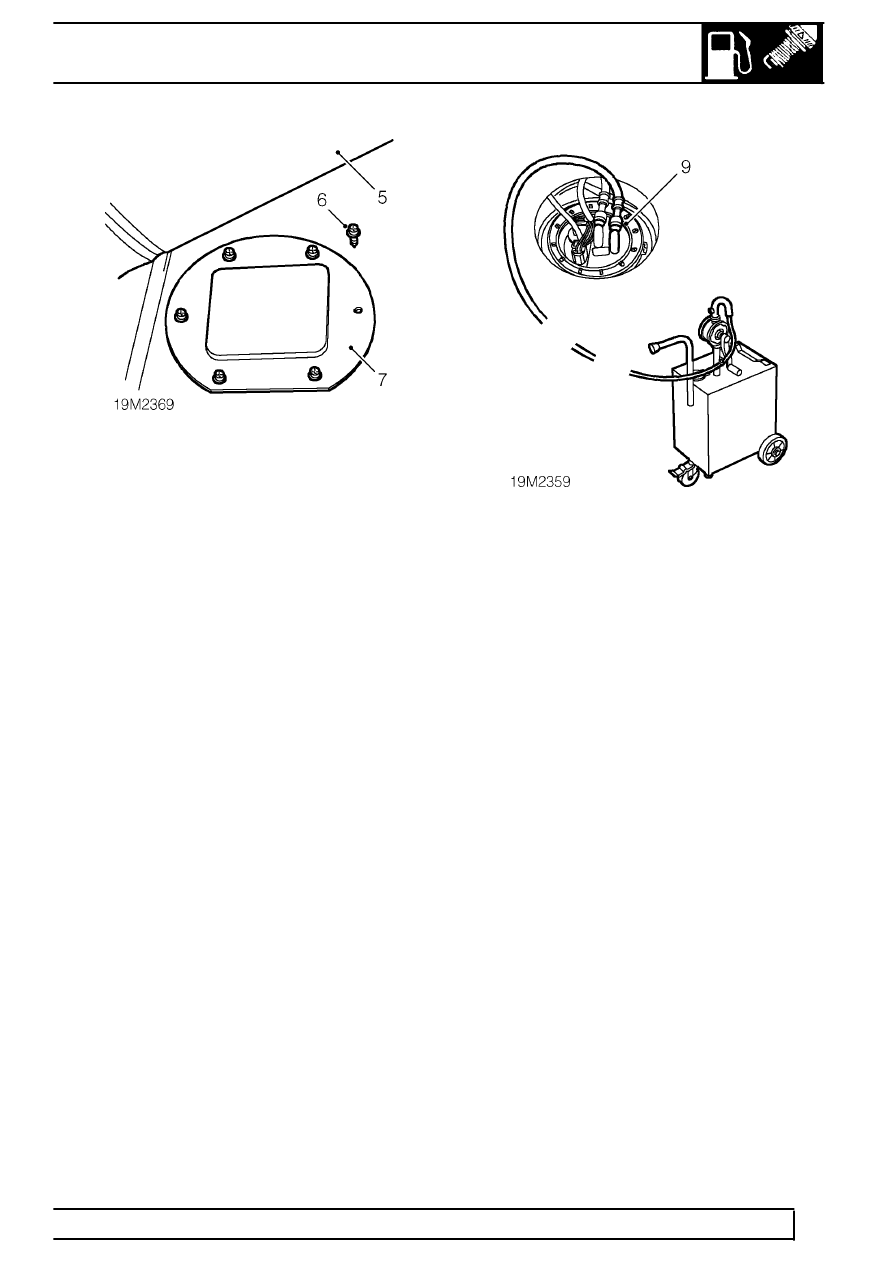
5. Fold back loadspace carpet and sound
insulation to reveal access panel.
6. Remove 6 screws securing fuel pump access
panel.
7. Remove access panel.
8. Disconnect the fuel return connection by
pressing the black release latch on connector
and pushing the connector back down the line.
Care must be taken to catch any excess fuel
which may spill from the fuel line once removed.
9. Using a bowser, with a 7 mm inside diameter
hose connection attach to fuel pump return stub,
drain fuel into a sealed container. Follow the
manufacturers instructions for the connection
and safe use of the bowser.
10. Continue draining until air bubbles appear and
fuel ceases to flow.
11. Disconnect bowser from fuel pump return stub.
12. Connect fuel return line to pump by pushing the
connector down line square to the pump
connection until the connector positively latches.
13. Fit access panel and secure with screws.
14. Reposition loadspace sound insulation and
carpet.
15. Fit RH luggage compartment side panel.
See
CHASSIS AND BODY, Repair, rear
compartment trim panels
16. Fit tail door tread strip and secure with screws.
17. Reconnect battery negative lead.