
300Tdi Discovery
REAR SUSPENSION
3
REPAIR
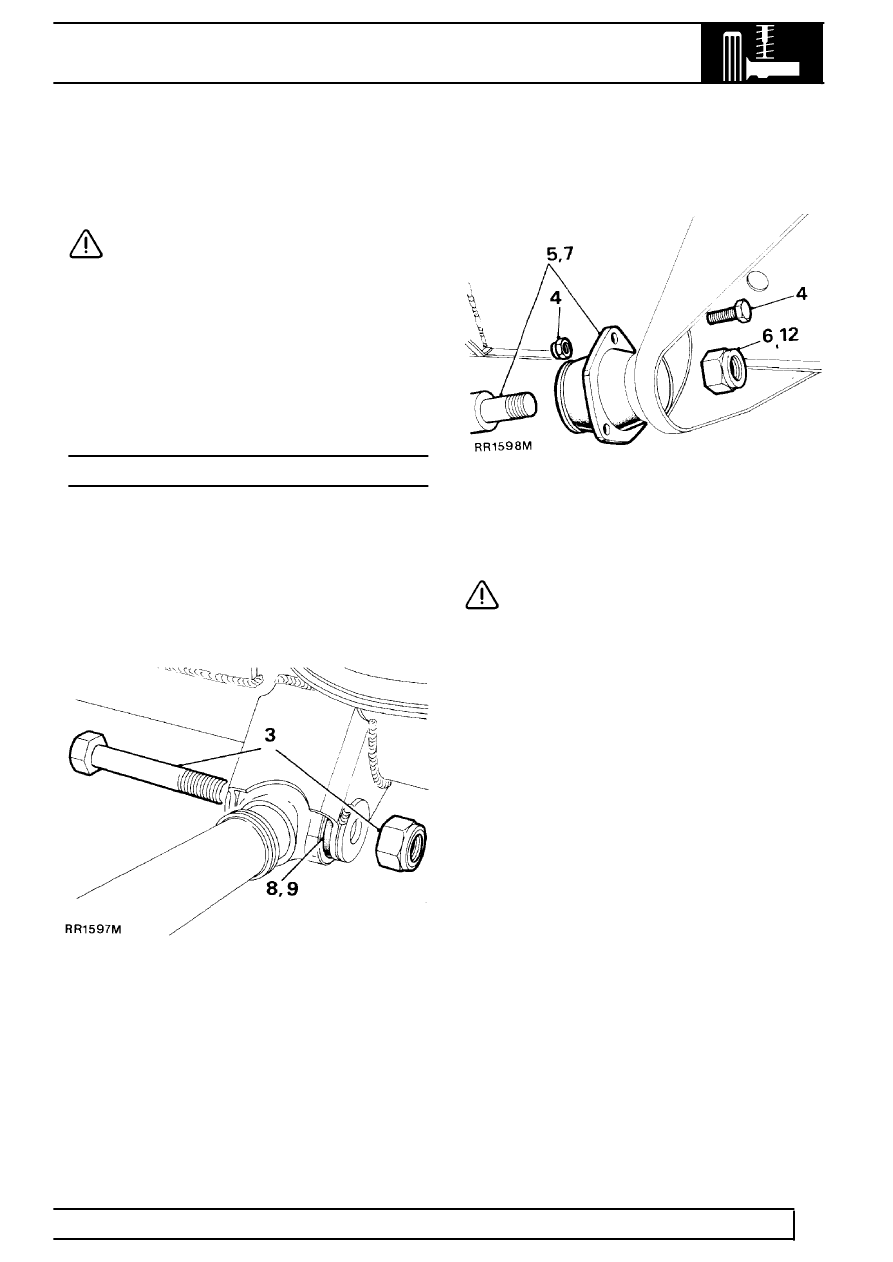
Renew bush
7. Press out rubber bushes.
8. Fit bush centrally in housing.
CAUTION: Apply pressure to outer edge of
bush, and not rubber inner.
Refit
9. Reverse removal procedure. 1 to 6. Do not fully
tighten fixings until all components are in
position.
10. Tighten fixings to correct torque.
See
Specifications, torque, Torque Values
SUSPENSION LINK LOWER
Service repair no - 64.35.02.
Remove
1. Site vehicle on a ramp [hoist].
2. Alternatively, support vehicle on stands under
rear axle.
3. Remove rear fixings.
4. Remove mounting bracket fixings at side
member bracket.
5. Remove lower link complete.
6. Remove locknut.
7. Remove mounting bracket from lower link.
Renew bush
8. Press out rubber bushes.
9. Fit bush centrally in housing.
CAUTION: Apply pressure to outer edge of
bush, and not rubber inner.
Refit
10. Reverse removal procedure. 6 and 7. Do not
tighten locknut.
11. Reverse removal procedure. 3 to 5.
12. Lower vehicle, allow axle to take up static laden
position. Tighten to
176 Nm.