
300Tdi Discovery
CHASSIS AND BODY
17
REPAIR
FRONT BODYSIDE TRIM CASING
Service repair no - 76.13.01
Remove
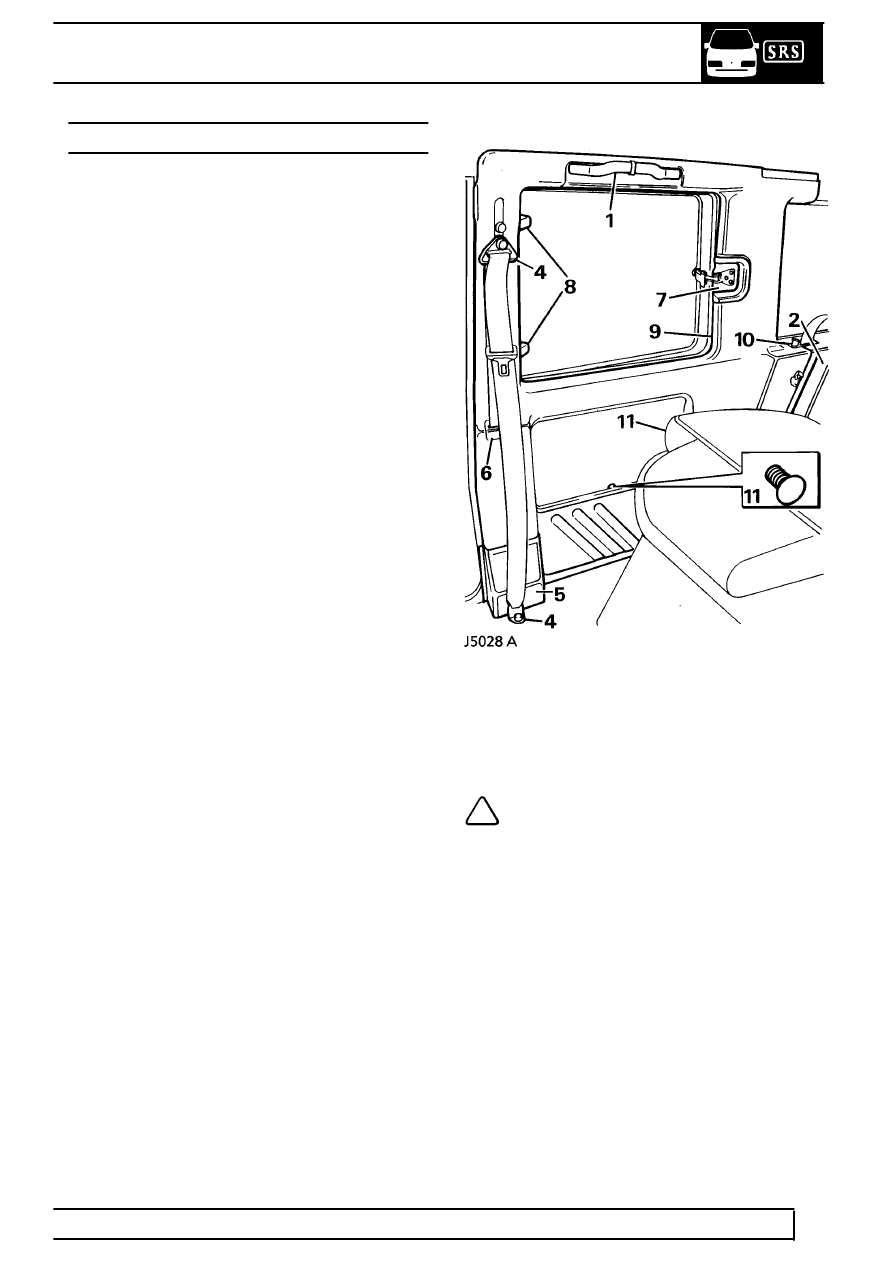
1. Remove the grab handle.
2. Remove the rear compartment lower trim panel.
See rear compartment lower trim panels.
3. Remove the alpine light trim casing.
See alpine
light trim casing.
4. Remove the bolts securing the upper and lower
seat belt mountings.
5. Remove the finisher from its location over the
seat belt inertia reel.
6. Remove the front seat belt guide from the upper
aperture in the casing.
7. Open the side window, remove the catch
securing screws and withdraw the catch trim.
8. Remove the side window hinge finishers.
9. Release the casing from the window rubber.
10. Release the rear seat belt from the guide
attached to the casing.
11. Fold down the rear seats and carefully ease the
casing from the fastenings.
12. Pass the front seat belt through the upper
aperture and withdraw the casing from the
vehicle.
Refit
13. Reverse removal procedure.
NOTE: Ensure that the trim material glued
to the door post is not wrinkled when the
door seal is fitted.
14. Tighten upper and lower seat belt fixings to
32
Nm (24 lbf ft) .