
300Tdi Discovery
76
CHASSIS AND BODY
66
REPAIR
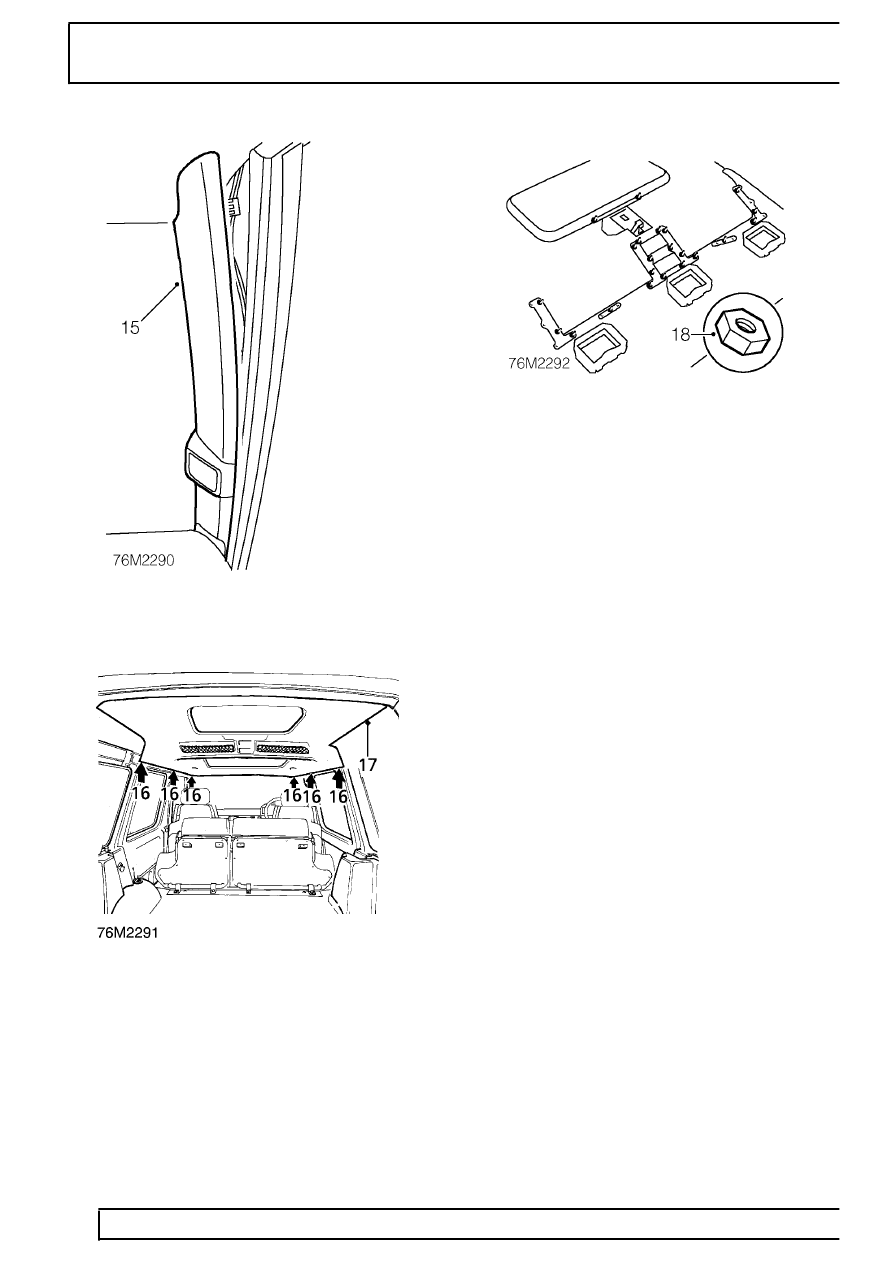
15. Release LH and RH, ’A’ post trim finishers from
uppermost retaining clips.
16. With assistance, release headlining from LH and
RH, ’A’, ’B’ and ’D’ post finishers.
17. Remove headlining assembly.
Dismantle
18. Remove 22 nuts securing headlining stowage
nets and rear headlining panel.
19. Remove stowage nets and headlining panel.
20. Collect 7 mounting plates.
Rebuild
21. Position stowage nets and headlining panel, fit
mounting plates to studs and secure with nuts.
Refit
22. With assistance, fit headlining and position to LH
and RH, ’A’, ’B’ and ’D’ post finishers.
23. Secure LH and RH, ’A’ post trim finisher
retaining clips.
24. Fit rear sun roof aperture seal.
25. Fit and tighten screw securing rear headlining
panel to body.
26. Position vents to headlining, attach clips to vents
and secure to headlining.
27. Position rear sun roof switch, connect multiplug
and secure to headlining panel.
28. Position rear passenger interior lamp, connect
multiplug and secure to headlining panel.
29. Fit front sun roof aperture seal.
30. Fit LH and RH sun visor retaining clips to body.
31. Fit and tighten screws securing sun visor
retaining clips and secure screw covers.
32. Fit RH alpine light trim casing.
See alpine light
trim casing.
33. Fit LH alpine light trim casing.
See alpine light
trim casing - lh - with rear air conditioning
fitted.
34. Fit front headlining stowage panel.
See
headlining stowage panel - front - with sun
roof fitted.
35. Fit grab handles.
See grab handle.
36. Fit sun visors.
See sun visor.