
300Tdi Discovery
CHASSIS AND BODY
33
REPAIR
WINGS [FENDERS]
Service repair no - 76.10.24
Remove
1. Disconnect battery negative lead.
2. Remove the headlamp surround.
3. Remove the front bumper assembly.
4. Remove the indicator repeater light.
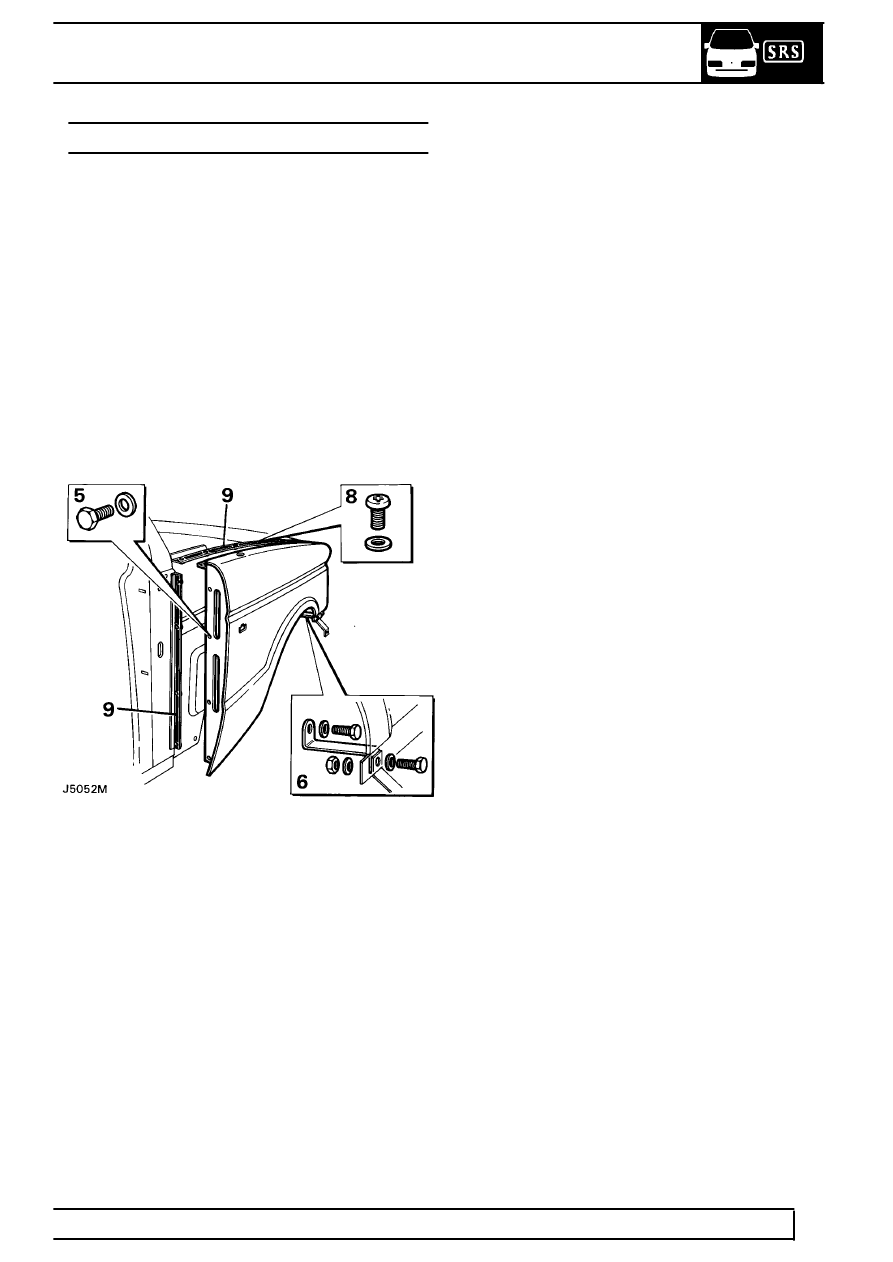
5. Remove the four screws securing the wing
[fender] at the ’A’ post.
6. Remove the bolts securing the bottom of the
wing [fender] at the bumper retaining bracket
and at the sill finisher.
7. If removing the RH wing [fender] loosen the
radio aerial securing nut.
8. Remove the seven bolts from the drain channel
in the top of the wing [fender].
9. Break the sealed joints at the valance and ’A’
post; then complete the removal of the wing
[fender]. If removing a RH wing withdraw the
wing [fender] sufficiently to allow removal of the
aerial before completing the removal.
Cleaning/painting
10. Thoroughly clean all traces of existing sealant
from the sealing faces of the valance and ’A’
post.
11. Paint the cleaned surfaces with etch primer.
12. If the existing wing [fender] is to be refitted
repeat the cleaning and painting procedure on
the wing [fender] sealing surfaces.
Refit
13. Apply 3M 8572 Bolted Panel Sealer to the joint
faces on the valance and ’A’ post and to the
bracket face.
14. Refit the wing [fender], on RH wings [fenders] fit
the radio aerial, and secure with the bolts and
screws ensuring that the wing [fender] correctly
aligns with the bonnet [hood].