
300Tdi Discovery
AIR CONDITIONING
11
REPAIR
THERMOSTAT
Service repair no - 86.25.50
Remove
1. Remove heater and cooler unit.
See Heater
and Cooler Unit
2. Remove lower cover and evaporator.
See
Evaporator and Expansion Valve
3. Remove 5 clips and screw securing evaporator
top cover.
4. Remove evaporator top cover.
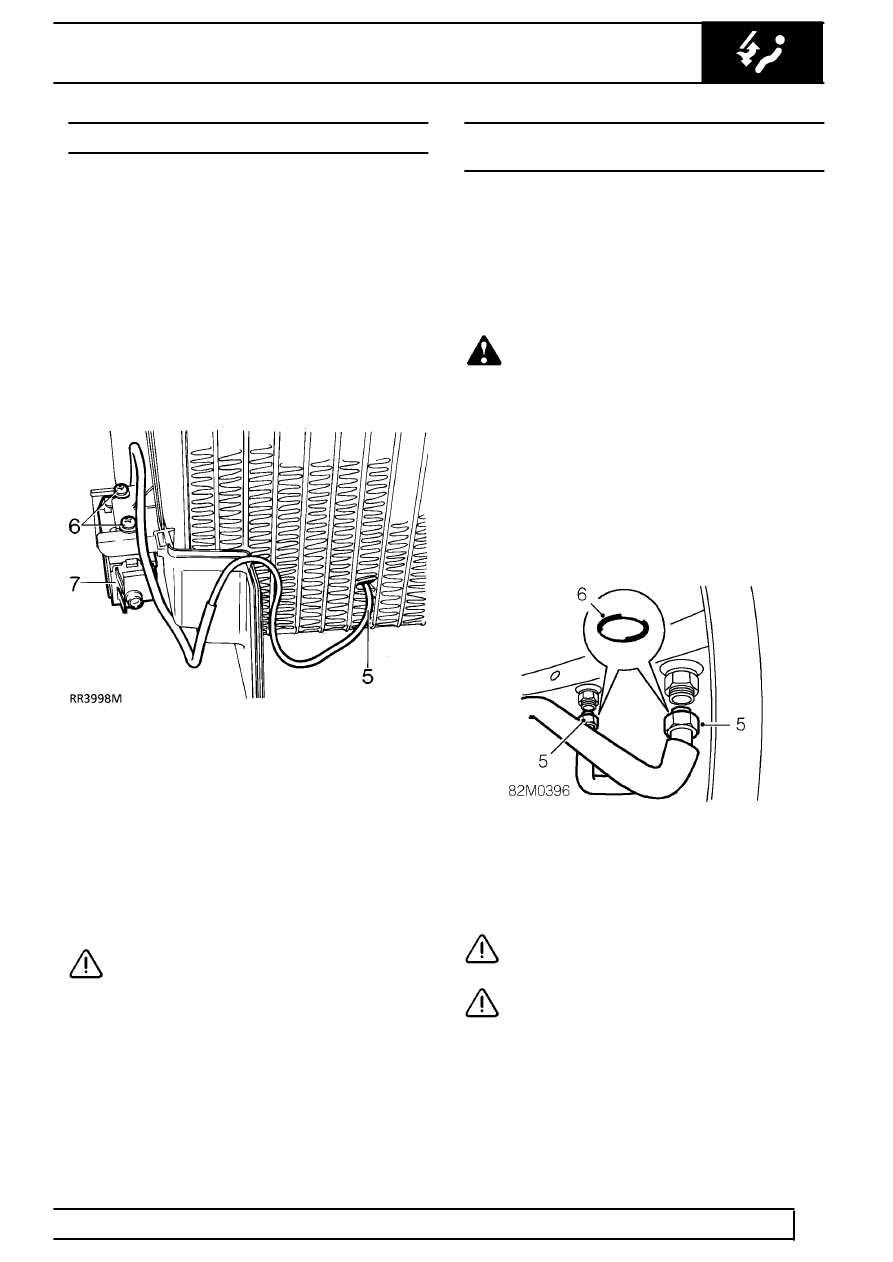
5. Remove thermostat sensor from evaporator
matrix.
6. Remove 2 screws securing sensor unit.
7. Remove thermostat and insulation.
Refit
8. Reverse removal procedure.
CAUTION: The thermostat insulation must
be installed in the ORIGINAL POSITION in
the evaporator.
EVAPORATOR/BLOWER MOTOR ASSEMBLY -
REAR
Service repair no - 82.26.01
Remove
1. Recover refrigerant from system.
See
Adjustment, refrigerant recovery recycling
recharging
WARNING: Wear eye and hand protection
when disconnecting components
containing refrigerant. Plug all exposed
connections immediately.
2. Remove evaporator to alpine light duct.
See
evaporator to alpine light duct
3. Remove LH rear mud flap.
See CHASSIS AND
BODY, Repair, mud flap - rear - lh
4. Clean area around low and high pressure air
conditioning pipe unions, beneath rear wheel
arch, to prevent any risk of dirt entering the
system.
5. Loosen and disconnect high and low pressure
air conditioning pipe unions beneath rear wheel
arch.
6. Remove and discard ’O’ rings from pipe unions.
CAUTION: Use 2 spanners when loosening
or tightening air conditioning pipe unions.
CAUTION: Plug exposed connections
immediately.