
300Tdi Discovery
82
AIR CONDITIONING
12
REPAIR
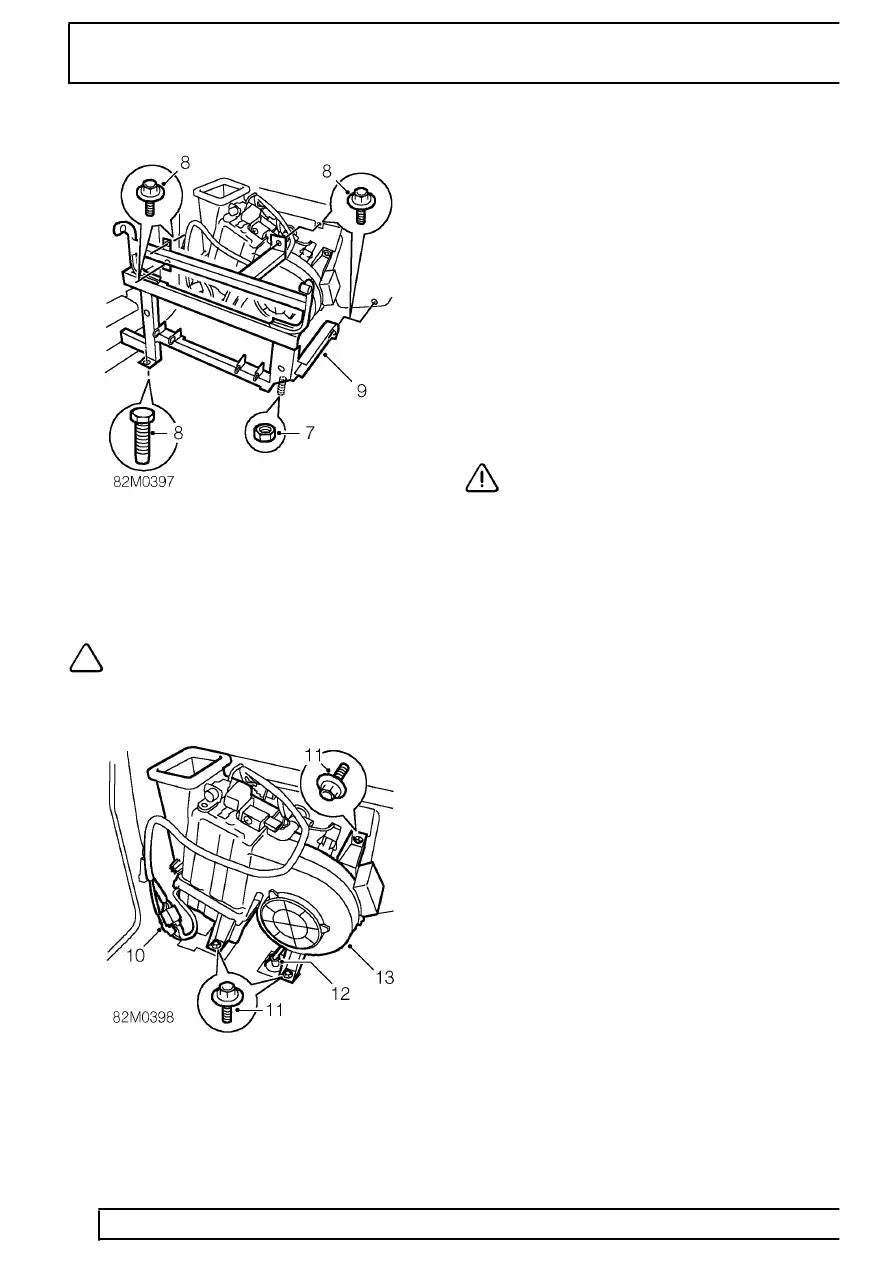
7. Remove nut securing rear fold down seat
mounting frame to wheel arch.
8. Remove 5 bolts securing rear fold down seat
mounting frame.
NOTE: The rear fold down seat mounting
frame retaining nut is located in the LH
rear wheel arch.
9. Remove mounting frame.
10. Disconnect 2, main to rear air conditioning unit
harness multiplugs.
11. Remove 3 bolts securing evaporator/blower
motor assembly to body.
12. Release evaporator/blower motor assembly
pipes from body grommets.
13. Remove evaporator/blower motor assembly.
Refit
14. Lubricate body grommets to aid fitment of
evaporator/blower motor assembly pipe unions.
15. Fit evaporator/blower motor assembly, feed pipe
unions through grommets and align to fittings.
16. Fit bolts securing evaporator/blower motor
assembly to body and tighten to
25 Nm .
17. Connect, main to rear air conditioning unit,
harness multiplugs.
18. Position and align rear fold down seat mounting
frame to fittings, fit nut and bolts and tighten to
25 Nm .
19. Lubricate NEW ’O’ rings with refrigerant oil, and
fit to pipe unions.
20. Remove plugs, align unions, and tighten to;
High pressure pipe:
14 Nm
Low pressure pipe:
22 Nm .
CAUTION: Use 2 spanners when loosening
or tightening air conditioning pipe unions.
21. Fit LH rear mud flap.
See CHASSIS AND
BODY, Repair, mud flap - rear - lh; Refit
22. Fit evaporator to alpine light duct.
See
evaporator to alpine light duct; Refit
23. Evacuate and recharge air conditioning system.
See Adjustment, refrigerant recovery
recycling recharging