
300Tdi Discovery
AIR CONDITIONING
13
REPAIR
BLOWER MOTOR - REAR
Service repair no - 82.26.02
Remove
1. Remove evaporator/blower motor assembly.
See evaporator/blower motor assembly -
rear
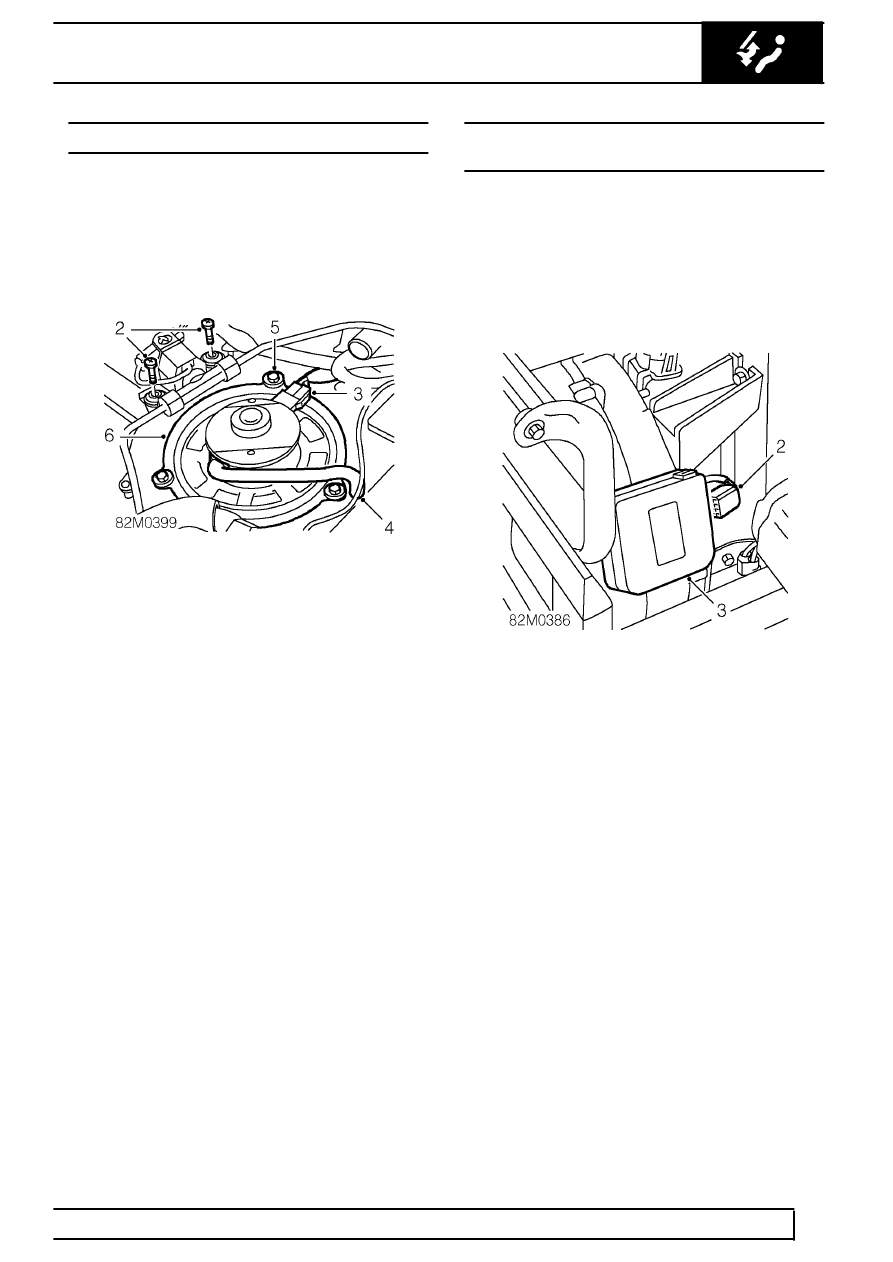
2. Loosen 2 screws securing high pressure control
valve solenoid to blower motor housing.
3. Disconnect multiplug from blower motor.
4. Release blower motor cooling tube from
evaporator/blower motor housing.
5. Remove 3 screws securing blower motor.
6. Remove blower motor .
Refit
7. Position blower motor to housing and secure
with screws.
8. Secure blower motor cooling tube from
evaporator/blower motor housing.
9. Connect multiplug to blower motor.
10. Tighten screws securing control valve solenoid.
11. Fit evaporator/blower motor assembly.
See
evaporator/blower motor assembly - rear;
Refit
ELECTRONIC CONTROL UNIT - REAR AIR
CONDITIONING
Service repair no - 82.26.03
Remove
1. Remove rear compartment lower trim panel.
See CHASSIS AND BODY, Repair, rear
compartment lower trim panel - lh - with rear
air conditioning fitted
2. Disconnect multiplug from ECU.
3. Remove ECU from mounting bracket.
Refit
4. Fit ECU to mounting bracket and connect
multiplug.
5. Fit rear compartment lower trim panel.
See
CHASSIS AND BODY, Repair, rear
compartment lower trim panel - lh - with rear
air conditioning fitted; Refit