
300Tdi Discovery
82
AIR CONDITIONING
14
REPAIR
SOLENOID - HIGH PRESSURE PIPE CONTROL
VALVE - REAR
Service repair no - 82.26.05
Remove
1. Remove evaporator/blower motor assembly.
See evaporator/blower motor assembly -
rear
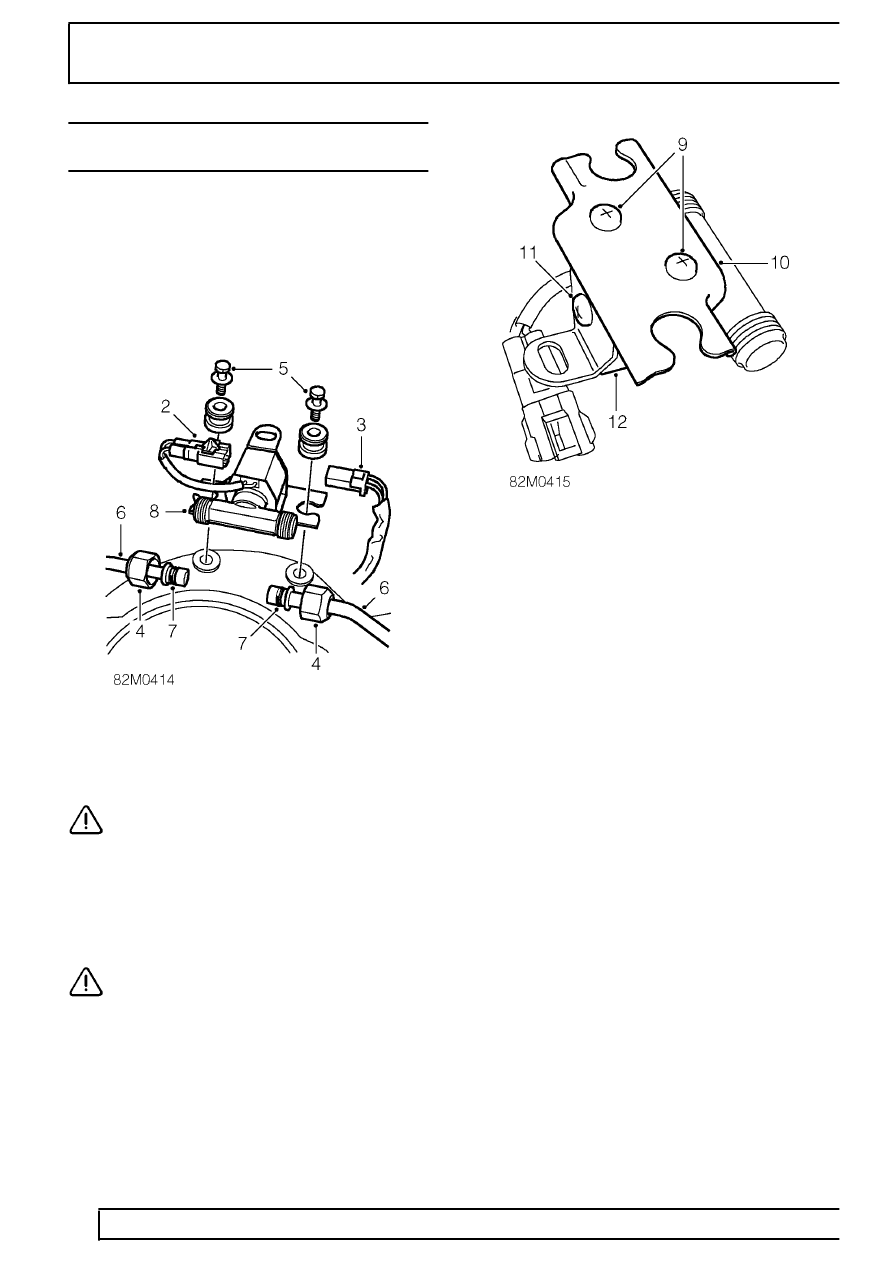
2. Release multiplug clip from solenoid bracket.
3. Disconnect solenoid multiplug.
4. Loosen 2 control valve unions.
CAUTION: Use 2 spanners when loosening
or tightening air conditioning pipe unions.
5. Remove 2 screws securing control valve to
blower motor housing.
6. Release unions from control valve.
7. Remove and discard 2 ’O’ ring seals from control
valve.
CAUTION: Immediately plug air
conditioning connections.
8. Remove control valve assembly.
9. Remove 2 screws securing mounting bracket to
control valve.
10. Remove mounting bracket.
11. Noting the direction arrow on control valve,
remove screw securing solenoid to valve.
12. Remove solenoid from valve.